NTP Digital Clock using ESP8266 and OLED Display
With the advancement of technology, time has always been measured in different devices in different ways. In this tutorial, we will let you know about NTP Digital Clock using ESP8266 and OLED Display. No worries that you will lose time by turning off the circuit and going out of power, you will always be able to get the exact date and time by connecting to the internet.
In the past, when it comes to time keeper, we use the RTC (Real Time Clock) chip. But these chips are not quite accurate, so you have to make manual adjustments over and over again to make them synchronous. TO overcome this issue we can use NTP. If your IoT project has Internet access, then you can get the date and time (with a precision of a few milliseconds of UTC) for free. You do not need any separate hardware for configuring NTP.
Things You Need
- ESP8266 NodeMCU/ WeMOS D1 Mini
- OLED Display
- Breadboard
- Jumper cables
NTP
NTP stands for Network Time Protocol. It is a standard Internet Protocol for synchronizing computer clocks with some specific NTP server over network. This protocol can be used to synchronize all network devices with synchronized global time (UTC) in a few milliseconds. The difference or a lag of 50 milliseconds over the Internet and 5 milliseconds in a LAN environment is observed. Universal Time Coordinated (UTC) is a global standard that is closely related to GMT or Greenwich Mean Time.
NTP sets computer clocks to UTC. NTP has a hierarchical structure, in the first level the exact time is received from very accurate instruments such as GMT or atomic clocks. In the second level, the time received from the first level on the Internet as an interface and the third level is the requesting device that asks the second level for date and time.
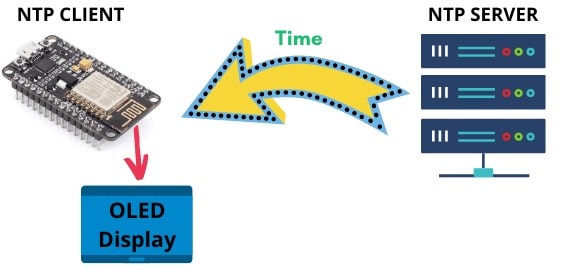
NTP can work in several ways. The most common job configuration is in client-client mode. The basic premise is that a client device such as ESP8266 connects to the server using User Datagram Protocol (UDP) on port 123. The client then forwards a request to an NTP server. In response to this request, the NTP server sends a time stamp packet. A time stamp packet contains several pieces of information such as date, time, accuracy, latency or time zone.
Working
In this project, we will first analyze the values, which include day, month, year, as well as the exact time in the moment, by receiving the exact time from NTP servers. We will display these values in the Serial monitor along with showing them in the OLED display.
Installing Library
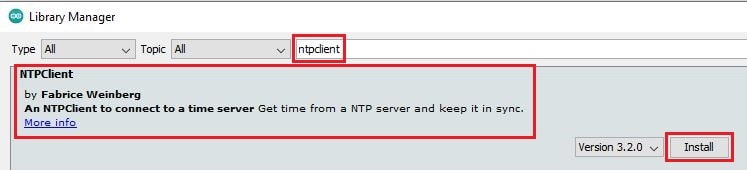
In order to make the code working, we need a NTP client library. You can open Arduino IDE and locate Navigate to the Sketch -> Include Library -> Manage Libraries
Search for “ntpclient” and look for NTPClient by Fabrice Weinberg. Select it and then Install.
Connection
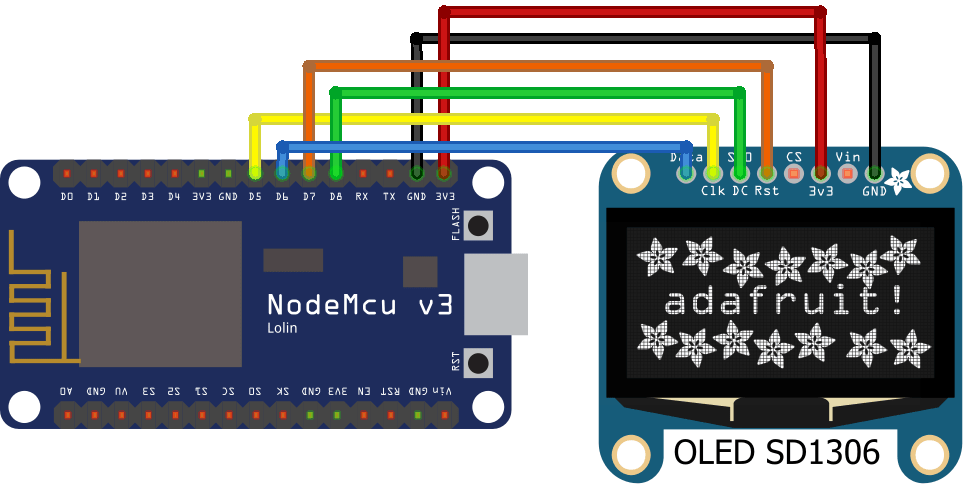
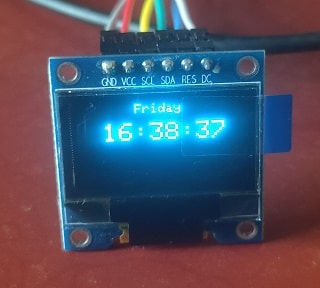
In this project, only two components are used, a nodemcu board with ESP8266 chip and an OLED display with ssd1306 chip. To set up the OLED display, we have to use the SPI connection in the ESP8266 chip. Make the connections according to the table and diagram below.
NodeMCU | OLED Display |
D5 | SCL |
D6 | SDA |
D7 | RES |
D8 | DC |
+5V | VCC |
GND | GND |
Suggested Reading:
- NodeMCU based WiFi Network Scanner with OLED Display
- DHT11 Sensor with ESP-NOW and ESP32
- Raspberry Pi Flask Web Server with DHT11
- ESP32 Web Server PWM based LED Control
- IoT Heart Rate Monitoring with ThingSpeak Platform
- Temperature Monitoring with ESP-DASH Webserver
- Setting up a LDR Sensor with Arduino
- Wemos D1 Mini Web Server based Servo Motor Control
- ESP8266 Web Server for Controlling Electrical Devices
- Smart Switch using Blynk | IoT Based WiFi Switch
- PIR based Motion Switch | PIR Sensor Light
- IoT based water level Indicator using ESP8266
- Interfacing MQ2 Gas Sensor with Arduino
Understanding the Code
So let’s take a quick look at the code to see how it works. We will first call the libraries required for this project. The project libraries are used to set up the Wi-Fi and receive time from NTP servers. Finally send the data to set up the OLED display. Before uploading the code, you need to make some changes. After calling the libraries, we have to make changes from the following section, which is actually related to the Wi-Fi network used to receive data. You must modify the following two variables with your network user information so that ESP8266 can communicate with the existing network.
const char* ssid = "Your Network SSID";
const char* password = "Your WiFI Password";
- For UTC +5.30 : (5 * 60 * 60)+1800 = 19800 [This belongs to India Time]
- For UTC +1.00 : 1 * 60 * 60 = 3600
We need to adjust the UTC shift for our time zone in milliseconds. For detailed information, you can refer to the UTC time list. We also introduce the days of the week to the code that you can change according to your needs.
const long utcOffsetInSeconds = 19800;
Next we need to specify the NTP server address we want. “pool.ntp.org” is an open NTP server suitable for such cases. pool.ntp.org automatically selects time servers that are geographically close to you. But if you want to choose explicitly, use one of the sub-domains pool.ntp.org.
NTPClient timeClient(ntpUDP, "pool.ntp.org", utcOffsetInSeconds);
Complete Code & Uploading
You can download the code from below link. Once you download the code, now it time to upload the code in nodemcu board. If you are not sure how to upload the code then you can refer the guides below.

Building and Testing
Now we have connected the NodeMCU board with OLED display as per the connection diagram and powered on the project.
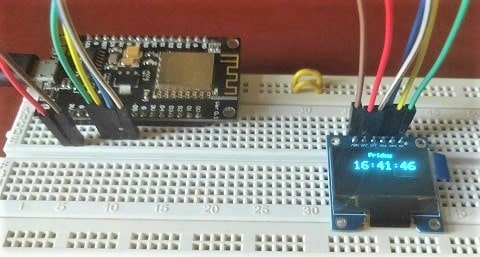
You will get the final output in terms of day and time in OLED diaplay.
Conclusion
In IoT projects executing any operations at a specific time or showing the time to the user has always been one of the challenges ahead. The first common solution to this challenge is to use RTC modules such as the DS1307, which are usually inaccurate. Second via the Internet, which will display the time in the display. You can also build this project using WeMOS D1 Mini development board.
Really nice project to start working on IoT as a beginner.
Thank you for sharing this idea.
Thanks!