Coding the WeMos D1 Mini using Arduino IDE
WeMOS D1 Mini is compact development boards available in the market. It is one of the board from ESP8266 family. In this article we will see coding the WeMos D1 Mini using Arduino IDE software.
WeMOS D1 Mini is equipped with ESP8266 WiFi based micro-controller board. This development board helped to eradicate some of the complex issues while using wifi based chips and modules in IoT based projects.
Arduino boards are very popular these days among all electronics enthusiast. Arduino also provides IDE (Integrated Development Environment) which is a free tool and to use. Many development boards are supported by Arduino IDE and this is the biggest advantage.
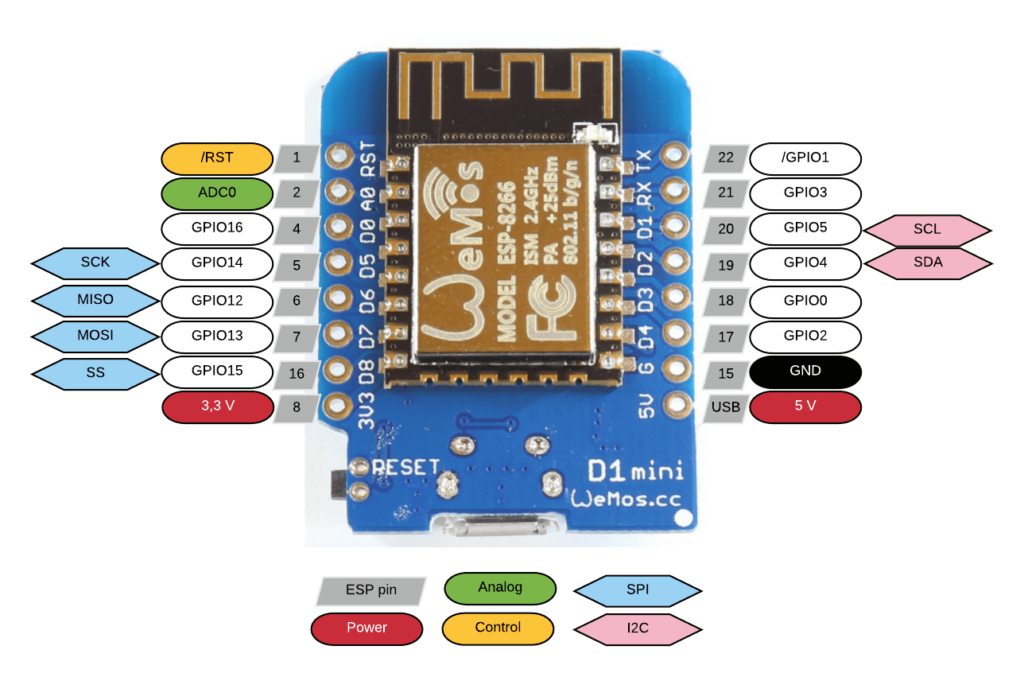
This D1 mini module is a mini WIFI board based on ESP-8266MOD. This board contains 11 digital I/O pins, all pins have interrupt / PWM / I2C with a micro-USB connection for power and data connectivity. This also has one analog pin for analog inputs. WeMos D1 Mini board is 100% compatible with Arduino IDE.
Step# 1 Configuring Arduino IDE
Before we proceed we need to configure Arduino IDE. It has been a great help since Arduino supports a wide range of development boards for programming and uploading codes. You can download Arduino IDE from the given link as per your operating system. After downloaded, install the Arduino IDE on your laptop or computer.
Now launch Arduino IDE and locate below
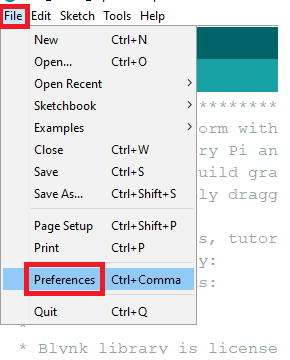
Go to File -> Preference
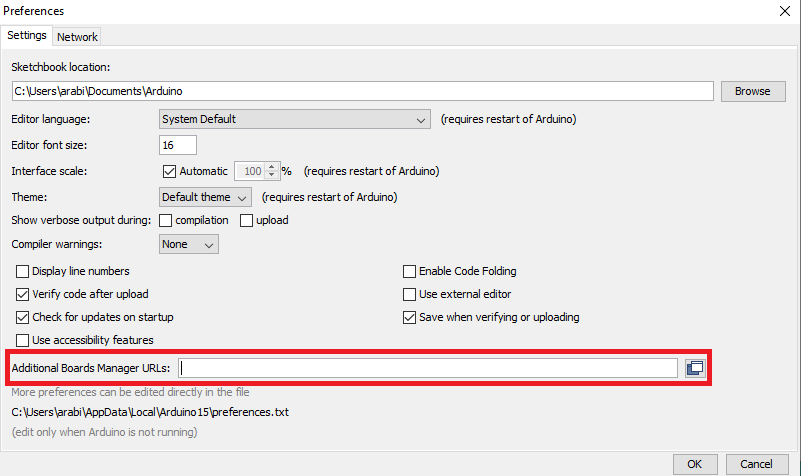
Locate Boards Manager URLs and copy paste the below url and click OK
http://arduino.esp8266.com/stable/package_esp8266com_index.json
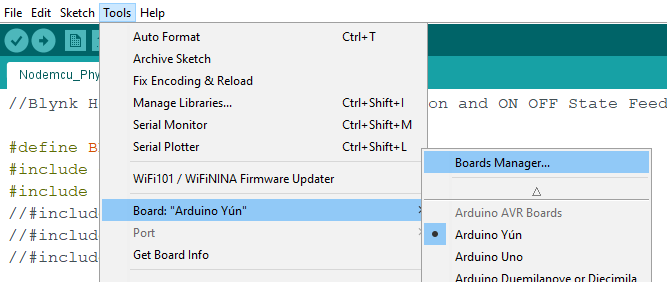
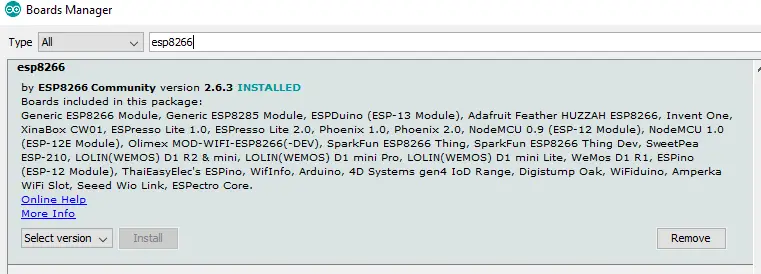
Now locate Tools -> Board -> Boards Manager…
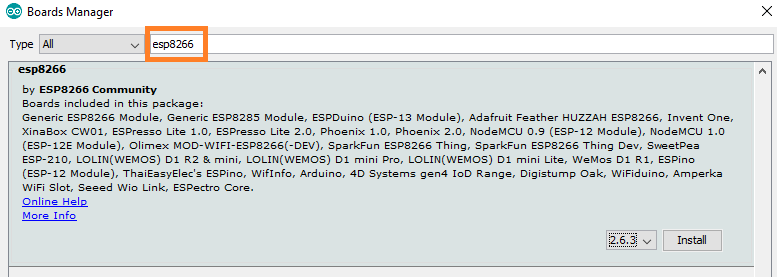
Search for “ESP8266”. It will pop up with esp8266 by ESP8266 Community. Here you will find all esp8266 related development boards configurations.
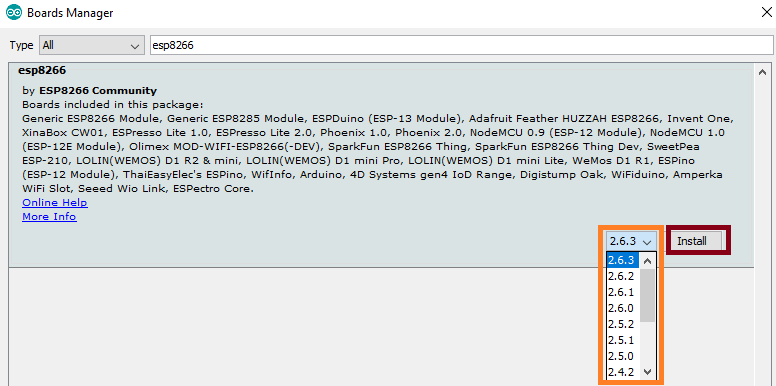
You can select the version and click on Install. By default latest version will be selected.
The installation will start and will take 1-2 min to complete.
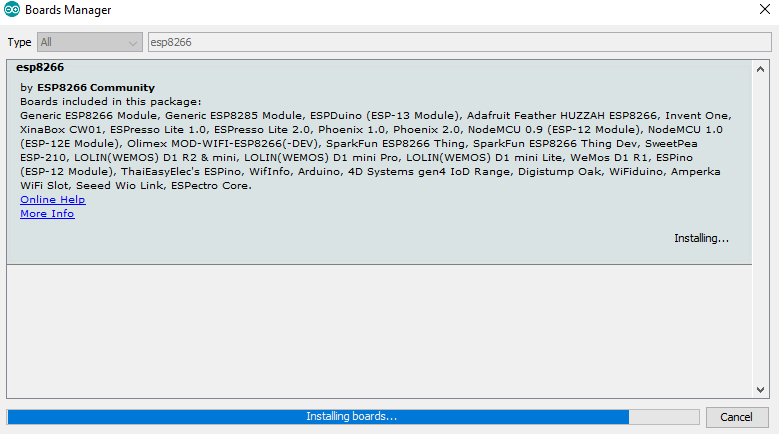
Finally the installation will complete.
Interesting Projects:
- Smart switch using NodeMCU with feedback
- Touch based Switch
- IoT Vehicle Parking System using ESP8266 and Blynk
- NTP Digital Clock using ESP8266 and OLED Display
- DHT11 Sensor with ESP-NOW and ESP32
- NodeMCU based WiFi Network Scanner with OLED Display
- ESP32 Web Server PWM based LED Control
- IoT Heart Rate Monitoring with ThingSpeak Platform
- Wemos D1 Mini Web Server based Servo Motor Control
- Setting up a LDR Sensor with Arduino
- Temperature Monitoring with ESP-DASH Webserver
Step# 2 Connection and Board Selection
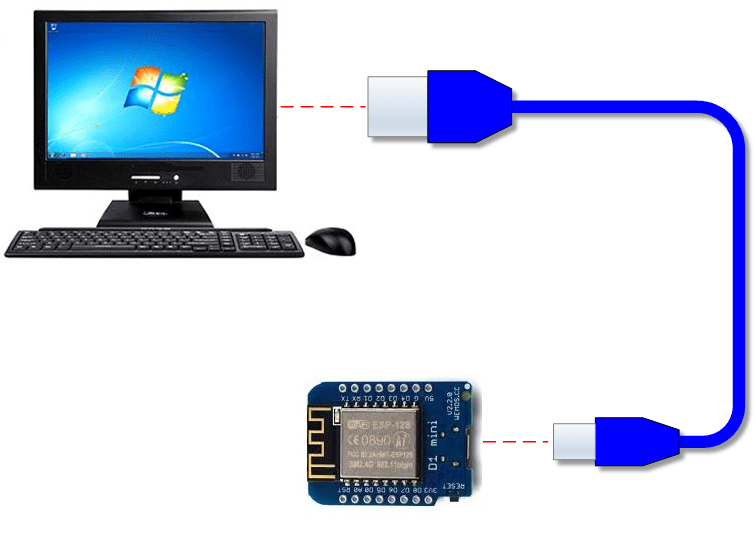
In this step you need to connect WeMos D1 Mini module with your computer. This requires a USB to Micro USB cable for connectivity. WeMos D1 Mini boards are have a micro USB port. You need a USB to micro USB cable to connect WeMos D1 Mini to the computer. Once you power on WeMos D1 Mini for the first time, the build-in LED will quickly blink and it will turn off. Some WeMos D1 Mini boards are preloaded with LED blink program once it is powered on.
Note: Your USB cable should supports data transmission. If you connect your WeMOS D1 Mini with cables which supports only power supply, then you will find the WeMOS D1 Mini is powered on and red power light is on. Unfortunately there will be no data communication between them.
Select the board Tools -> Board -> LOLIN (WEMOS) D1 R2 & mini
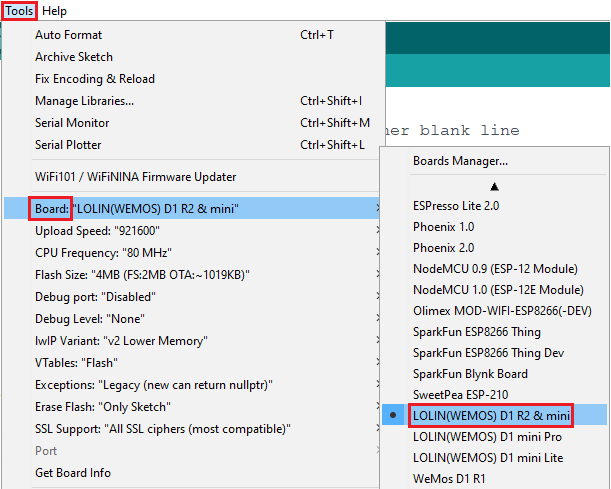
Select the proper port is very important. Select Tools -> Port

Step# 3 Uploading the first Sketch
For uploading the first sketch, we will be using built in sketch. Go to File -> Examples -> ESP8266 -> Blink
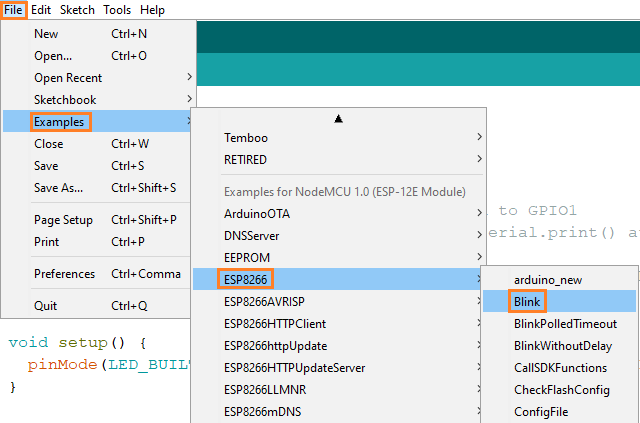
Below is the Blink code, which will blink the on board blue led. The code is ready for uploading and no modification needed. Just click on upload button.
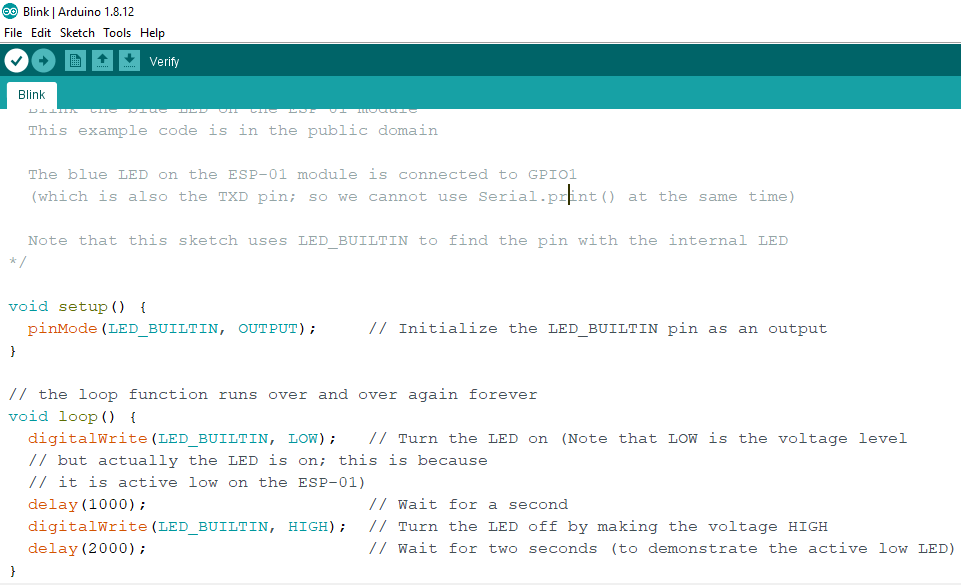
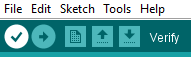
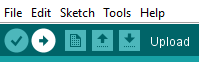
Now Click on Verify button to compile and check for errors. If compilation is successful without any errors then click on Upload.
Step# 4 Testing
Once you upload the code successfully in WeMos D1 Mini the blue led will start blinking with a interval of 1 sec. If you get this result then you have successfully uploaded your first code in WeMos D1 Mini. Host this was easy tutorial on easy WeMos D1 Mini programming with simple steps.
Very good, got my Wemos D1 to blink 🙂
But how do I turn it off?
For turning it off you can either disconnect it from power or you can flash empty code to WeMOS D1 mini.
That’s the neat part, you don’t !
dit werkt , maar nu is alles grijs en kan ik de schets niet meer aanpassen met b.v. tijd , hoe kan ik dit oplossen en of veranderen ?