IoT Heart Rate Monitoring with ThingSpeak Platform
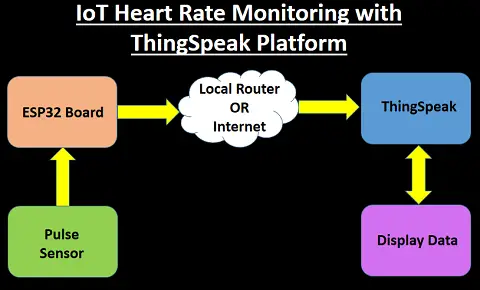
In the IoT Heart Rate Monitoring with ThingSpeak Platform tutorial, we set up the heart rate sensor or pulse sensor using a Wi-Fi board that uses the ESP32 chip. We then transfer the information received from the sensor to the IoT platform. Of course, you have often seen connecting this sensor with different boards, including Arduino. But this project is different from other examples. In this project, using the ESP32 board and the Wi-Fi capability of this chip, we will display all the output values in the IoT platform called ThingSpeak.
Materials Required
ThingSpeak Platform
To monitor and store data in the Internet of Things, we must use the appropriate platform. The ThingSpeak platform is one of the best open source IoT platform. It uses API for storing and retrieving information via HTTP and MQTT protocols over the Internet or over a local area network. The ThingSpeak platform allows you to collect, store and analyze sensor data. Also, using the features available in the IoT dashboard of this site, we can draw graphs based on the values obtained. ThingSpeak is an IoT analysis platform service which gives you option to create your own dash boards. It also allows you to collect, visualize, and analyze live data streams. You can send data to ThingSpeak from your IoT devices and it can be customized to trigger alerts using different web services.
Wi-Fi board ESP32
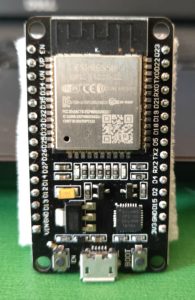
We must use Wi-Fi boards in IoT projects. In the heart rate monitoring project , we use the Nodemcu ESP32 board. When we talk about ESP32 boards, we are talking about lower power consumption, better processing power, up-to-date technology, a new generation of WIFI chips that followed the previous generation, the ESP8266. It also supports Bluetooth in addition to WIFI. Auxiliary boards for this chip include NodeMCU and ESP32-CAM. This chip is produced in three types: wroom, wrover and solo.
Working
In the heart rate monitoring project , we used an IoT platform called ThingSpeak. This platform allows us to build a dashboard with the ability to monitor the values coming from different IoT hardware. And in this project, using this feature, we will measure the heart rate of a person using a relevant sensor and display it as a graph on this dashboard. In this project we have used a pulse sensor. Just place the sensor on the surface of the skin or you can also place a finger on top of this sensor to get the values.
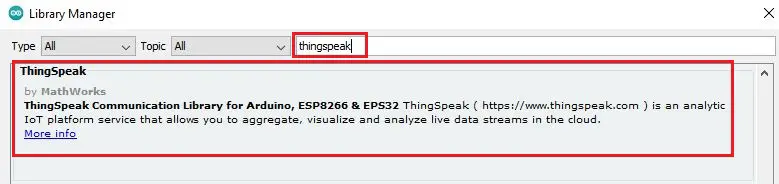
Required libraries
To launch the heart rate monitoring project, we first install the PulseSensor and ThingSpeak reference libraries in the Arduino IDE software. Follow these steps:
- Go to Sketch -> Include Library -> Manage Libraries
- Search for PulseSensor and ThingSpeak
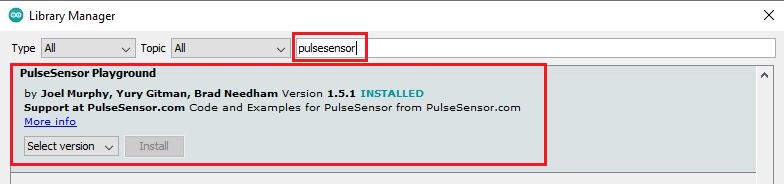
Installing Thingspeak library
Setting Up ThingSpeak Dashboard
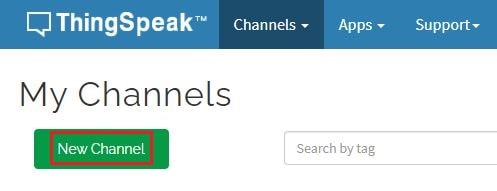
This section we are going to create a account in ThingSpeak portal. First go to thingspeak.com and create a new account, then in the Channels section and then, like the image below New Channel, create a channel.
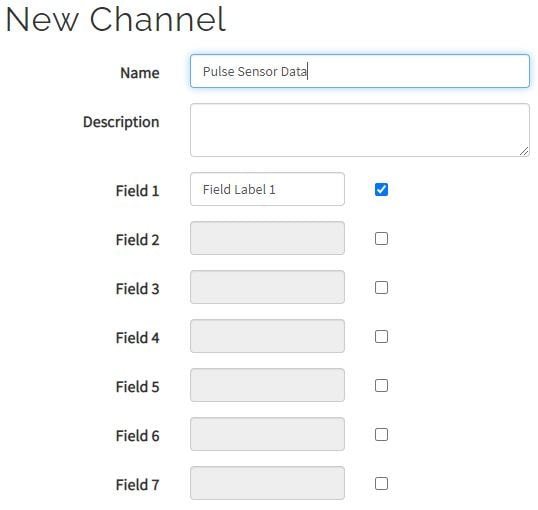
Next you will see a page like the one below, fill in the name and description information as desired and select the save channel option at the bottom of the page.
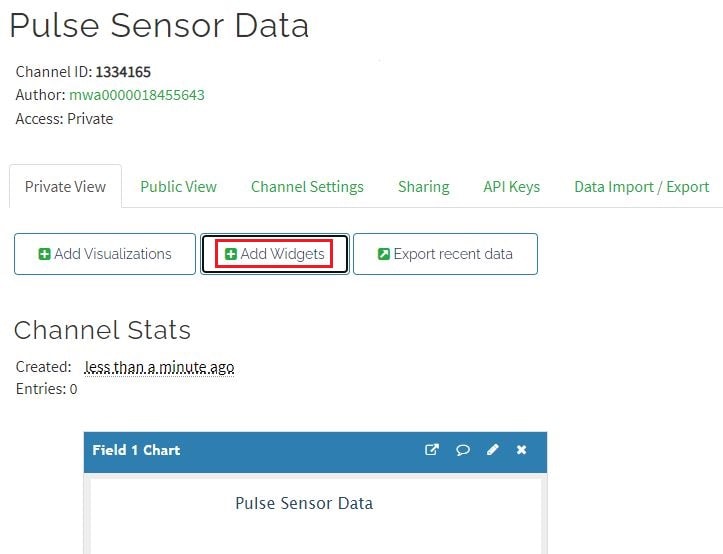
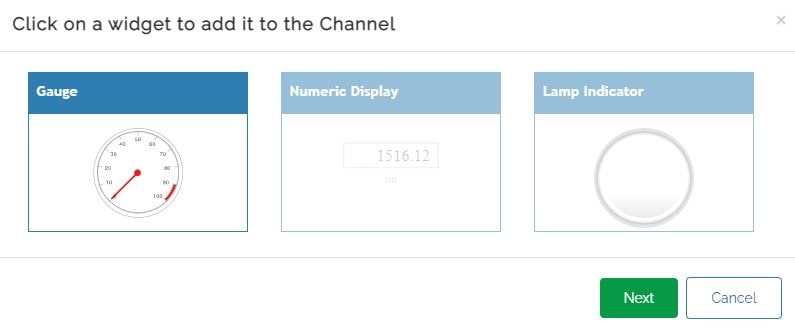
Now your Channel is created and it will also display the Channel ID. Keep a note of this channel ID somewhere. It will contain a chart when your channel is ready. Along with this chart lets add widgets to it. Click on Add Widgets
Now enter the details as shown below in widget parameter and click on create.

Now we will select Gauge to display the data. So select gauge and click on next.
Here you will see the received values from your hardware. You can also add custom elements to display values using the Add Widgets option. Now we have completed the configuration of ThingSpeak channel.
Suggested Reading
- Wemos D1 Mini Web Server based Servo Motor Control
- ESP8266 Web Server for Controlling Electrical Devices
- Important Tips to Improve Security of your Raspberry Pi
- Raspberry Pi Temperature Logger DS18B20
- Raspberry Pi Temperature Logger DS18B20
- Controlling ESP32 via Bluetooth using Blynk
- Smart Switch using Blynk | IoT Based Wi-Fi Switch
- DHT11 based Temperature Humidity Monitoring IoT Project
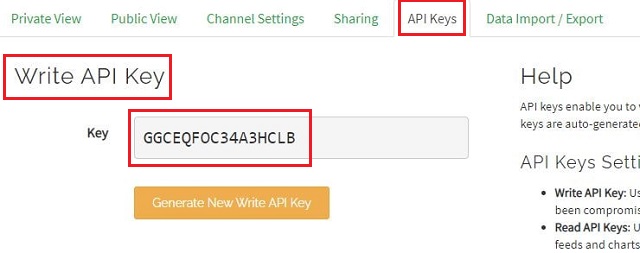
ThingSpeak API Keys
In the API keys section and in the box specified, you can find the API required for the project, we will use this API below. This will be a alphanumeric key which will be shown.
Connection
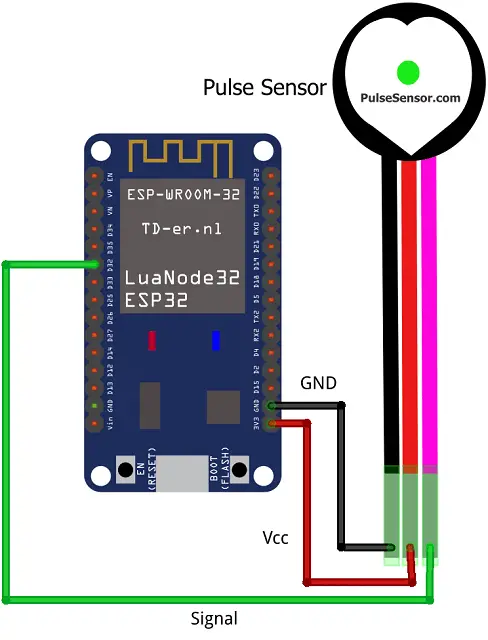
In this project, we have used only the heart rate sensor and ESP32 board, which can be set up only by connecting the Signal pin from the heart rate sensor to pin D32 to the ESP32 board.
Code Analysis
In this project, as mentioned earlier and the necessary training was given, we use the PulseSensorPlayground and ThingSpeak libraries. In this code, we will first display the values received from the heart rate module in the monitor serial and then send the values to the ThingSpeak servers. In this part of the tutorial, we will review parts of the code of this tutorial, in the first section, we will call the libraries.
#include <PulseSensorPlayground.h>
#include <WiFi.h>
#include <ThingSpeak.h>
In the following, we enter the information of the Wi-Fi network to connect the ESP32 board to the Internet.
const char ssid[] = "Your Network SSID";
const char password[] = "Your Wi-Fi password";
In this section, enter the channel ID created. This ID is displayed in the information section of each channel in Thingspeak.
const long CHANNEL = Your ThingSpeak Channel ID;
In the previous steps, you saw the API tutorial. In this step, enter this API in this section.
const char *WRITE_API = "WRITE API KEY";
pulseSensor.analogInput(PULSE_INPUT);
Complete Code
You can download the complete code from the link below and upload it using Arduino IDE. For uploading the code in ESP32 you can refer to the article below
How to upload code in ESP32 using Arduino IDE

Construction & Testing
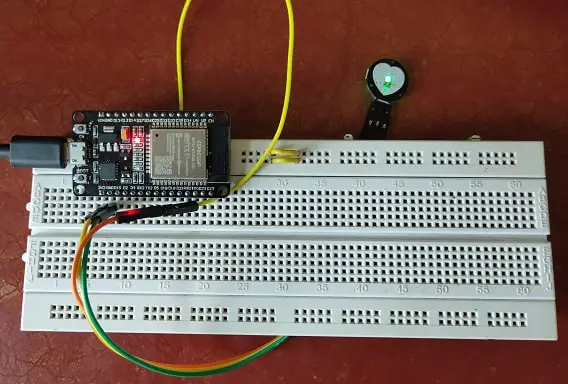
We have connected the sensor with ESP32 dev board as per the connection diagram. Once we power up the hardware and keep the finger on top of the sensor, it starts capturing and sending the data to IoT platform.
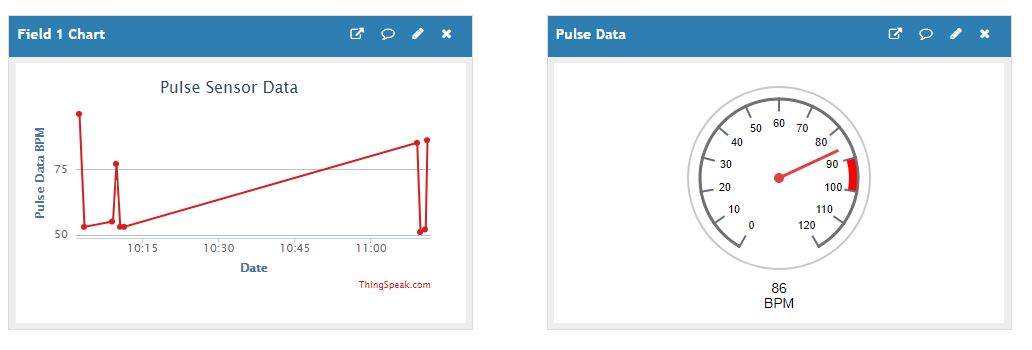
It shows the heart rate pulse data in a chart and also in a Gauge.
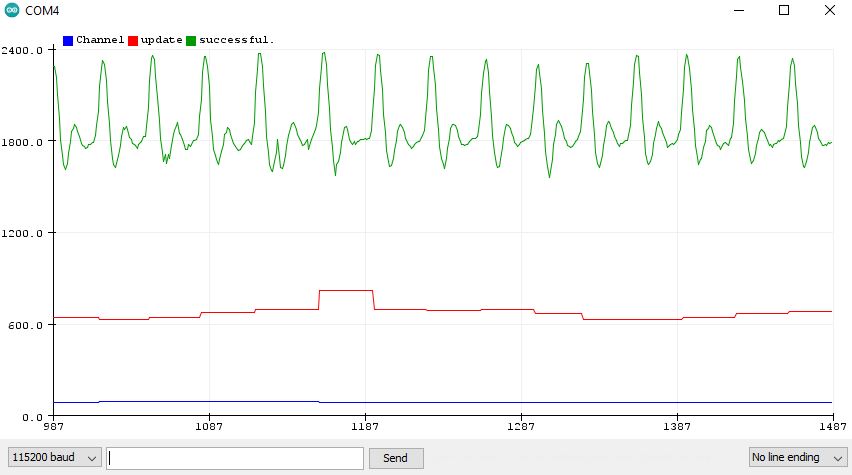
We can also see the graphical plotting of the heart beat in Arduino Serial Plotter.
Conclusion
In the heart rate monitoring project , we obtained heart rate values using a pulse sensor or heart rate sensor and analyzed these values using the ESP32 board and displayed them in the Arduino Serial Plotter. Next, by calling the ThingSpeak library, we will send the obtained values to ThingSpeak servers, and by the help of built-in dashboard in the program code, the values will be displayed in our dashboard.
Disclaimer: This project is for educational purpose only. Do not use this in critical medical condition. Neither the author nor the website is responsible for inappropriate usage of this project.
code was error
For those getting upload error on ESP32 — hold the BOOT button on ESP32 board while uploading the code. This fixed my issue completely. Great project overall!