ESP32 Web Server PWM based LED Control
In this tutorial, we are going to control the light intensity of an LED with the help of ESP32 chip. This process is done by creating an ESP32 web server which will help to interact with the user using PWM feature. We will be able to control the intensity of LED light easily using our own web server. Lets have a quick look on how to build ESP32 Web Server PWM based LED Control.
ESP32 Board
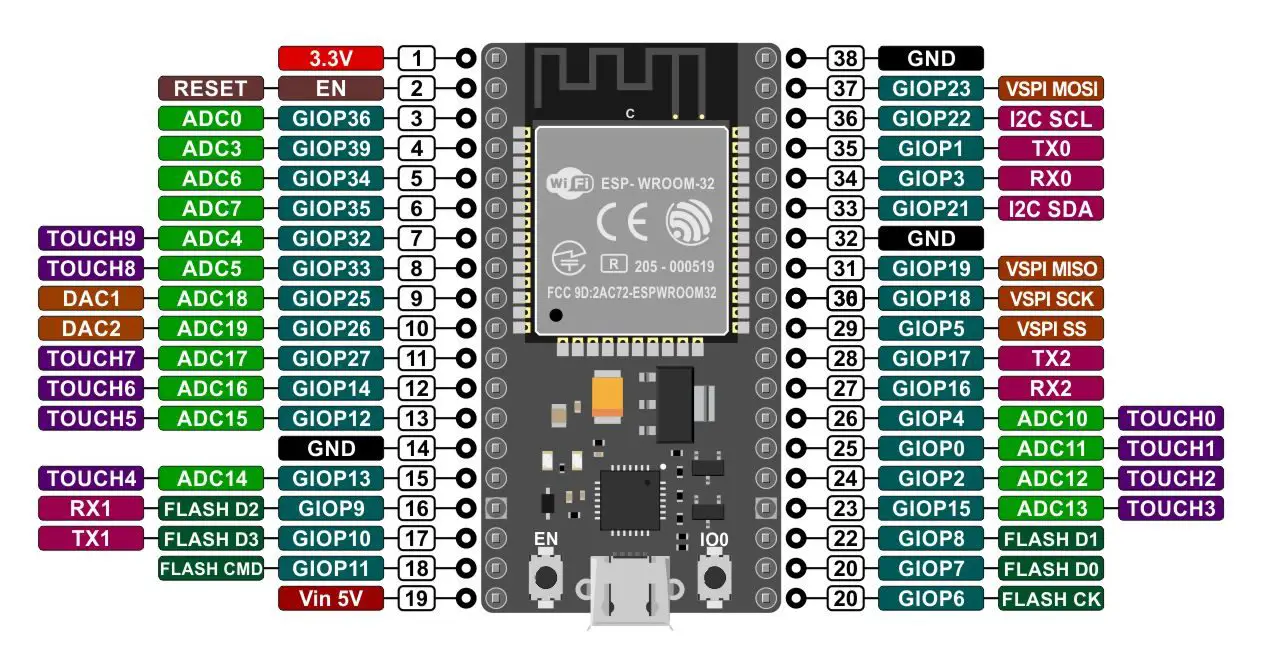
The ESP32 board is the advanced generation ESP8266. One of the differences is its built-in Bluetooth. It also has a 2.4 GHz Wi-Fi core and built-in Bluetooth with 40-nanometer technology from TSMC. This module has the best performance in energy consumption. It brings the best results for us with the least energy consumption. If we want to take a closer look at this board, we must say that this ESP32 chip is implemented on a development board, which is also called System on a chip.
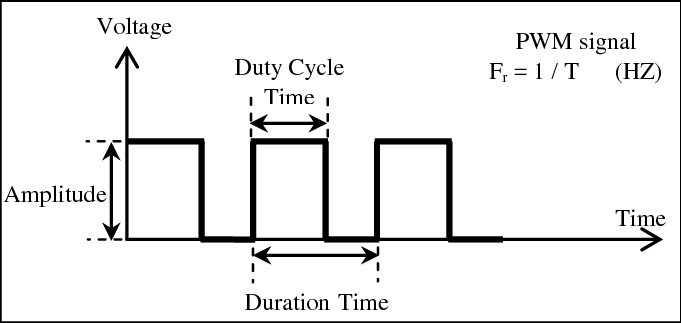
Pulse Width Modulation (PWM)
Pulse Width Modulation or pwm, means pulse width modulation, a way to regulate electrical power by changing the cut-off time and the connection of the source in each cycle. In fact, pwm is a square signal that can be 1, that is, 5 volts or 0, which means 0 volts at a time. For example, if the Duty Cycle of a PWM wave is equal to 80%, that is, in each cycle 80% of the voltage is equal to 5 volts and 20% of the voltage is equal to 0. The PWM is shown in the figure below.
Working
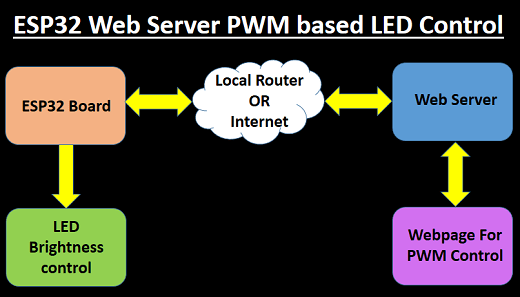
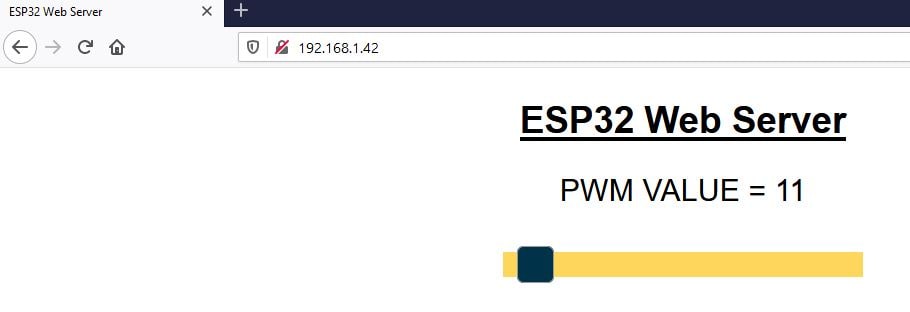
In this project, ESP32 creates a web page for us through which we can change the PWM values from 0 to 255. As a result the pwm value will change accordingly. This change will help in changing the intensity of the led light which is connected with GPIO2. In fact, when we change the value on a web page, an HTTP request is sent from the web server to ESP32 for the applied change and then ESP32 adjusts the pwm values according to the received number.
Arduino IDE Configuration
In this tutorial, we will use the ESP32 board. Follow the steps to install this board in Arduino software.
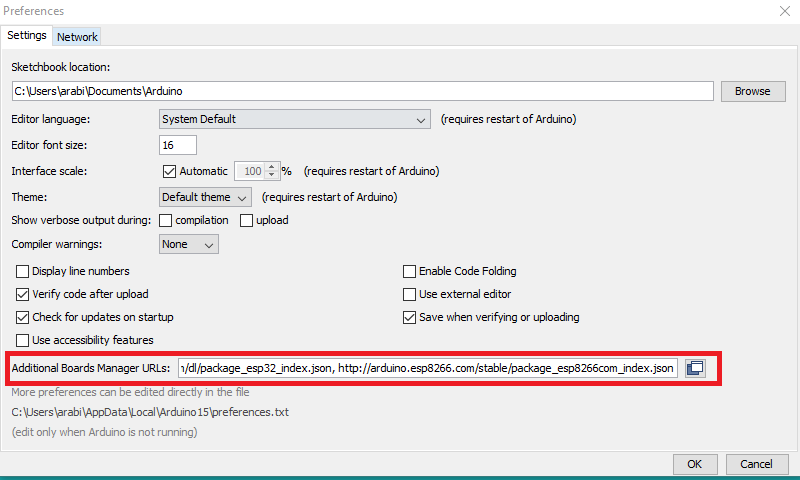
First, in the Arduino IDE software, go to File -> Preferences and put the following links in the specified section.
https://dl.espressif.com/dl/package_esp32_index.json,http://arduino.esp8266.com/stable/package_esp8266com_index.json
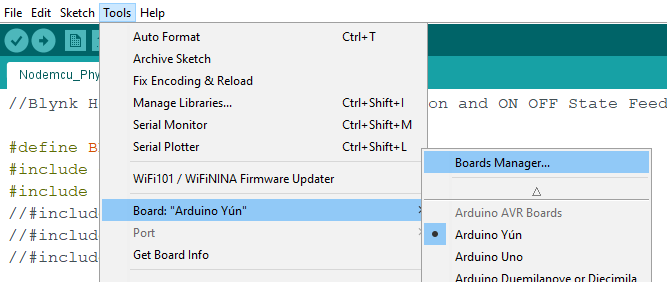
Then go to Tools -> Board -> Boards Manager
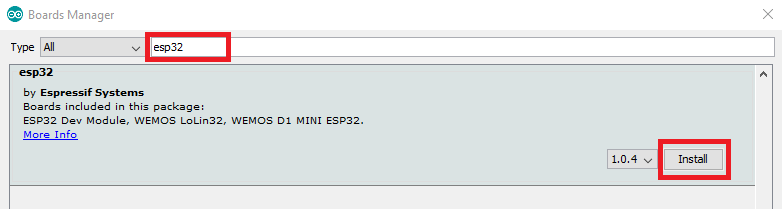
In the board manager section, search for the word ESP32 and click on Install
Required Libraries
This tutorial uses the following three libraries as mentioned in the header file. You can follow the installation steps below.
- WiFi.h
- AsyncTCP.h
- ESPAsyncWebServer.h
Download the library from the following links. First go to Sketch -> Include Library -> Add .zip Library and add the .Zip file you downloaded.
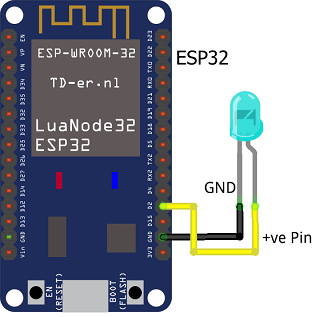
Connection
You can connect any color of LED with ESP32 board. This just a tutorial.
Code Analysis
I will first describe parts of the code. In this section we will add the required libraries ESPAsyncWebServer and ESPAsyncTCP as well as Wi-Fi which are needed to build the ESP32 web server.
#include <WiFi.h>
#include <AsyncTCP.h>
#include <ESPAsyncWebServer.h>
In this section, the user’s Internet details are required to establish a connection to the network.
const char* ssid = "REPLACE_WITH_YOUR_SSID";
const char* password = "REPLACE_WITH_YOUR_PASSWORD";
This line of code resets the initial value to zero.
String sliderValue = "0";
This section deals with pwm settings
const int freq = 5000;
const int ledChannel = 0;
const int resolution = 8;
Final Code
You can download the code from the download link. Unzip it and open the code using Arduino IDE. Then upload the code in ESP32. In case you are not sure on uploading the code then you can refer the article on Uploading Code in ESP32.

Construction & Testing
The result after uploading the code in ESP32 chip, got to Arduino IDE and open the Serial Monitor. Reset the ESP32 module and then it will try to connect with Wi-Fi. After connecting with network it will show you an IP address.

Now put this IP address in a browser and you can access the web page.
Conclusion
This is a simple tutorial for understanding the concept of webserver and pwm using ESP32 board. Instead of a LED you can connect the device which you want to control. Here we have build a web server and using esp32 pwm pin we controlling the brightness or intensity of the light. Do try if you are a beginner and want to start off with IoT projects.
will this be able to control dimming of a 7 watt LED Bulb?
Hello,
You have to use an AC dimmer in order to control a 7 watt bulb.