IoT Vehicle Parking System using ESP8266 and Blynk
We are using vehicles everyday and it is one of the most essential part of our day to day life. In this blog post we will learn how to build a IoT Vehicle Parking System using ESP8266 and Blynk app. This project is for beginners and can be helpful to park or reverse the vehicle. This project will let you know the distance from the any obstacle to your vehicle as per the placement of the sensor.
Things You Need
- Ultrasonic sensor HC – SRF04 x 1
- WeMOS D1 Mini x 1
- Jumper Cables
Working
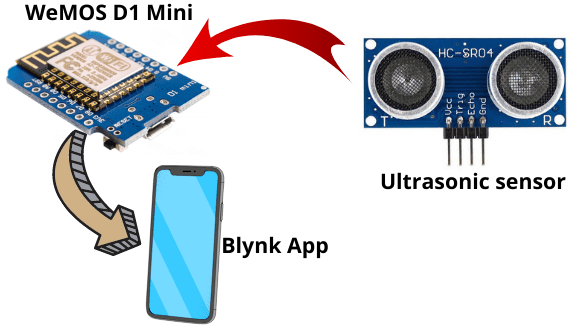
We will use a ultrasonic sensor to determine the distance in the parking area. The ultrasonic sensor will measure the distance and send it to WeMOS D1 mini WiFi board. WeMOS D1 Mini will send the data to Blynk servers which will further displayed to Blynk app.
Setting up a project in Blynk App
First you have to setup a project in Blynk app in your smart phone. After setting the app you will receive an AUTH TOKEN which has to be provided in the code.
You can download the Blynk app from below links based on you mobile OS platform.
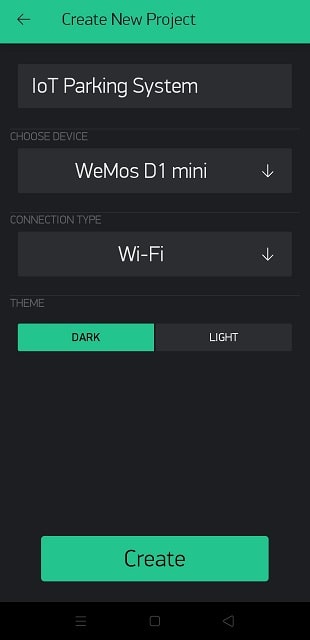
Open blynk app, register with an email ID and then login. After logging in we will create a project. Enter the details as shown below. Tap on create below.
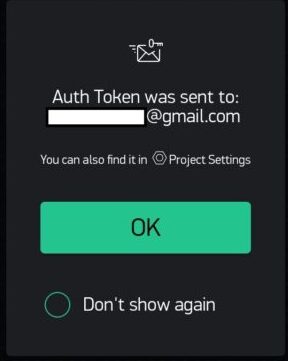
It will send you Auth Token on your registered email id.
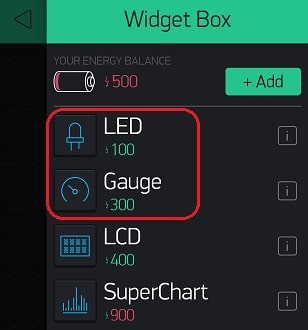
Now lets add the required widgets. Go to Widget Box (+)

Will add 1 Gauge and 5 LED widgets.
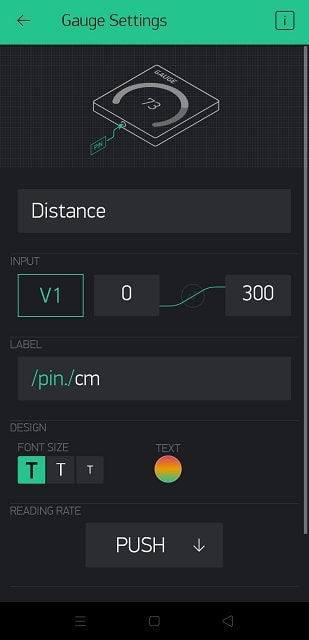
Once added tap on gauge and Configure it as shown.
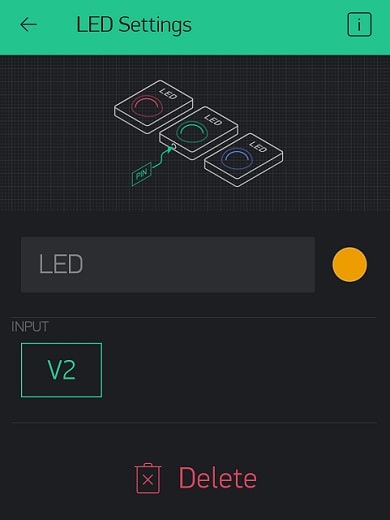
Configure the LED widgets as well
We have to set below parameters for LED:
- Bottom LED need to connect, select Virtual> V2
- Next LED need to connect, select Virtual> V3
- LED need to connect, select Virtual> V4
- LED need to connect, select Virtual> V5
- Top LED need to connect, select Virtual> V6
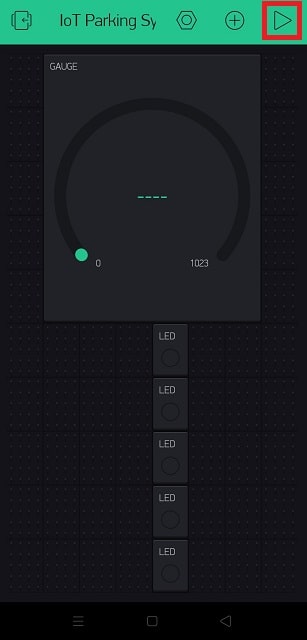
Finally reposition the widgets and resize them. The play button will start the project.
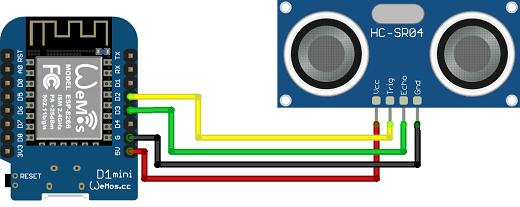
Connection diagram
NodeMCU/WeMOS D1 Mini | Ultrasonic Sensor |
3.3V/5V | VCC |
GND | GND |
D2 | Trigger |
D3 | ECHO |
Code
You can download the code from the download link. This code will work in ESP8266 based NodeMCU and WeMOS D1 Mini WiFi boards. You can select accordingly.
After downloading the zip file unzip it. Open the code using Arduino IDE and select the correct board from Tools -> Boards. For uploading the code you can refer to the guides below as per you choice of boards.
Building and Testing
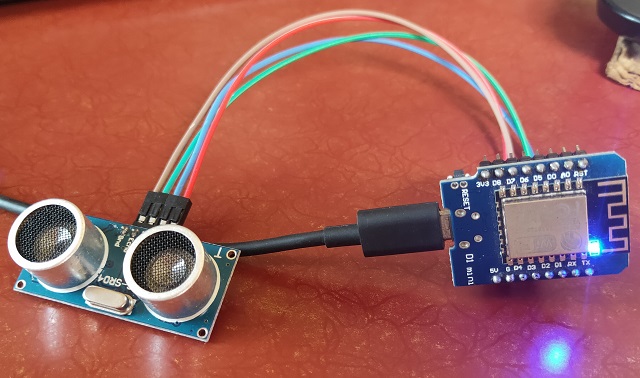
We have connected the sensor with WeMOS D1 mini wifi board as per the circuit diagram. Code is uploaded and powered on.
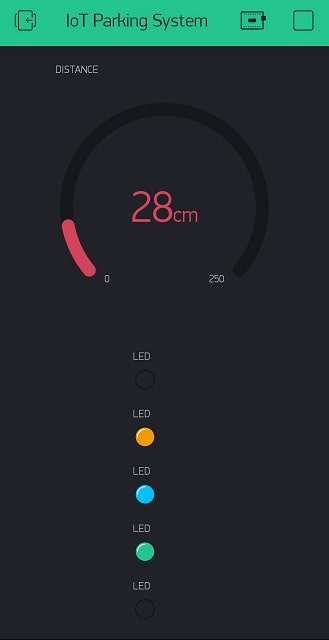
If you open Blynk app, now you can see the range is showing in the gauge along with LED’s lilting up. This concludes the project is ready to be mounted at the back or front of your car. You can power this project using a power bank and use your mobile hotspots to connect with Blynk and get the data.
Suggested Reading:
- NTP Digital Clock using ESP8266 and OLED Display
- NodeMCU based WiFi Network Scanner with OLED Display
- DHT11 Sensor with ESP-NOW and ESP32
- ESP32 Web Server PWM based LED Control
- IoT Heart Rate Monitoring with ThingSpeak Platform
- Temperature Monitoring with ESP-DASH Webserver
- Wemos D1 Mini Web Server based Servo Motor Control
- ESP8266 Web Server for Controlling Electrical Devices
- Setting up a LDR Sensor with Arduino
- Controlling ESP32 via Bluetooth using Blynk
- NodeMCU Blynk Feedback Switch with Physical Switch Status
- NodeMCU ESP8266 IoT based LPG Gas Leakage Alarm
Summary
It’s interesting isn’t it? A simple application through which you can create your own a better project. You can use this project in many other placed to measure distance and trigger alarm. You can also connect a buzzer with this project, which will beep if the vehicle is very near to any obstacle. Try this in your project and provide your feedback. Don’t forget to share this article with others.
