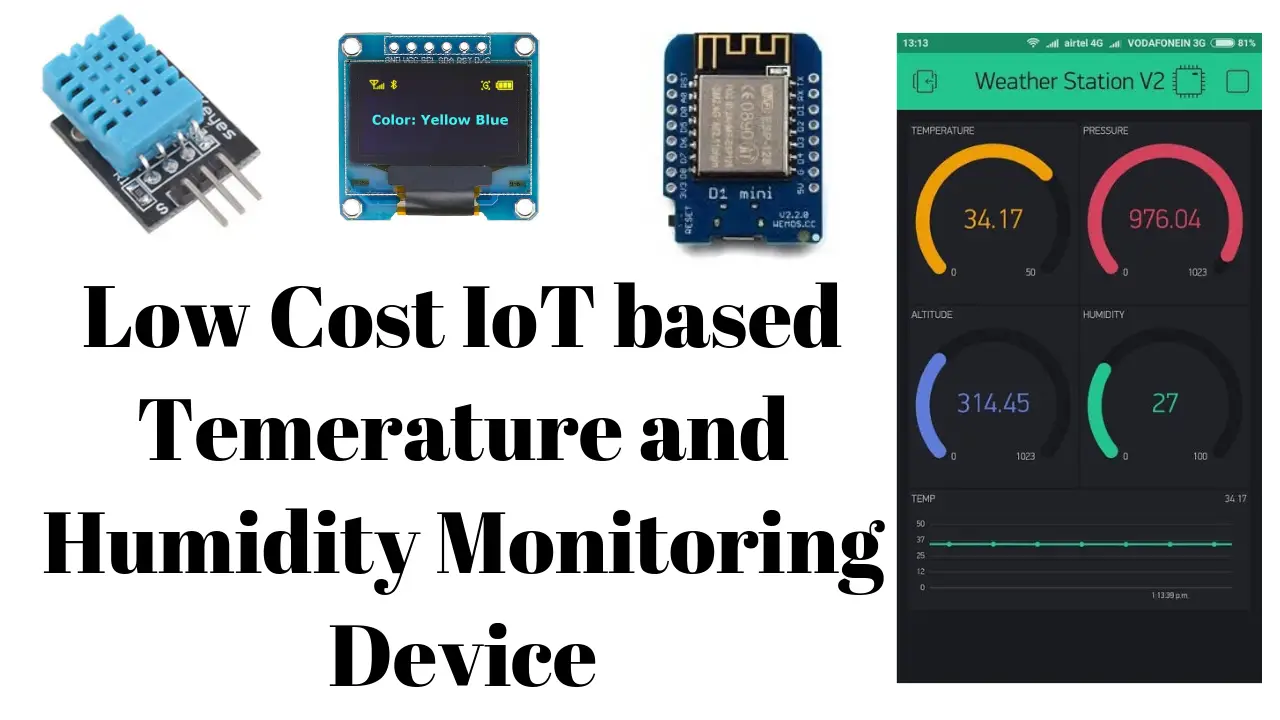
Introduction
Temperature and humidity change every moment. Sometime it is necessary to monitor it as well. This is a easy and simple project using some simple modules. This is a DHT11 based temperature humidity monitoring project. This also uses WeMos D1 Mini Wifi module and Blynk for IoT monitoring.
This project can be built by beginners as it requires minimum components. At the end of this project you will be able to know how to interface DHT11 sensor with Wemos D1 Mini, OLED display and Blynk.
How it Works?
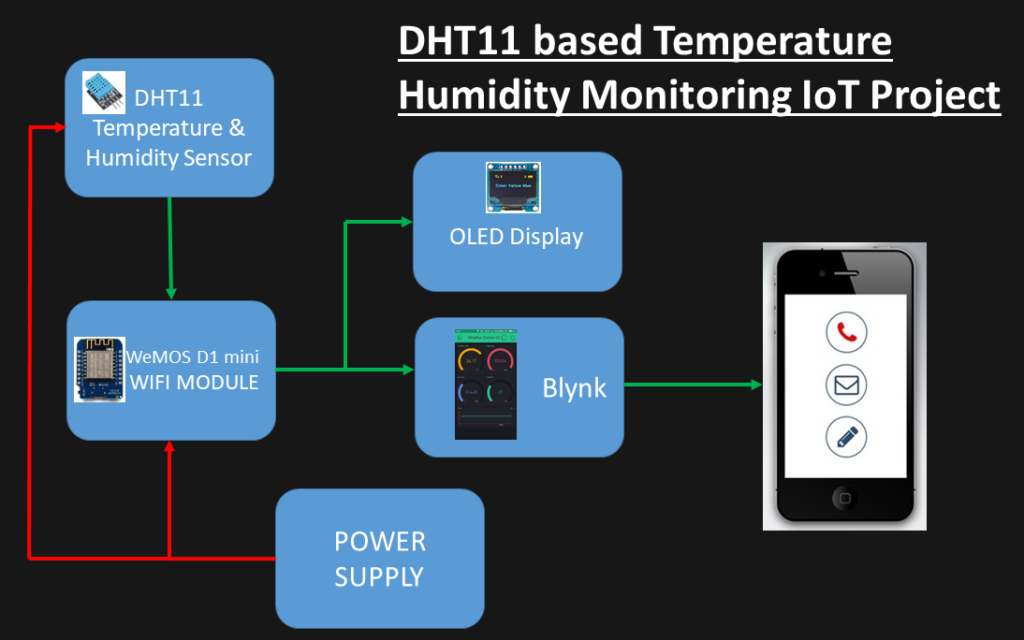
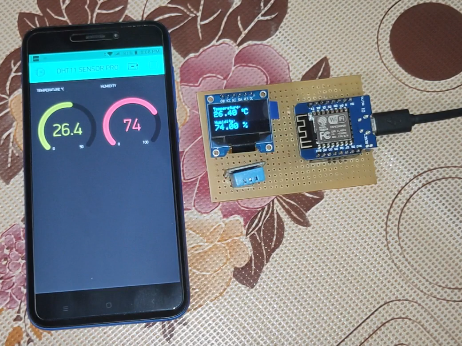
DHT11 is a temperature and humidity sensor. It will collect the data and send to WeMos D1 Mini WIFI Module. This module will display the data in a OLED display. The wifi module will also send the data to Blynk. We can also monitor the temperature and humidity changes in our smartphones using Blynk app.
Parts List
- WeMos D1 Mini x 1
- DHT11 Sensor x 1
- OLED display(0.96 inch) x 1
- Jumper wires for bread board connection
- 5 Volts Power supply
Sensors and Modules Functions
WeMos D1 Mini
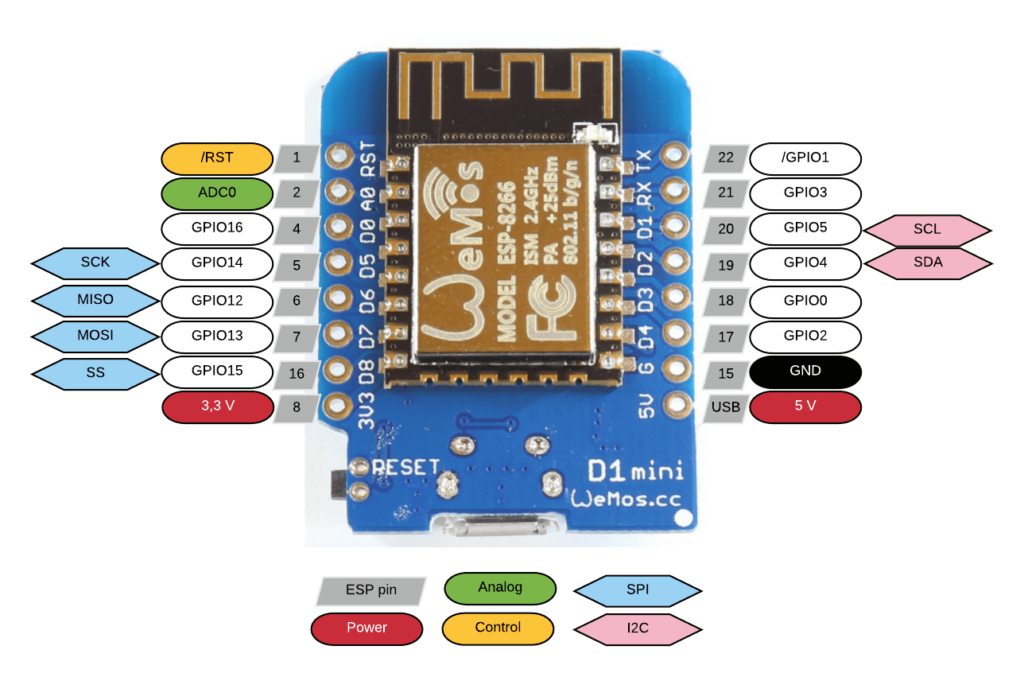
WeMos D1 mini is another ESP8266 module. This will work as a brain of this project which will contain the code and send data to Oled display.
DHT11 Temperature and Humidity Sensor

This sensor is used to measure temperature and humidity from atmosphere. Feature of this sensor are given below
- Operating Voltage 3V – 5.5V DC
- Operating Current 0.5mA
- Humidity Range 20-90%RH
- Humidity Accuracy ±4% RH
- Temperature Range 0-50 ℃
- Temperature Accuracy ±2℃
OLED Display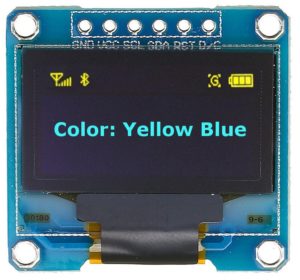
OLED stands for Organic LED. This is a display used to show the real time data. It is available in 4/6 pins for interfacing.
Features
- Power supply : 3V – 5V DC
- Interface : I2C / SPI
- Driver IC : SSD1306
- Power consumption : 0.04 W (normal operation)
- Working Temperature : 30 ºC – 70 ºC
Libraries for Arduino
4 Pins Oled Details
- VCC : Power Supply
- GND : Ground
- SLC : Serial Clock
- SDA : Serial Data
6 Pins Oled Details
- VCC : Power Supply
- GND : Ground
- SLC : Serial Clock
- SDA/MOSI : Serial Data
- RES : Reset
- DC : Data Command (Used for SPI protocol)
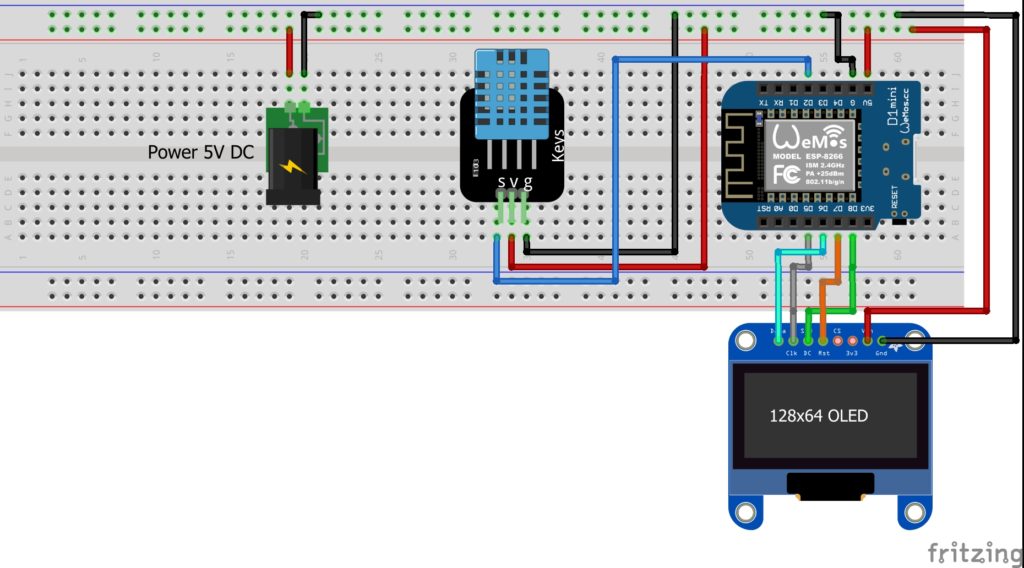
Connection Diagram
This project contains few components which are connected as below diagram. You can arrange all these components in a breadboard and later you can make it on a PCB.
Blynk Setup
Blynk is used for monitoring temperature and humidity over internet using smartphone. You can follow the steps as shown below to create project and configure it.
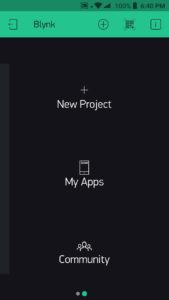
Open Blynk App and click on New Project
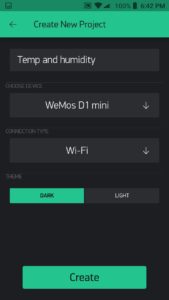
Provide a Name for your project. Select Device as WeMos D1 Mini and connection type is Wi-Fi. Tap on Create
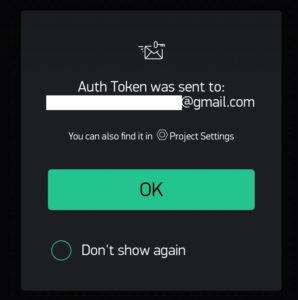
Auth Token will be sent to registered email id.
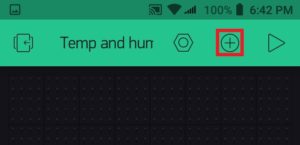
Tap on below highlighted icon to add widget
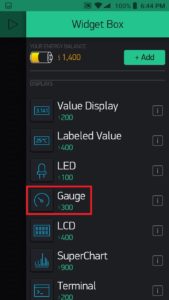
Select Gauge Widget two times for Temperature and Humidity.
Add name in the gauge As Temperature. Pin will be V6 and the higher limit will be 50. Reading rate will be set to 1Sec.
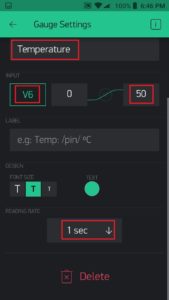
For humidity Input pin will be V5 and the higher limit will be 100.

Code
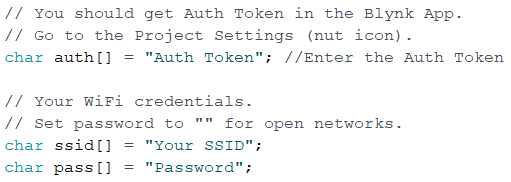
The code is simple and you can download the code from this link. Just add your Auth Token and put your network ID and password. Auth Token will be sent to you registered email id.
Construction
You can gather and place all the components on a PCB. Upload your code in WeMos d1 mini and power the project.
Testing
This is a complete video of the project.
Conclusion
This project can be used at home and other place where temperature and humidity needs to be monitored. Its a simple project with 3 modules. It can be build by any beginner electronics hobbyist. All the modules are easily available in market. Please comment on views on this project.
Related Projects:
- IoT based water level Indicator
- Touch Based Switch using capacitive sensor
- IoT Smart Plant Watering System Project
- Monitoring Weather Data using BMP280 and Blynk 2.0
- Web Server Pulse Oximeter using NodeMCU ESP8266
- Getting Started with Arduino IoT cloud using NodeMCU and DHT11
- Weather Station with Raspberry Pi PICO and DHT11
- Controlling a servo motor using Raspberry Pi Pico
- Configuring BMP280 Sensor with Raspberry Pi
- Weather Station with BMP280 Sensor and Raspberry Pi Pico
- IoT Pulse Oximeter Using NodeMCU MAX30100 & Blynk
- DIY Digital clock with RTC DS1307 and Raspberry Pi PICO
- IoT Security Camera using ESP32-Cam Blynk and PIR Sensor
- ESP8266 based IoT Panic Alarm for Old Age People using Blynk
- How to send sensor data to Thingspeak using Raspberry Pi
- ESP32-CAM based Email Notification System
- ESP32 based Gas Leakage Detection using Email Notification
- IoT based Motion Detection Alarm using ESP8266 and Blynk
- IoT based Fire Security Alarm System using NodeMCU
- NTP Digital Clock using ESP8266 and OLED Display
- DHT11 Sensor with ESP-NOW and ESP32
Great work could you upload the fritzing file connection to download
Thanks