Weather Station with Raspberry Pi PICO and DHT11
Do you need a weather station to monitor the temperature and humidity in your home or office? Instead of buying one, you can now make your own Weather Station with Raspberry Pi PICO and DHT11 sensor. When the project is complete, place the DHT11 sensor outside the window to get the most accurate weather readings or you can use this project to monitor the interior temperature as well.
Materials Required
- Raspberry Pi Pico
- 16×2 LCD
- DHT11 Temperature and Humidity Sensor
- Jumper Wires
- MicroUSB cable to power your Raspberry Pi Pico board
Working
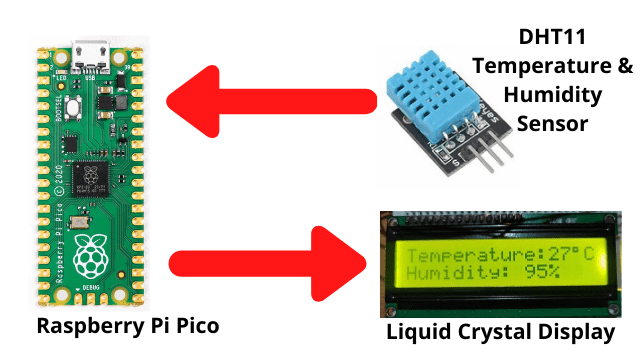
In this tutorial, we used the Raspberry Pi Pico board to read the temperature, humidity data. The data is displayed on a 16×2 LCD screen. We are using I2C protocol to connect the display with Raspberry Pi Pico.
Raspberry Pi Pico is a microcontroller board, rather than a mini computer like the other Pi boards. That makes it ideal for creating small projects. Raspberry Pi Pico is capable of handling analog input from sensors something other Pi boards cannot handle without an additional board. The Pico board can be programmed with C/C++ or MicroPython. We have chosen MicroPython for this tutorial.
Connection
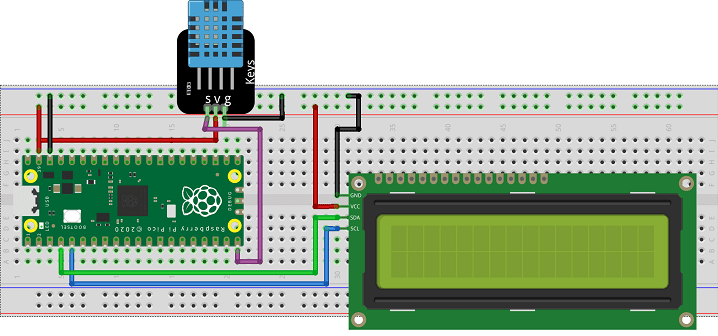
Connect the DHT11 sensor to the breadboard and connect GND to the GND rail, Vcc to Vcc and the OUT signal to GPIO15 (Pin 20). For LCD screen, connect SDA to Pin 5 and SCL to Pin 4. To power the LCD screen, connect LCD VCC to pin 36 on Raspberry Pi PICO board and LCD GND to the GND rail.
Code Analysis
Before we jump in to the code lets understand the main python commands used. We have added the LCD I2C library along with DHT11 library. First we will declare the headers.
from pico_i2c_lcd import I2cLcd
from machine import Pin, I2C
from time import sleep
from dht import DHT11
Now we have initialized the LCD I2C connectivity.
i2c_lcd = I2C(id=1,scl=Pin(3),sda=Pin(2),freq=100000)
Similarly we have to configure the DHT11
pin = Pin(15)
dht11 = DHT11(pin,None,dht11=True)
If the condition is true then the data will be collected from DHT11 and if the data is not available the it will print a message. If the data is available then it will display them in Thonny IDE console.
while True:
T,H = dht11.read()
if T is None:
print("Unable to connect to sensor")
else:
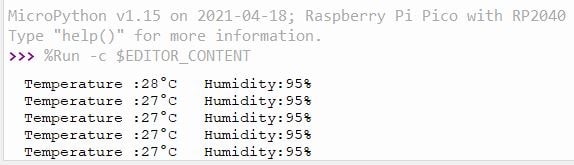
print("Temperature :" + str(T) + "°C "+ "Humidity:"+ str(H) +"%")
Below commands will print the temperature and humidity in LCD display.
lcd.move_to(0,0)
lcd.putstr("Temperature: " + str(T) + chr (0xDF) + "C")
lcd.move_to(0,1)
lcd.putstr("Humidity: "+ str(H) +"%")
Complete Code
You can download the python code from the download link below. Once you downloaded you can unzip the it and open the python file using Thonny IDE.

Uploading Code in Raspberry Pi Pico
This project requires pin connections to your Pico board. If you haven’t already, you’ll need to solder pins to your Raspberry Pi Pico. To upload the code and configuring the Raspberry Pi Pico for the first time we have made a nice tutorial. You can follow it step by step and upload the code the using Thonny IDE to Raspberry Pi PICO.
How to configure Raspberry Pi PICO with Thonny IDE
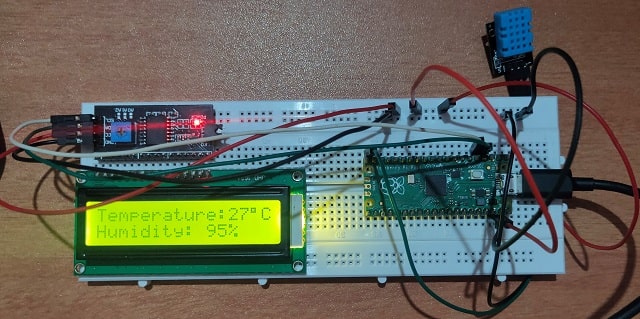
Building & Testing
In a few seconds you should see the temperature and humidity of your room on the LCD screen. Once your Pico weather station is working, you can add an LED or a buzzer if the temperature or humidity goes above (or falls below) a threshold that you set. Now you can power the Pico using power bank charger or USB power adapter.
Once you run the code and the connection is correct then you will receive the below output in your Thonny IDE Console.
Some More Interesting Projects
- Controlling a servo motor using Raspberry Pi Pico
- Configuring BMP280 Sensor with Raspberry Pi
- Configuring Motion Sensor with Raspberry Pi Pico
- Weather Station with BMP280 Sensor and Raspberry Pi Pico
- IoT Pulse Oximeter Using NodeMCU MAX30100 & Blynk
- DIY Digital clock with RTC DS1307 and Raspberry Pi PICO
- IoT Security Camera using ESP32-Cam Blynk and PIR Sensor
- Reading built in Temperature sensor values of Raspberry Pi PICO
- ESP8266 based IoT Panic Alarm for Old Age People using Blynk
- How to send sensor data to Thingspeak using Raspberry Pi
- ESP32-CAM based Email Notification System
- ESP32 based Gas Leakage Detection using Email Notification
- IoT based Timer Switch using Blynk and NodeMCU
- IoT Heart Rate Monitoring with ThingSpeak Platform
- Raspberry Pi Flask Web Server with DHT11
- DHT11 Sensor with ESP-NOW and ESP32
Summary
In this tutorial we have learnt how to interface a DHT11 temperature and humidity sensor with Raspberry Pi Pico. We are also using micro python code to make it work. Also we have interfaced a LCD to display the sensor readings. We hope this article will help you to understand the interfacing technique. Do try this tutorial by yourself and don’t forget to share the article.


Traceback (most recent call last):
File “”, line 11, in
File “pico_i2c_lcd.py”, line 21, in __init__
OSError: [Errno 5] EIO
How to fix?
I got the same error but somehow i figured out that it shows up when lcd or DHT11 are disconnected. Connect them while testing and the error should not occur
I’m using Raspberry Pi Pico W – On the first run the code ran great (I didn’t have the sensor at hand at the time) but after rerunning it had errno 12. Looked up for the error and found this:
https://forums.raspberrypi.com/viewtopic.php?t=338158
I’ve added “rp2.PIO(0).remove_program()” at the start of DHT11 class and it worked like before (printing something when nothing is connected to the assigned pin).
I’ve tested the code with the sensor and it works when you have the sensor, disconnect it halfway through and reconnect it.
Today I’ve found out that micropython does have their own dht library, it does however crash if you disconnect the sensor while it’s running…
Usually your connection should be complete to make your project run using MicroPython code.