DIY Digital clock with RTC DS1307 and Raspberry Pi PICO
Recently we were exploring the Raspberry Pi PICO and thought of building a simple project. We thought of building a digital clock using a RTC. This is a simple DIY Digital clock with RTC DS1307 and Raspberry Pi PICO. You might have build a digital clock using Arduino, RTC and coded it with embedded C. In this project we will be using micro python and electronics. People who have the basic knowledge of python and electronics can build this project easily. It will help you to explore the possibilities of interfacing a RTC module with Pi PICO board. Lets start building this project.
Things Required
- Raspberry Pi PICO x 1
- 16×2 LCD (I2C) Display x 1
- Breadboard x 1
- Jumper Cables
- Micro USB data cable
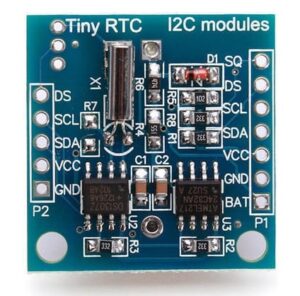
RTC Module DS1307
DS1307 is a low cost real-time clock (RTC) module. The accuracy is good and works as a prefect time keeper. This RTC chip is built using Maxim – DS1307. It is also the heart of this module. It has a good feature of two-wire I2C interface. Using I2C protocol it is easy to interface it with different microcontrollers and development boards.
 This time keeper maintains seconds, minutes, hours, day, date, month, and year information. This module can automatically adjust according to leap year. The clock can operate in both the format i.e. 24-hour or 12-hour format with an AM/PM indicator.
This module comes with an external 32kHz crystal for keeping accurate time. The only problem with these external crystals are, they are very temperature sensitive. The change in temperature affects their oscillation frequency. Although this change is negligible but in the long run it affects the time slightly.
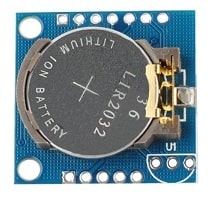
The DS1307 RTC module is equipped with a coin battery source. This battery helps the chip to maintains accurate time even if there is a power interruption. This RTC module is also equipped with a 32 bytes 24C32 EEPROM chip manufactured by Atmel. It is use to save the configuration or time when setting it for first time.
Working
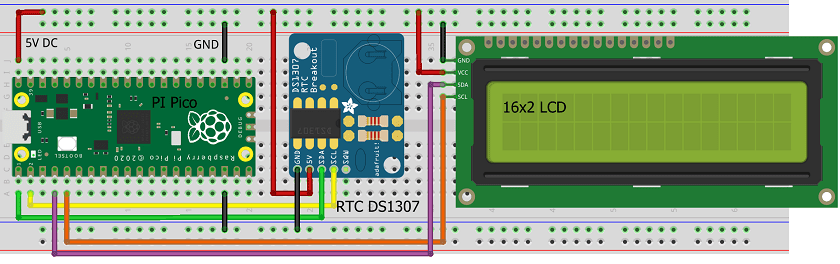
The working of this project is simple. The RTC and LCD is connected with Raspberry Pi Pico using I2C protocol. The PICO acts as a brain of this project by running the micro python code in it. The RTC is responsible for storing the date and time. With the help of LCD display the date and time is displayed.

Connection
After placing all the components on a breadboard connect them as per the diagram shown below. Once the testing is done you can also mount these components on a plastic case.
Understanding the code
Before we upload the code on Raspberry Pi Pico we need to understand the code. Below are the libraries which we will be using in the entire code.
from machine import I2C, Pin
from ds1307 import DS1307
from pico_i2c_lcd import I2cLcd
import utime
Below line of code are used for configuring and initializing the LCD display using I2C protocol.
i2c_lcd = I2C(id=1,scl=Pin(3),sda=Pin(2),freq=100000)
lcd = I2cLcd(i2c_lcd, 0x27, 2, 16)
We are also connecting the RTC module using I2C interface and hence we be using below line of code to configure it.
i2c_rtc = I2C(0,scl = Pin(1),sda = Pin(0),freq = 100000)
Below code should be uncommented only to set the time for first time in RTC and then it should be commented back again.
'''
year = int(input("Year : "))
month = int(input("month (Jan --> 1 , Dec --> 12): "))
date = int(input("date : "))
day = int(input("day (1 --> monday , 2 --> Tuesday ... 0 --> Sunday): "))
hour = int(input("hour (24 Hour format): "))
minute = int(input("minute : "))
second = int(input("second : "))
now = (year,month,date,day,hour,minute,second,0)
rtc.datetime(now)
print(rtc.datetime())
'''
Code
You can download the code from below link. Unzip the file and open these files using Thonny IDE. Now we need to upload all these files in Raspberry Pi PICO. If you are not sure about uploading the python code files using Thonny IDE then you can follow the link below.
Upload Guide: Raspberry Pi PICO with Thonny IDE

Building & Testing
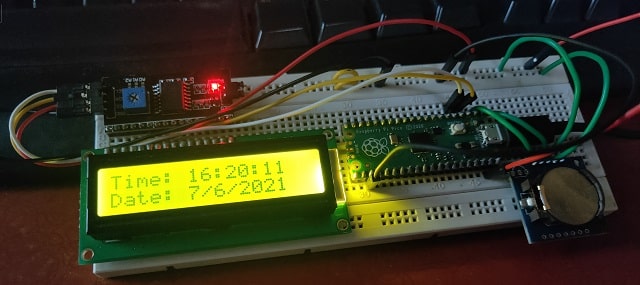
Once we have connected the components as per the connection diagram and uploaded the code, now its time to test the project. In the first run of the code we have to set the time as shown above. After setting the time it will display the date and time in LCD.
Some more projects:
- IoT Security Camera using ESP32-Cam Blynk and PIR Sensor
- Reading built in Temperature sensor values of Raspberry Pi PICO
- ESP8266 based IoT Panic Alarm for Old Age People using Blynk
- Smart Switch using Blynk | IoT Based WiFi Switch
- PIR based Motion Switch | PIR Sensor Light
- IoT based water level Indicator using ESP8266
- ESP8266 Web Server for Controlling Electrical Devices
- How to send sensor data to Thingspeak using Raspberry Pi
- ESP32-CAM based Email Notification System
- DS18B20 with NodeMCU Local WebServer
- IoT based Timer Switch using Blynk and NodeMCU
- Raspberry Pi Flask Web Server with DHT11
- Wemos D1 Mini Web Server based Servo Motor Control
- How to read DHT11 sensor data using Blynk
Summary
So we have connected a RTC DS13070 with Raspberry Pi PICO and LCD to display date and time. PICO ha equipped with RP2040 SOC chip. This will be a simple digital clock using micro python code. Its a beginner project for micro python learners. Do try this and also you can modify this project as per your need. Don’t forget to share this project with your friends.
Dear Sir
I am writing a technical book and would like to use your codes: lcd_api.py and pico_i2c_lcd.py, taken from the internet, in my book. I will be happy if you give me permission to use these codes in my book.
Hi Prof Dogan Ibrahim,
Sure you can use these codes in your book.
Hi, I’m just curious if you know if this tutorial would work with the Adafruit version of the DS1307? When I try to run it I get an error: “OSError: 5”.
perhaps I found an error:
the weekday is not :1 –> monday , 2 –> Tuesday … 0 –> Sunday
but :
weekday is 0-6 for Mon-Sun
from https://docs.micropython.org/en/latest/library/time.html
For some reason when I use:
from pico_i2c_lcd import I2cLcd
I get the error:
Traceback (most recent call last):
File “”, line 3, in
ImportError: no module named ‘pico_i2c_lcd’
Kindly check the connection with LCD
iI Found :
Traceback (most recent call last):
File “”, line 7, in
File “pico_i2c_lcd.py”, line 21, in __init__
OSError: [Errno 5] EIO
>>>
check the connection and code properly, Also keep the dependencies in same folder.