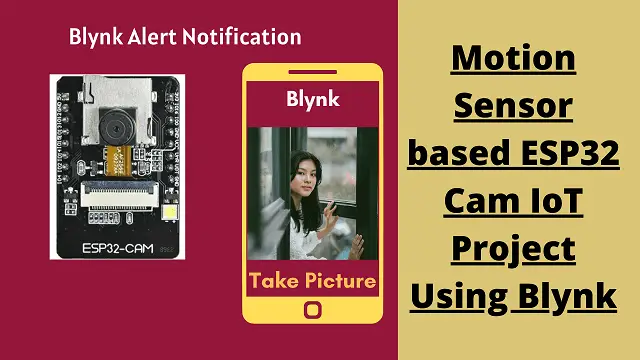
IoT Security Camera using ESP32-Cam Blynk and PIR Sensor
In this tutorial, we will build an IoT Security Camera using ESP32-Cam Blynk and PIR Sensor with motion detection feature. This is a kind of DIY Home surveillance system. Its a simple but very effective project. We will discuss in details on this about its working and building this project. With the combination of ESP32 CAM, PIR motion sensor and Blynk app, this is a nice project to build. Lets get started.
It is really tough to take capture multiple pictures of anyone automatically. Its difficult to identify the person if the captured photo is under focused or not in frame. So we have decided to implement a new feature in this project. Apart from taking pictures automatically, we can also take multiple pictures of the intruder whenever we want.
Things You Need
- ESP32Cam x 1
- PIR Sensor x 1
- Jumper cables
- Transistor BC547 x 1
- Resistor 1K x 1
- Resistor 10K x 1
ESP32 Cam Module

ESP32-cam contains a ESP32 chip with built-in Bluetooth and WiFi feature. This module has the best performance in energy consumption. This board is also equipped with a ESP32-cam which include the OV2640 camera. This camera has the ability to record images in JPEG, BMP and grayscale formats. You will also be able to shoot in dark places with the LED flash mounted on this module. One of the best features of this module is, the micro SD input module which can be upgraded to 4GB SD card. You can store images in SD card locally or you can send it via WiFi to any IoT platforms.
Feature of ESP32 Camera:
Here is a list with the ESP32-Cam features:
- The smallest 802.11b/g/n Wi-Fi BT SoC module
- Low power 32-bit CPU, can also serve the application processor
- Up to 160MHz clock speed, summary computing power up to 600 DMIPS
- Built-in 520 KB SRAM, external 4MPSRAM
- Supports UART/SPI/I2C/PWM/ADC/DAC
- Support OV2640 and OV7670 cameras, built-in flash lamp
- Supports image WiFi upload
- Support TF card
- Supports multiple sleep modes
- Embedded Lwip and FreeRTOS
- Supports STA/AP/STA+AP operation mode
- Support Smart Config/AirKiss technology
- Support for serial port local and remote firmware upgrades (FOTA)
ESP32-Cam Pinout

How it works?
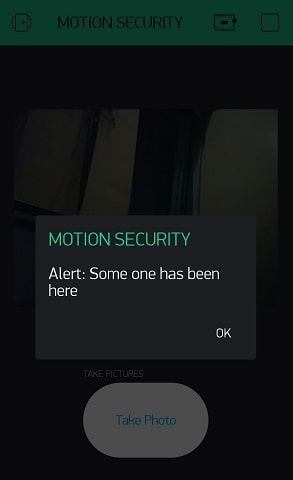
If any motion detected by PIR sensor, the ESP32-CAM Motion Sensor Security Camera will send a notification to smartphone with the photo. It has a feature where manually photos can be taken from Blynk app using a button as well. When the motion is detected by PIR Motion Sensor then an interrupt to wakeup the ESP32-Cam Module.
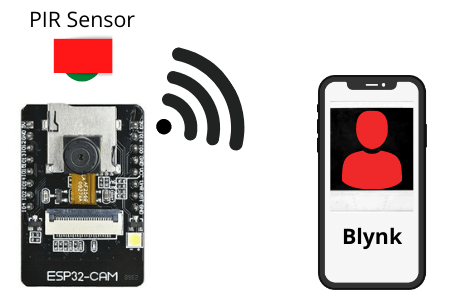
As soon as motion detected, GPIO13 gets LOW. As per the code ESP32-cam will send a notification to Blynk app along with the captured image. We will receive the captured images as long as the intruder’s motion is detected.
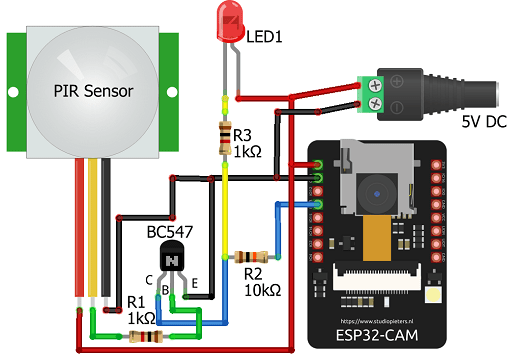
Connection Diagram
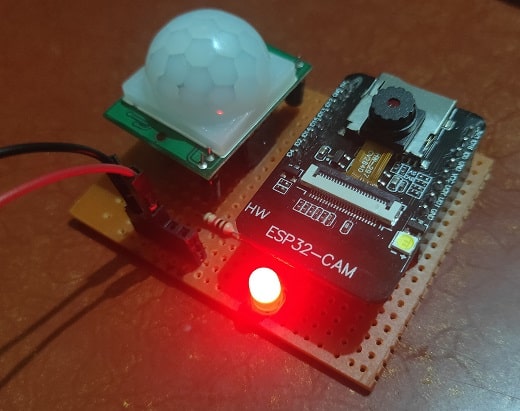
We have to connect the sensor and other components as per the connection diagram shown below. Vcc and Ground pins are connected to respective power input pins of PIR sensor. GPIO13 of ESP32-cam is connected to PIR sensor with a NPN transistor in between. There is a LED connected with the signal pin to get the output state of PIT motion sensor.
Setting up Blynk project
Before we understand about the code, lets set up the Blynk app for our project.
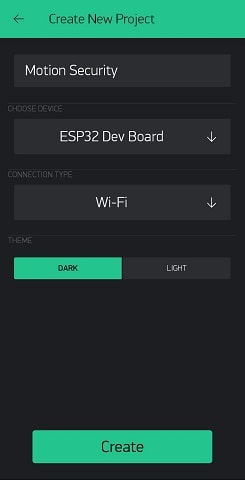
Now open the Blynk app and create a new project. You put any name as you like but select the device and connection type as shown below.
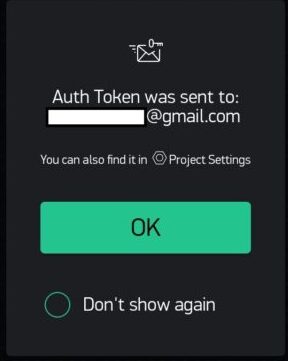
After tapping on create, You will receive the Auth Token on your registered email id.
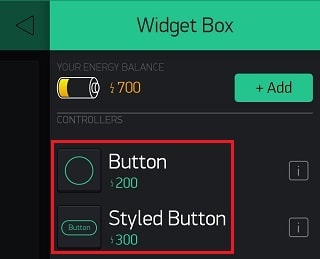
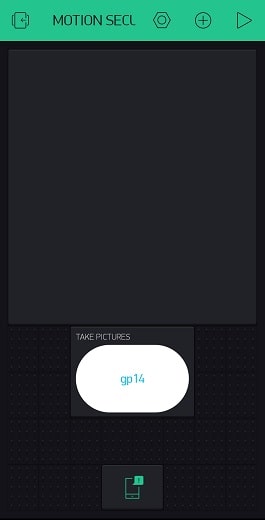
Now open the widget box and add a button or a styled button.
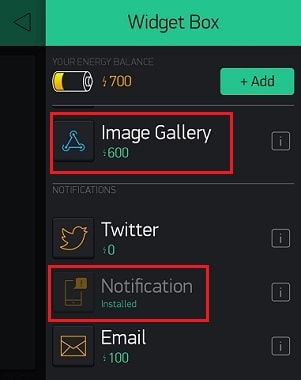
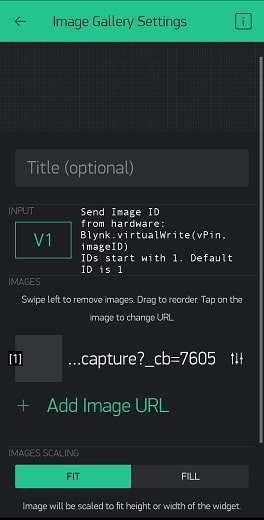
Select Image Gallery and Notification widget as well.
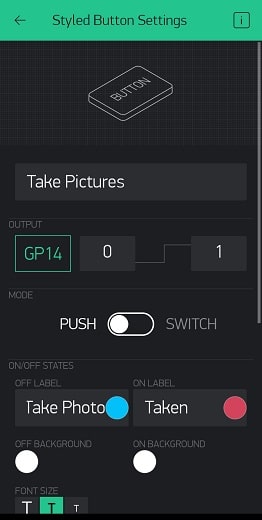
Configure the button as shown below by tapping on it.
Also select V1 as in Input while configuring Image Gallery Settings.
Once you add all these widgets and position them as shown below, your Blynk setup is complete.
Preparing the Code before upload
Before we upload the code in ESP32-Cam, we need to make some changes in the code.
First update the network details in the below line of code to make the board connected with our network.
// Enter your WiFi ssid and password
const char* ssid = "xxxxxxxxxxxxx";
const char* password = "xxxxxxxx";
Now enter the Auth Code which you have received while creating the blynk project on your registered email.
char auth[] = "xxxxxxxxxxxxxxxxxxxxxxxxxxxxxxx"; //Auth Token
Uploading Code
We are using Arduino IDE to compile and upload the code in ESP32-Cam board. If you don’t have Arduino IDE installed then get it from the this link. Also you need to get the ESP32 add-on configured on it and you can refer this article as a guide.
You can download the code from the below link and unzip it. Then open it in Arduino IDE, compile and upload it to ESP32-Cam.

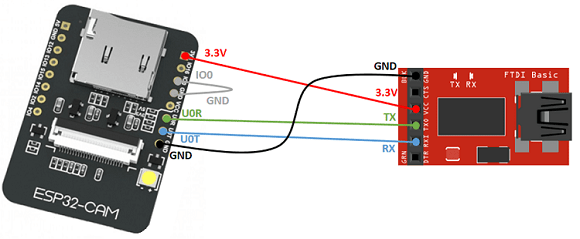
If you are getting error uploading the code using Arduino then you can also use FTDI Module. Connect the ESP32-cam and the module with your computer as shown below. To upload codeGPIO0 (IO0) needs to be connected to GND, to put ESP32-Cam in the flash mode .
Board Settings In Arduino IDE:
Before uploading the code go to boards and make sure you have the same configuration as shown below.
- Board: “ESP32 Wrover Module”
- Upload Speed: “921600”
- Flash Frequency: “80MHz”
- Flash Mode: “QIO”
- Partition Scheme: “Hue APP (3MB No OTA/1MB SPIFFS)”
- Core Debug Level: “None”
- COM Port: Depends *On Your System*
- GPIO 0 must be connected to GND pin while uploading the sketch
Building & Testing
We have connected the modules on PCB as per the circuit diagram and uploaded the code. After successful uploading of code, disconnect the jumper cable between IO0 and GND pins.
Restart and open the serial monitor on Arduino IDE. Now you can see ESP32-cam is trying to connect with the programmed WiFi network. After successful connection ESP32 cam will be allocated with an IP address. As soon as the PIR sensor detects a motion you will receive a notification on your Blynk App as shown below with a custom message.
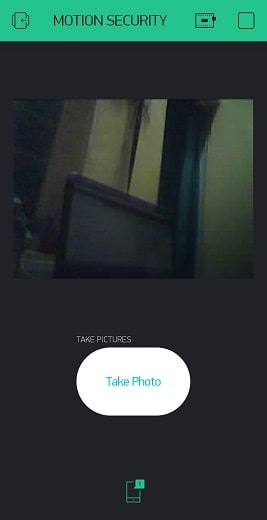
Same way it will also take a picture of the person present near the door or location where you have placed the project.
More Projects:
- Reading built in Temperature sensor values of Raspberry Pi PICO
- ESP8266 based IoT Panic Alarm for Old Age People using Blynk
- How to send sensor data to Thingspeak using Raspberry Pi
- ESP32-CAM based Email Notification System
- IoT based Motion Detection Alarm using ESP8266 and Blynk
- ESP32 Web Server PWM based LED Control
- IoT based Fire Security Alarm System using NodeMCU
- IoT based Timer Switch using Blynk and NodeMCU
- NTP Digital Clock using ESP8266 and OLED Display
- NodeMCU based WiFi Network Scanner with OLED Display
- Controlling ESP32 via Bluetooth using Blynk
- Telegram NodeMCU based Home Automation
- Touch Based Switch board using TTP223
- Smart Switch using Blynk | IoT Based WiFi Switch
- IoT Vehicle Parking System using ESP8266 and Blynk
Summary
This is how we can make an IoT Security Camera using ESP32-Cam, Blynk and PIR Sensor, This project will also allow the user to take multiple pictures of the person or thief. This is nice and simple project which can be used as a real-time project after fine tuning it if needed. Don’t forget to share this article with other.
hello ad, first ad sorry for the complexity, i’m currently working on esp32-cam but it’s getting some error when i use IC 7805 to power esp32-cam then it’s draining power but down 1,2-1.5v and em socket of the source 5v 2a such as, with all when e mount more relay, the power not enough. Please help me to fix the above point. Thank you