Raspberry Pi PICO with Thonny IDE
Raspberry Pi PICO is one of the latest dev board developed by Raspberry Pi foundation. This is a small compact and supports C/C++ and micro python. In this tutorial we will be learning how to use Raspberry Pi PICO with Thonny IDE. Raspberry Pi PICO is one of the cheapest micro python supported development board.
We will be learning, how to upload python code in Raspberry Pi PICO. There are multiple ways to do it, but in this tutorial we use the simple method. We will be using Thonny Python IDE for compiling and uploading the code in PI PICO.
Materials Required
For this tutorial you need three items as listed below.
- Raspberry Pi PICO [BEST BUY]
- Data Cable
- Windows OS based Laptop
Thonny Python IDE
This is a Python IDE for beginners which is simple to use. Thonny comes with Python 3.7 built in, so you don’t need to install python separately. Just install Thonny and you’re ready to learn programming. (You can also use a separate Python installation, if necessary.) The initial user interface is stripped of all features that may distract beginners. You can download the latest version from the link below.
Connection
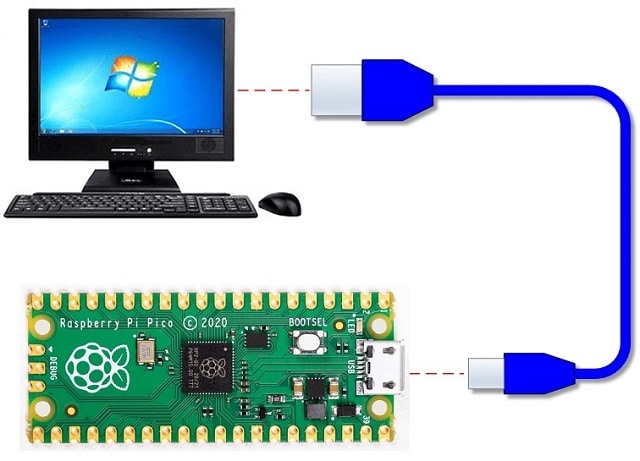
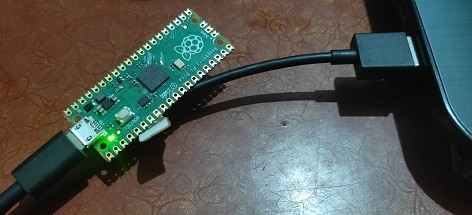
Once you have installed Thonny IDE, no its time to connect your Raspberry Pi PICO with you computer using a data cable.
Initial Setup
Before you start uploading the code, you need to install micro python firmware. Follow these steps to install the firmware.
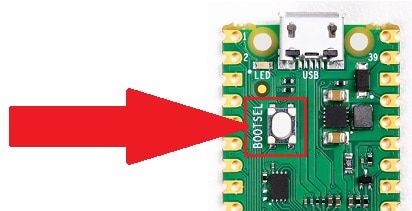
Press the BOOTSEL button and connect it with your computer using a USN to micro USB data cable.
Once connected, This will show your Raspberry Pi Pico as USB mass storage device with two files in it. It has a storage of 128MB.

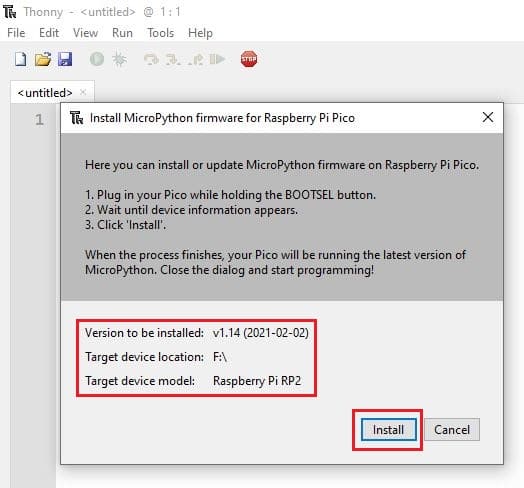
Now you can open Thonny IDE and there will be a popup as shown below. This popup will show some information regarding Pi PICO. Just click on Install to install the micro python firmware.
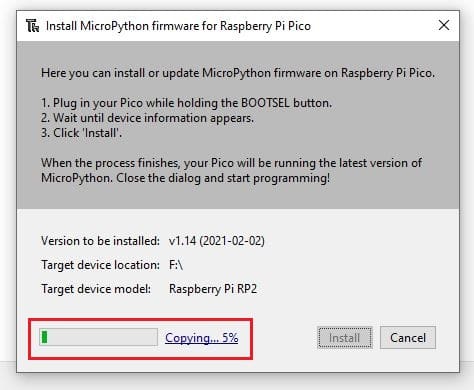
Once you click on install, you will see the progress bar showing the progress of installation.
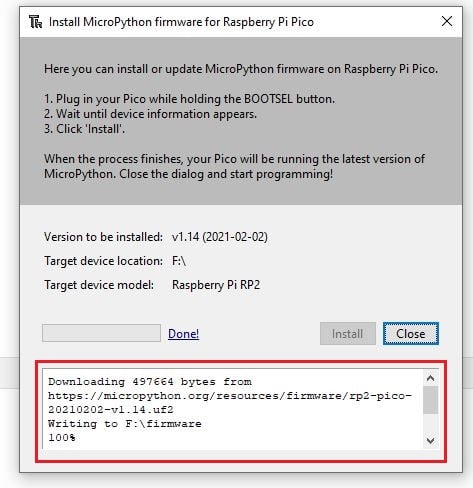
Once the installation is completed, You can click on done to see the uploaded details. This step is optional.
Finally you Raspberry Pi Pico is updated with micro Python firmware and ready to execute python codes.
Must Read:
- How to install Raspbian Lite on Raspberry Pi Zero W
- Connecting DHT11 Sensor with Raspberry Pi 4 / 3 using Python
- Interfacing MQ2 Gas Sensor with Arduino
- Send DS18B20 Temperature Sensor data to ThingSpeak
- IoT based Timer Switch using Blynk and NodeMCU
- How to read DHT11 sensor data using Blynk
Python Code
For testing purpose we will be running this blink code. This code will be blinking the onboard led ON and OFF in a certain interval.
from machine import Pin, Timer
led = Pin(25, Pin.OUT)
timer = Timer()

def blink(timer):
    led.toggle()

timer.init(freq=2.5, mode=Timer.PERIODIC, callback=blink)
Uploading the code and Testing
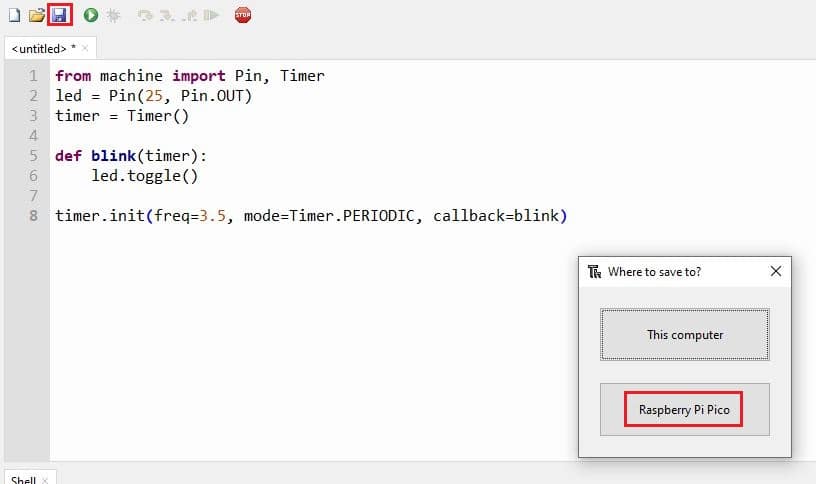
Now copy paste the python code which will blink the onboard LED. Once pasted in Thonny editor then click on the Floppy button. This will save the code before you run it. Click on Raspberry Pi PICO
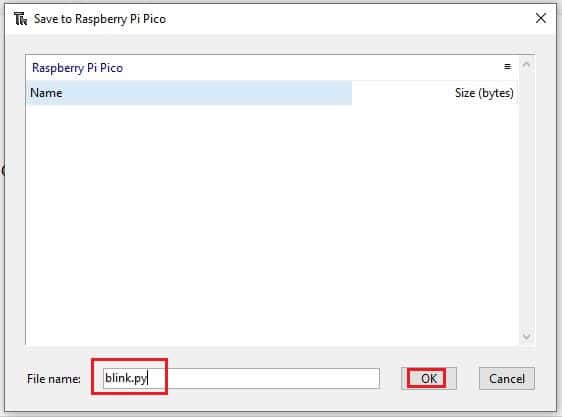
Put a name for your python file with an extension “py“. Then click on OK.
Once the code is saved, then click on the Green Play button to execute the code in Raspberry Pi Pico. To stop execution of any code Click the red STOP button.
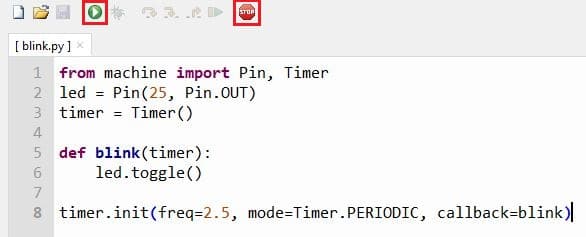
Now you will see the Green onboard LED will start blinking.
NOTE: If you wish to run the code automatically whenever you power Raspberry Pi Pico then you have to name your code file as “main.py” while saving it.
Conclusion
Students, Electronics Hobbyist, Engineering students can use this board to start learning python and coding the electronics with python. Python and micro python is one of the emerging coding language which can be learnt. It is easy to learn and start off with Raspberry Pi Pico.

