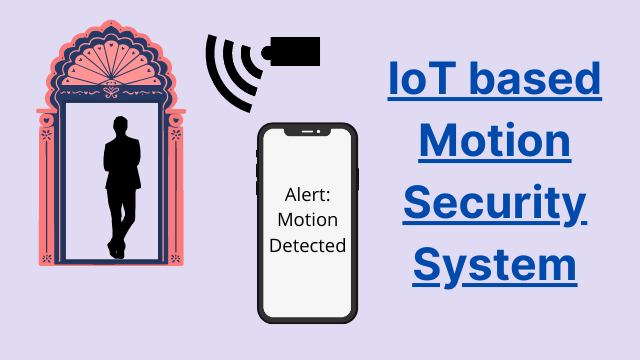
IoT based Motion Detection Alarm using ESP8266 and Blynk
In this tutorial we will learn about motion detection and implementing it on a IoT based project. We will be using a PIR sensor for motion detection. Its a kind of intruders detection system which will inform a in case any motion detected. So lets build IoT based Motion Detection alarm using ESP8266 and Blynk app.
Things Needed:
- ESP8266-01 x 1
- PIR Sensor x 1
- Breadboard x 1
- LD33V x 1
- Jumper cables
PIR Sensors
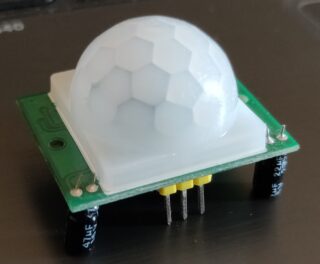
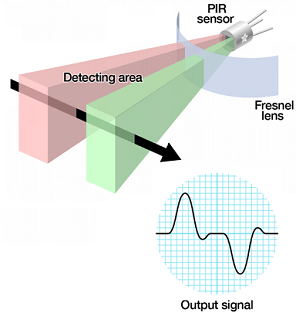
Infrared sensors are designed to detect infrared waves emitted by objects and consist of two parts: Pyroelectric Sensor and Fresnel lens. The pyroelectric door is made of two rectangles in its structure that allow infrared waves to enter and behind it are two infrared sensor electrodes.
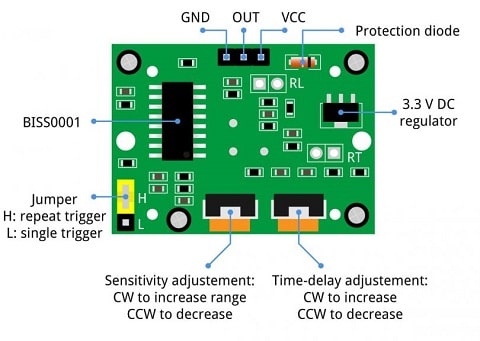
The HR501 motion detection sensor has very low power consumption, reasonable price and wide viewing angle. The operating voltage is 5 volt for this sensor. The structure of the PIR module is given below
Working
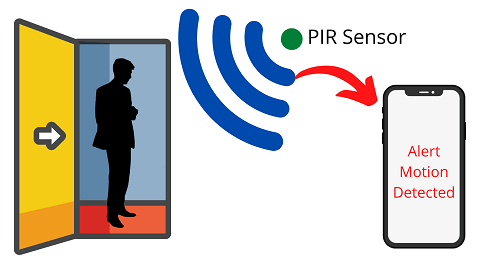
This system will send a notification to blynk app when motion is detected. A notification disabling switch has been added which with which you can disable the alarm when ever you want. This is a simple and effective security IoT project.
Setting up a Blynk Project
You can download the Blynk app from below links based on you mobile OS platform.
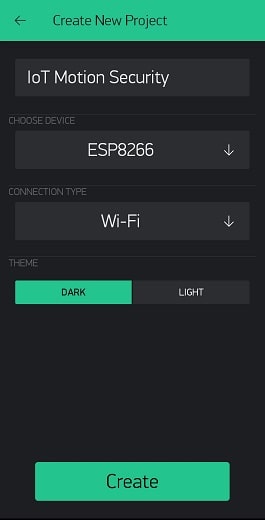
Open Blynk app and create a new project. Enter the details as shown and tap on create.
Add a notification widget

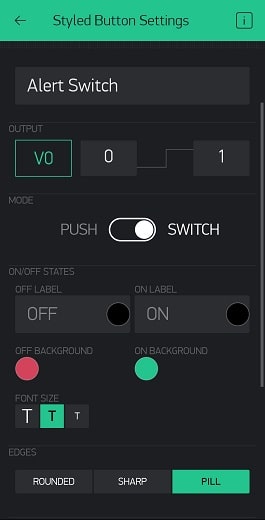
Add a button for switching alert in blynk.

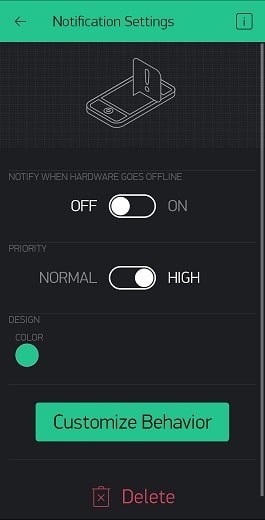
Configure the notification widget as shown below
- Under “NOTIFY WHEN HARDWARE GOES OFFLINE”: Turn OFF button to ON button
- Section “PRIORITY”: Change HIGH to LOW.
Configure the button as well.
Now your blynk configuration is done and project is ready.
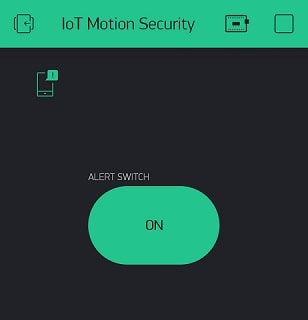
Now that the installation is complete, the next step we proceed to upload the program and see the results.
Some More Projects:
- IoT based water level Indicator using ESP8266
- Touch Based Switch board using TTP223
- DHT11 based Temperature Humidity Monitoring IoT Project
- IoT based Door Security Alarm Project with Blynk
- Telegram NodeMCU based Home Automation
- NodeMCU Blynk Feedback Switch with Physical Switch Status
- ESP32 / NodeMCU based Web Server with Physical Switch Feedback
- Low Cost Local Blynk Server for IoT Projects
- NodeMCU ESP8266 IoT based LPG Gas Leakage Alarm
- Smart Doorbell using ESP32 Camera
- DS18B20 with NodeMCU Local WebServer
- Interfacing LM35 Temp Sensor with Arduino
Connection Diagram
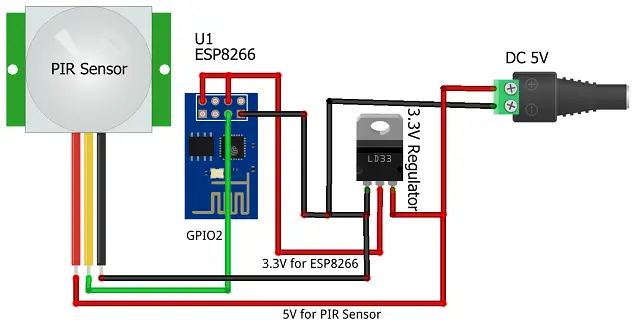
We have connected all the components as per the below diagram. For PIR sensor a separate power supply will be provided. ESP8266-01 is not 5V tolerant hence it needs 3.3V only.
| ESP8266 | PIR Sensor |
| 3.3V | VCC (5V Separately) |
| GPIO2 | OUT |
| GND | GND |
Code
You can copy the code from below and make some small changes. Just add the Auth Token (“Enter you Auth Token”). Also add your WiFi name (“Your WiFi Name”) and your WiFi password (“Your WiFi Password”). You can refer to this article on uploading the code in ESP8266-01.
#include <ESP8266WiFi.h>
#define BLYNK_PRINT Serial
#include <BlynkSimpleEsp8266.h>
char auth[] = "Your Auth Token";

/**********WiFi credentials************/
char ssid[] = "Your WiFi Name";
char pass[] = "Your WiFi Password";

/*********Motion Sensor Config**********/
#define sensor 2 // PIR sensor connected to GPIO2 of ESP01
int sensor_value; // Variable to keep PIR sensor value
int sensor_state ; //Variable to read virtual pin state

BLYNK_WRITE(V0)
{
sensor_state = param.asInt();
}

void setup()
{
Serial.begin(115200);
delay(10);
Blynk.begin(auth, ssid, pass);
pinMode(sensor, INPUT);
}

void loop()
{
if (sensor_state == HIGH)
{
getsensor_value();
}
Blynk.run();
}

void getsensor_value(void)//Get PIR Data
{
sensor_value = digitalRead(sensor);
if (sensor_value)
{
Serial.println("Someone Detected by Sensor");
Blynk.notify("Someone Detected by Sensor");
}
}
Building & Testing
the connection is very simple and we have arranged the components as per the diagram. Now the code is uploaded and hardware is powered on.
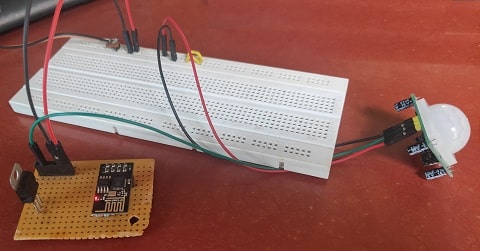
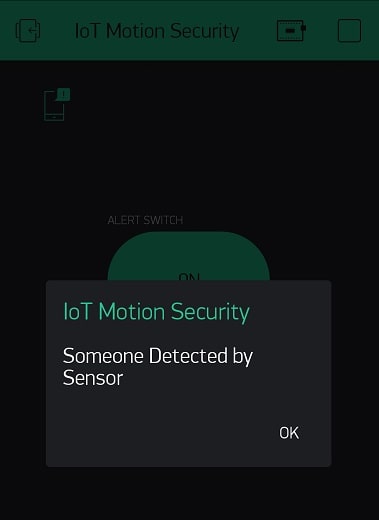
Once you wave your hand or move near to the PIR sensor it will detect the motion and send notification alert via blynk on your smart phone. You can press the alert switch to turn on or turn off the notification.
Summary
It’s a simple project through which you can create your own a good projects. For example you can use PIR (HC – SR501) as an anti-theft circuit. This can be built by any beginner or student as this project requires minimum components.
