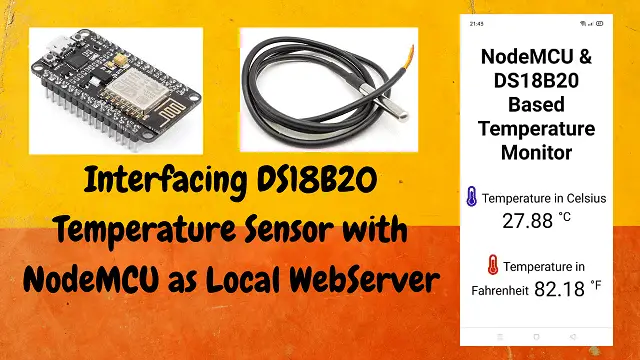
DS18B20 with NodeMCU Local WebServer
There are many temperature sensors available in the market. Yo might have come across many and used in your projects as well. In this article we will see how to connect a DS18B20 with NodeMCU Local WebServer. This project will be independent from internet.
We will also create a web server in NodeMCU, where we will be getting the output. This tutorial is simple and easy to build. Let’s see what are the components needed for building this project.
Parts List
- DS18B20 Temperature Sensor x 1 (Best Buy)
- ESP8266 NodeMCU Wifi Module x 1 (Best Buy)
- Resistor 4.7KΩ x 1
- Breadboard (Best Buy)
- Jumper cables (Best Buy)
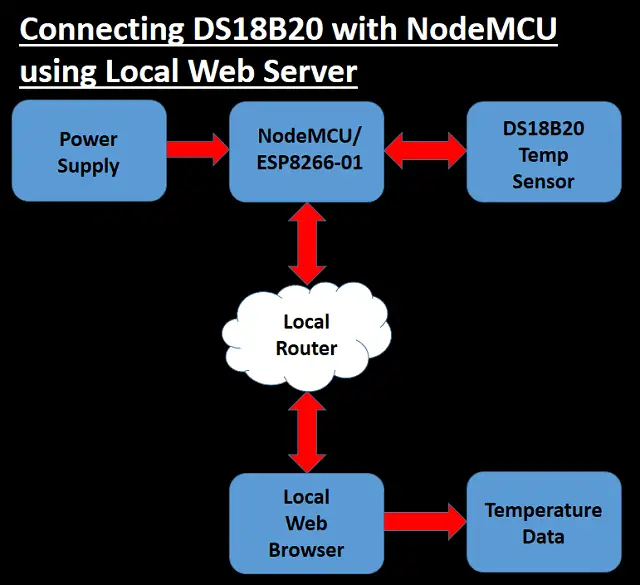
How it Works?
Here we are connecting NodeMCU with DS18B20. After uploading code, we can get the IP address visible in Arduino IDE serial monitor. This is the IP address of the web server. We can put that IP in our mobile or computer web browser and it will start displaying the temperature readings. It will automatically update with the change in temperature reading.
Sensors and Modules Functions
DS18B20 Temperature Sensor
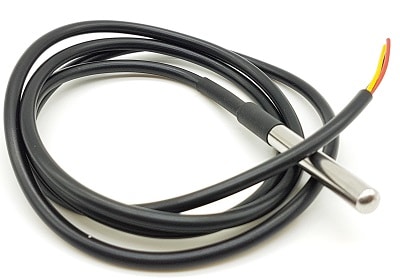
This is a one wire temperature sensor, which can be used to build many useful projects. It has 3 leads like a transistor. It is also easy to interface with different development boards. This measures the temperature and sends it to NodeMCU web server.
Some Features of DS18B20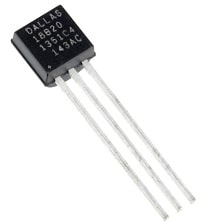
- Temperatures Range from -55°C to +125°C (-67°F to +257°F)
- Accuracy ±0.5°C from -10°C to +85°C
- 1-Wire Interface which requires Only One Port for Communication
- Programmable Resolution from 9 Bits to 12 Bits
- No External Components Required
- Parasitic Power Mode Requires Only 2 Pins for Operation (DQ and GND)
- Each Device Has a Unique 64-Bit Serial Code Stored in On-Board ROM
- Available in 8-Pin SO (150 mils), 8-Pin µSOP, and 3-Pin TO-92 Packages
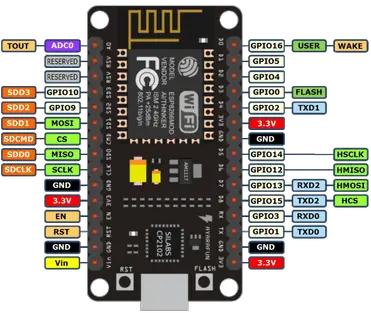
NodeMCU Wifi Module
Node MCU is very well know ESP8266 chip based development board. This is very popular among all electronics and IoT lovers. This will be working a the brain of this project. Below diagram shows the nodemcu pinout. You can also connect esp-01 to ds18b20.
Also Read:
- Telegram NodeMCU based Home Automation
- NodeMCU ESP8266 IoT based LPG Gas Leakage Alarm
- ESP32 Cam code upload using Arduino Uno
Circuit Diagram
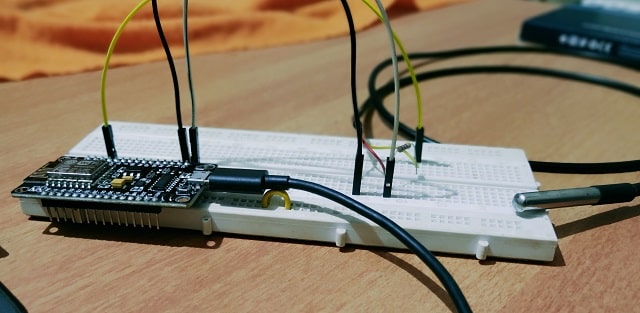
You can connect the components as per the given diagram or you can mount it on a PCB as well.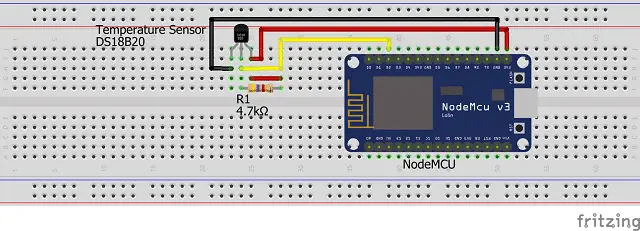
Code & Libraries
The code is big but it is simple to understand. For illustration of the code please refer the video tutorial below. You can download the libraries from given link
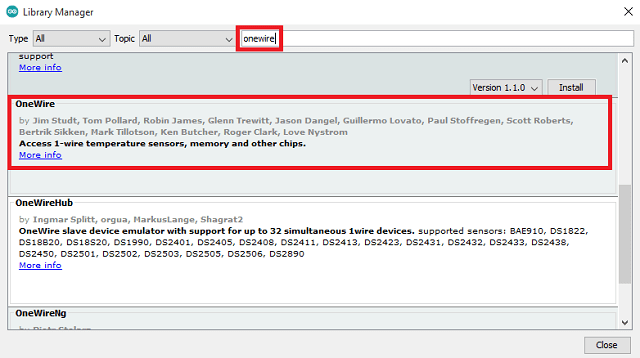
You have to download One wire and Dallas temperature library. Go to Sketch > Include Library > Manage Libraries
Search for Onewire and install it.
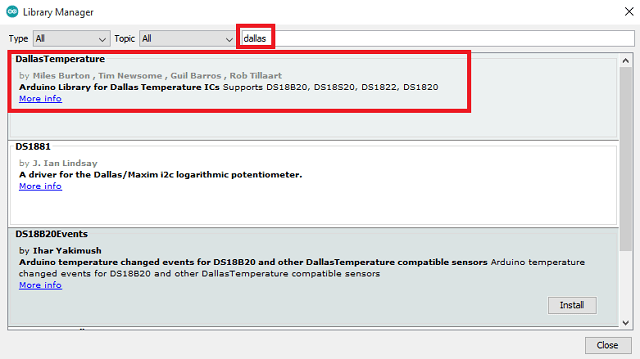
Install Dallas Temperature Library as well.
After installing all library, copy paste the below code in Arduino IDE. Now save and compile. Once the compilation is done, upload the code.
#include <ESP8266WiFi.h>
#include <Hash.h>
#include <ESPAsyncTCP.h>
#include <ESPAsyncWebServer.h>
#include <OneWire.h>
#include <DallasTemperature.h>
// Data wire is connected to GPIO 4
#define ONE_WIRE_BUS 4
// Setup a oneWire instance to communicate with any OneWire devices
OneWire oneWire(ONE_WIRE_BUS);
// Pass our oneWire reference to Dallas Temperature sensor
DallasTemperature sensors(&oneWire);
// Replace with your network credentials
const char* ssid = "Your network SSID";
const char* password = "Your Network Password";
// Create AsyncWebServer object on port 80
AsyncWebServer server(80);
String sensor_dataC() {
// Call sensors.requestTemperatures() to issue a global temperature and Requests to all devices on the bus
sensors.requestTemperatures();
float tempC = sensors.getTempCByIndex(0);
if (tempC == -127.00) {
Serial.println("Unable to read from sensor");
return "--";
} else {
Serial.print("Temp. in Celsius: ");
Serial.println(tempC);
}
return String(tempC);
}
String sensor_dataF() {
// Call sensors.requestTemperatures() to issue a global temperature and Requests to all devices on the bus
sensors.requestTemperatures();
float tempF = sensors.getTempFByIndex(0);
if (int(tempF) == -196) {
Serial.println("Unable to read from sensor");
return "--";
} else {
Serial.print("Temp. in Fahrenheit: ");
Serial.println(tempF);
}
return String(tempF);
}
const char index_html[] PROGMEM = R"rawliteral(
<!DOCTYPE HTML><html>
<head>
<meta name="viewport" content="width=device-width, initial-scale=1">
<link rel="stylesheet" href="https://use.fontawesome.com/releases/v5.7.2/css/all.css"
integrity="sha384-fnmOCqbTlWIlj8LyTjo7mOUStjsKC4pOpQbqyi7RrhN7udi9RwhKkMHpvLbHG9Sr" crossorigin="anonymous">
<img src="data:image/gif;base64,R0lGODlhAQABAIAAAAAAAP///yH5BAEAAAAALAAAAAABAAEAAAIBRAA7" data-wp-preserve="%3Cstyle%3E%0Ahtml%20%7B%0Afont-family%3A%20Arial%3B%0Adisplay%3A%20inline-block%3B%0Amargin%3A%200px%20auto%3B%0Atext-align%3A%20center%3B%0A%7D%0Ah2%20%7B%20font-size%3A%203.0rem%3B%20%7D%0Ap%20%7B%20font-size%3A%203.0rem%3B%20%7D%0A.units%20%7B%20font-size%3A%201.8rem%3B%20%7D%0A.ds-labels%7B%0Afont-size%3A%201.8rem%3B%0Avertical-align%3Amiddle%3B%0Apadding-bottom%3A%2015px%3B%0A%7D%0A%3C%2Fstyle%3E" data-mce-resize="false" data-mce-placeholder="1" class="mce-object" width="20" height="20" alt="<style>" title="<style>" />
</head>
<body>
<h2>NodeMCU & DS18B20 Based Temperature Monitor</h2>
<p>
<i class="fa fa-thermometer-three-quarters" aria-hidden="true" style="color:#471ccf;"></i>
<span class="ds-labels">Temperature in Celsius</span>
<span id="tempc">%TEMPC%</span>
<sup class="units">°C</sup>
</p>
<p>
<i class="fa fa-thermometer-three-quarters" aria-hidden="true" style="color:#f01313;"></i>
<span class="ds-labels">Temperature in Fahrenheit</span>
<span id="tempf">%TEMPF%</span>
<sup class="units">°F</sup>
</p>
</body>
<img src="data:image/gif;base64,R0lGODlhAQABAIAAAAAAAP///yH5BAEAAAAALAAAAAABAAEAAAIBRAA7" data-wp-preserve="%3Cscript%3E%0AsetInterval(function%20(%20)%20%7B%0Avar%20xhttp%20%3D%20new%20XMLHttpRequest()%3B%0Axhttp.onreadystatechange%20%3D%20function()%20%7B%0Aif%20(this.readyState%20%3D%3D%204%20%26%26%20this.status%20%3D%3D%20200)%20%7B%0Adocument.getElementById(%22tempc%22).innerHTML%20%3D%20this.responseText%3B%0A%7D%0A%7D%3B%0Axhttp.open(%22GET%22%2C%20%22%2Ftempc%22%2C%20true)%3B%0Axhttp.send()%3B%0A%7D%2C%2010000)%20%3B%0AsetInterval(function%20(%20)%20%7B%0Avar%20xhttp%20%3D%20new%20XMLHttpRequest()%3B%0Axhttp.onreadystatechange%20%3D%20function()%20%7B%0Aif%20(this.readyState%20%3D%3D%204%20%26%26%20this.status%20%3D%3D%20200)%20%7B%0Adocument.getElementById(%22tempf%22).innerHTML%20%3D%20this.responseText%3B%0A%7D%0A%7D%3B%0Axhttp.open(%22GET%22%2C%20%22%2Ftempf%22%2C%20true)%3B%0Axhttp.send()%3B%0A%7D%2C%2010000)%20%3B%0A%3C%2Fscript%3E" data-mce-resize="false" data-mce-placeholder="1" class="mce-object" width="20" height="20" alt="<script>" title="<script>" />
</html>)rawliteral";
// Replaces placeholder with DHT values
String update_data(const String& var)
{
//Serial.println(var);
if (var == "TEMPC") {
return sensor_dataC();
}
else if (var == "TEMPF") {
return sensor_dataF();
}
return String();
}
void setup() {
// Serial port for debugging purposes
Serial.begin(115200);
Serial.println();
// Start up the DS18B20 library
sensors.begin();
// Connect to Wi-Fi
WiFi.begin(ssid, password);
Serial.println("Connecting to WiFi");
while (WiFi.status() != WL_CONNECTED) {
delay(500);
Serial.print(".");
}
Serial.println();
// Print ESP Local IP Address
Serial.println(WiFi.localIP());
// Route for root / web page
server.on("/", HTTP_GET, [](AsyncWebServerRequest * request) {
request->send_P(200, "text/html", index_html, update_data);
});
server.on("/tempc", HTTP_GET, [](AsyncWebServerRequest * request) {
request->send_P(200, "text/plain", sensor_dataC().c_str());
});
server.on("/tempf", HTTP_GET, [](AsyncWebServerRequest * request) {
request->send_P(200, "text/plain", sensor_dataF().c_str());
});
// Start server
server.begin();
}
void loop() {
}
Construction & Code Uploading
The initial construction is simple and can be mounted on a breadboard as per the circuit diagram. For uploading the code please check the link below
Easy NodeMCU Programming with Simple Steps
Testing
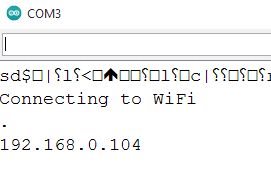
After uploading the code, open serial monitor in Arduino IDE. Then reset NodeMCU and you will be able to see the web server IP address.
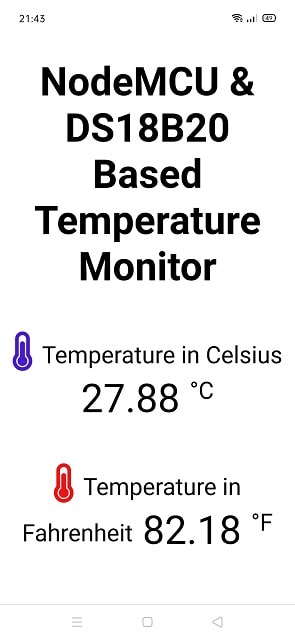
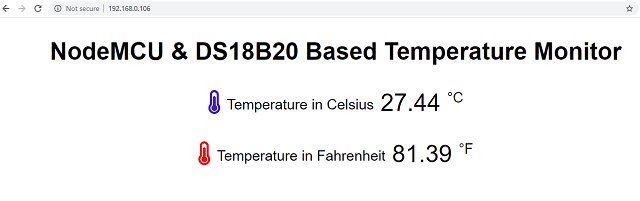
 Enter the same IP in your web browser. Your mobile or computer should be connected to same network.
Even if you don’t have internet this web server will work and share the data.
Video Tutorial
Conclusion
DS18B20 is a good temperature sensor to start with. It has one wire interface and doesn’t need any additional components to interface. DS18B20 can be easily interfaced with arduino as well. You can connect to esp8266 onewire temperature sensor and build a esp8266 thermometer. Here we have built DS18B20 with NodeMCU Local WebServer.

