IoT LPG Gas Detection with Blynk 2.0
Detecting and monitoring gas leaks is crucial for public safety. In this project we will build an IoT LPG gas detection system with blynk 2.0 which will send you push and email notification upon gas leakage.
MQ5 gas sensor is a device that is used to detect the presence of LPG gas in the atmosphere. LPG gas is a colorless, odorless and flammable gas that is produced from the decomposition of organic matter. Liquid Petroleum Gas is used in a variety of applications, including cooking, heating, and powering vehicles. This tutorial is all about building an IoT LPG gas detection with Blynk 2.0 dashboard.
Parts List
- MQ5 Gas Sensor
- WeMOS D1 Mini / NodeMCU
- Jumper Cables
MQ5 Sensor
The LPG gas sensor is composed of a sensing element and a readout device. The sensing element is typically a metal oxide semiconductor (MOS) or a conducting polymer. The readout device is an electronic display or a digital output that is used to indicate the concentration of LPG gas in the atmosphere.

LPG gas sensors are used in a variety of applications, including home security systems, industrial gas detection systems, and automotive gas detection systems.
Working
The sensor is placed near the potential leak site. If there’s a gas leak, the sensor will send a signal to ESP8266 and further sent to the Blynk app. This is a valuable tool for first responders, who can use it to quickly and accurately identify the source of a gas leak.
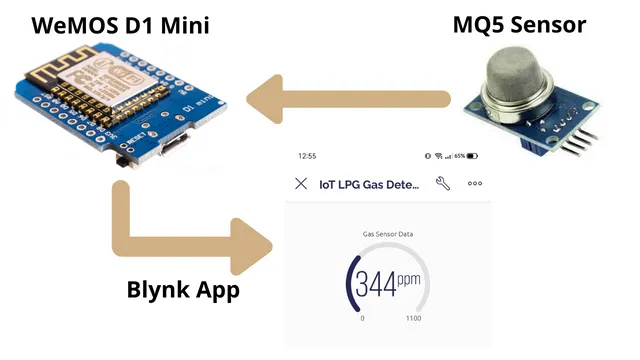
Connection
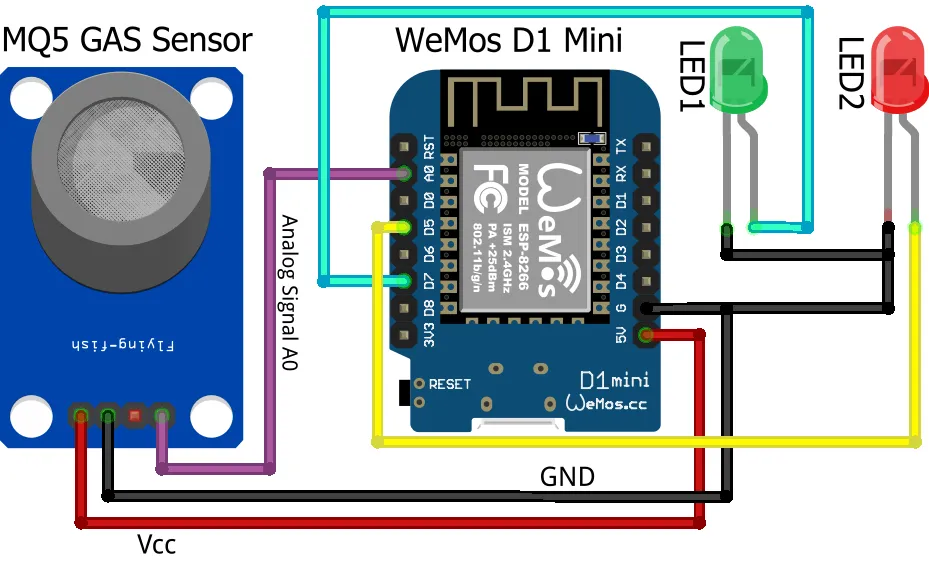
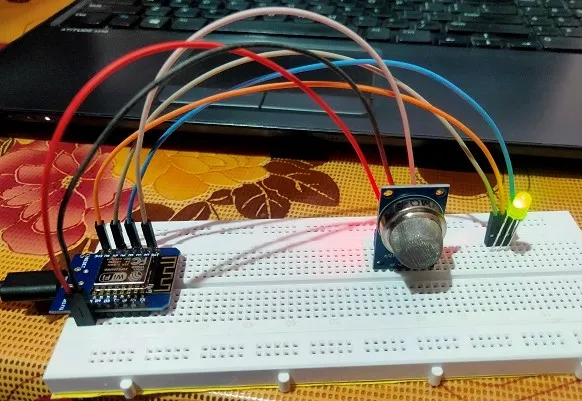
Now connect the MQ5 sensor with ESP8266 (WeMOS D1 Mini or NodeMCU) board. Vcc pin of sensor is connected to 5V or 3.3V of ESP8266 board along with GND to GND connectivity. The A0(Analog) pin is connected to A0 pin of ESP8266. Analog pin gives us a wide range of sensor data which is easy to evaluate and display.
Blynk Configuration
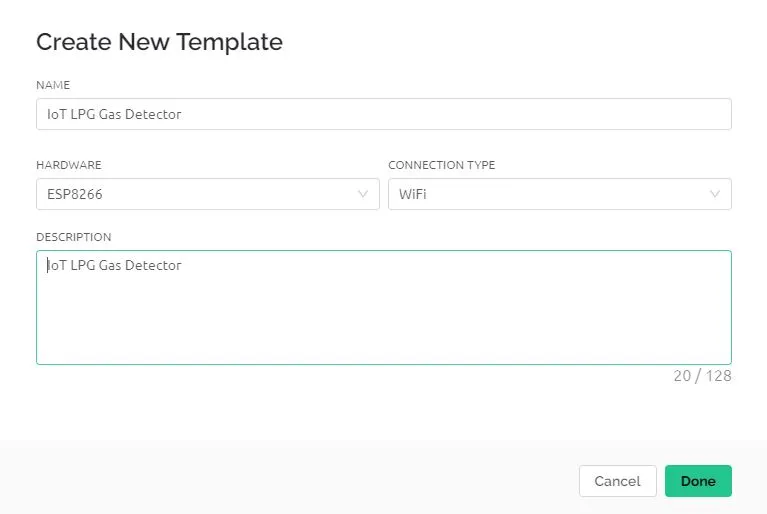
Login to Blynk cloud and click on New Template

Fill in the details as required, You can provide your own name and description. Click on Done
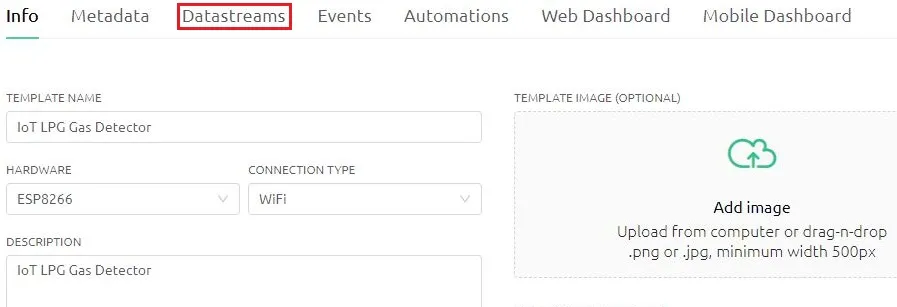
Click on Datastreams to create new Datastreams for sensor data communication.
Provide a name along with the details as shown below and click on Create.
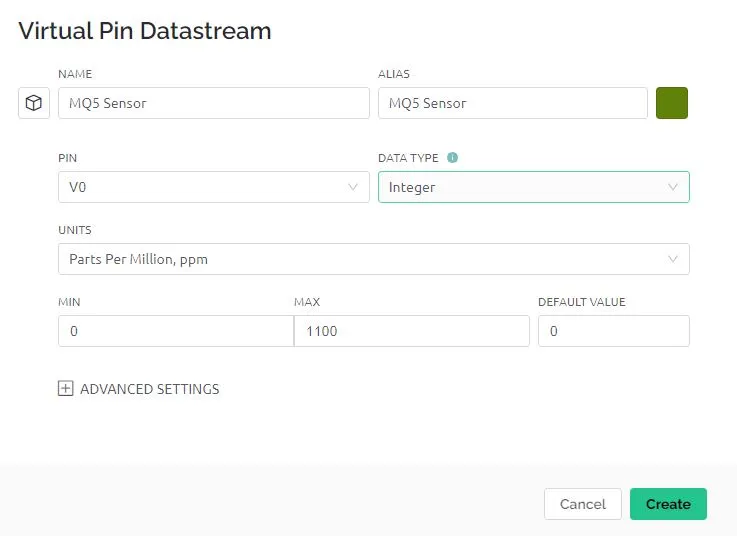
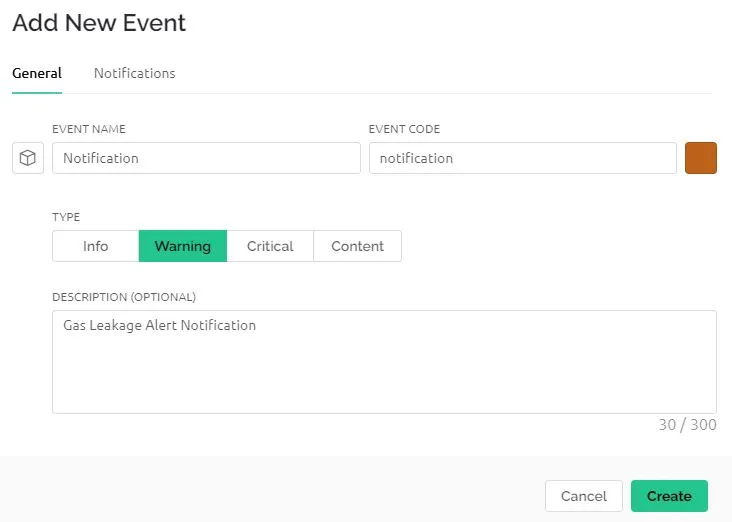
We need to create a notification event for which click on Events tab and fill in the details as shown below. Also click on Create.
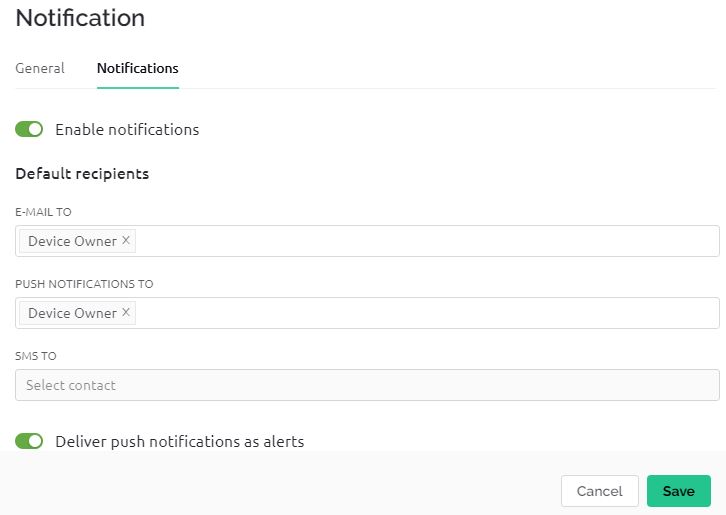
Go to Notifications tab and enable it as shown below. Click on Save
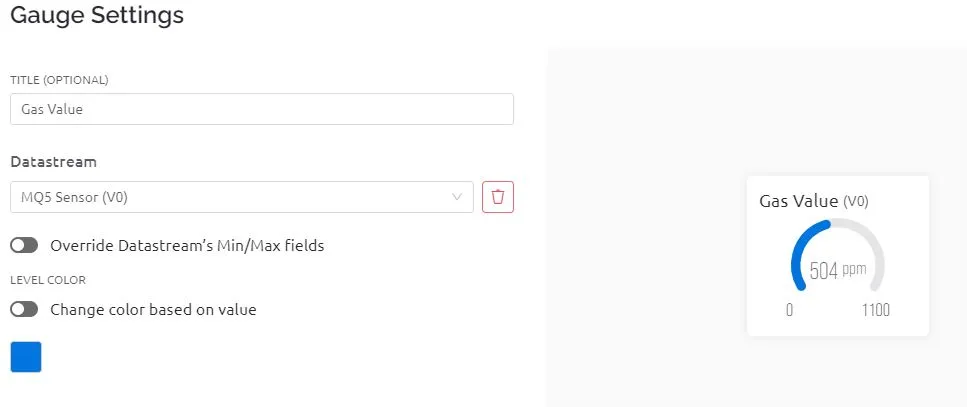
The next tab in Web Dashboard to add widgets. Drag and drop a Gauge widget as shown below.
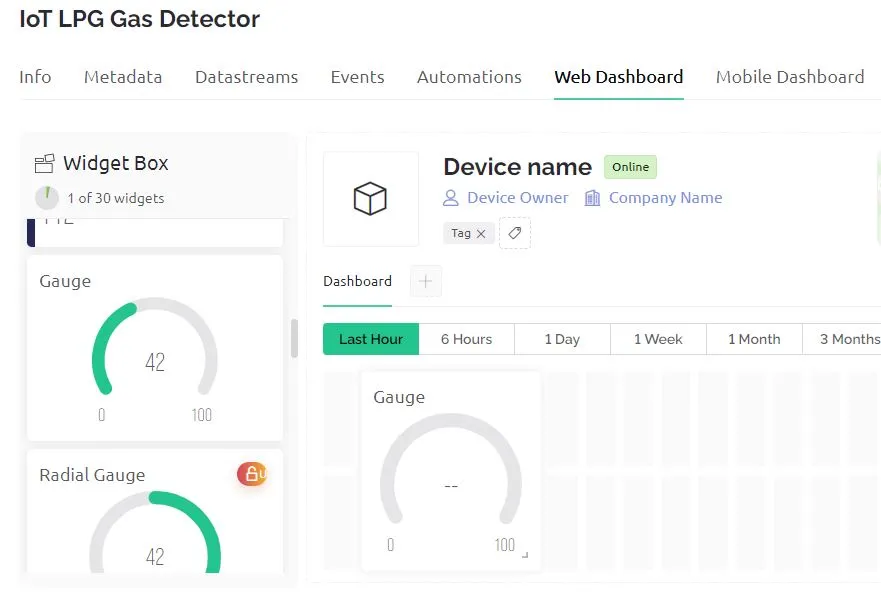
Enter the Gauge settings as shown and Click on Save And Apply on top right hand corner.
Code
You can download the code from below and open it using Arduino IDE. This code can be used for ESP8266, with slight modification and it can be used for ESP32 as well.
Coding the WeMos D1 Mini using Arduino IDE
Manually Adding Device
Click on the Search option on left hand side of the dashboard.

Click on New Device
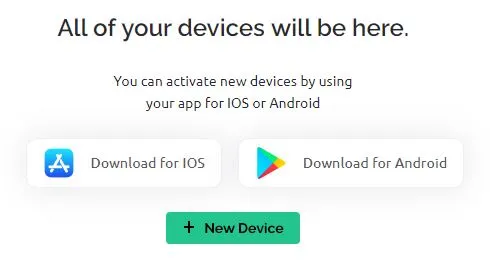
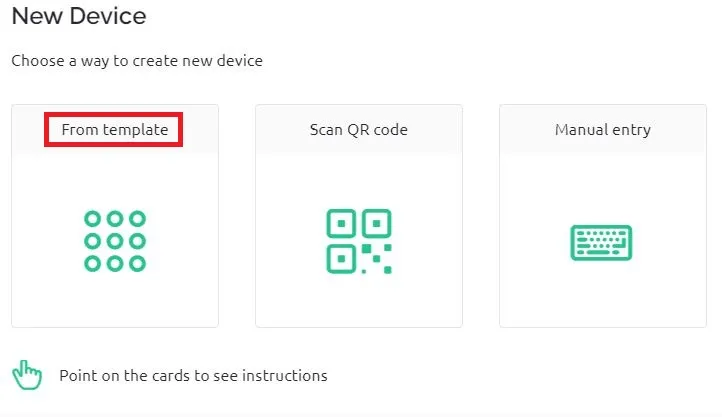
Select From template option
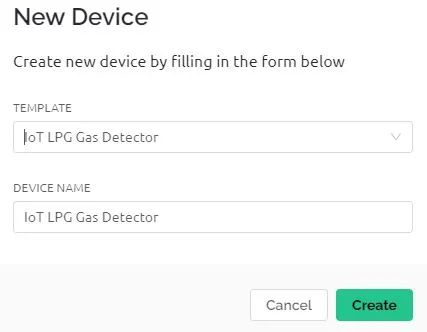
From the drop down select the existing template and the device name will auto populate on the box below. Click on Create.
Click on Copy to clipboard which will copy the template ID, Device name and Authentication Token.
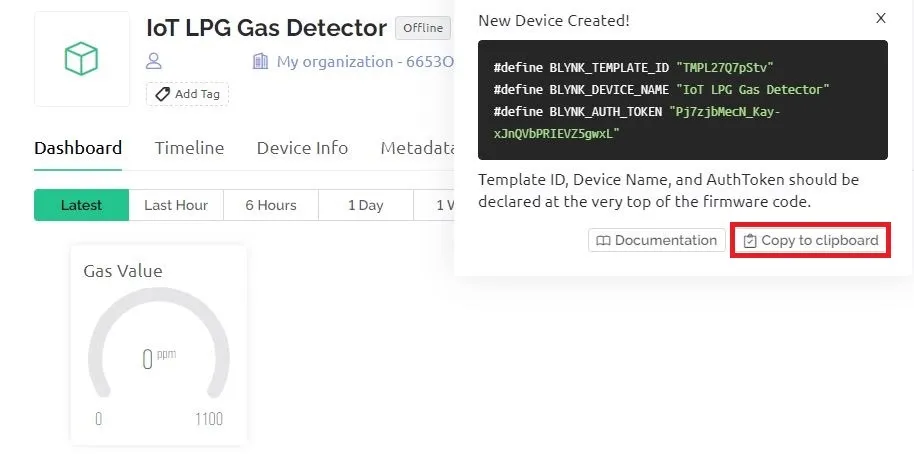
Paste the copied content in your code opened in Arduino IDE and upload it to your ESP8266 development board.

Adding Widget in Blynk Mobile App
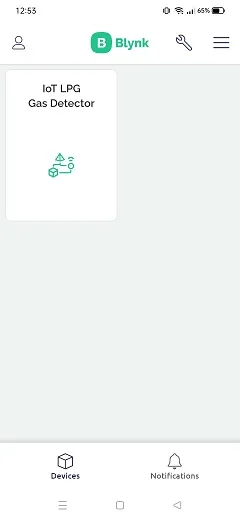
Open the Blynk app on your mobile and you will see the template. Tap on it
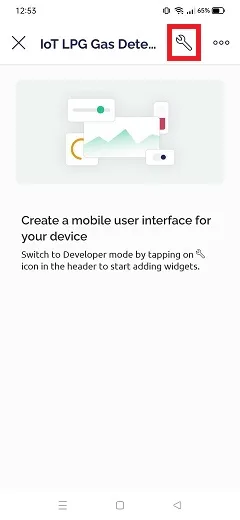
Now tap on the Icon below to start adding widgets
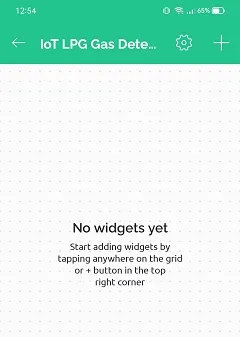
Tap on the + icon to add widgets
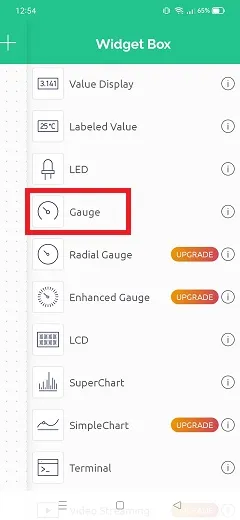
Scroll down and select Gauge widget for this project
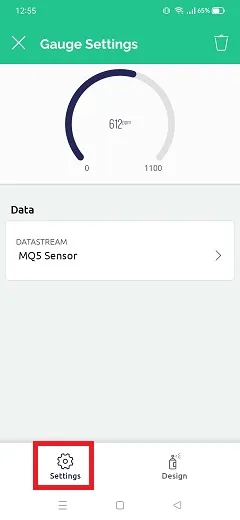
Configure the gauge by choosing the correct Datastream
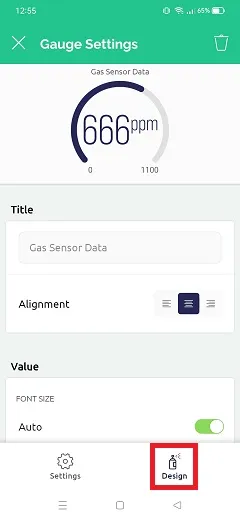
You can design the gauge widget based on your choice and the setup is ready to show the sensor data in blynk app
Building & Testing
Once the code is uploaded the connection is made as per the connection diagram shown above, then it is ready for testing.
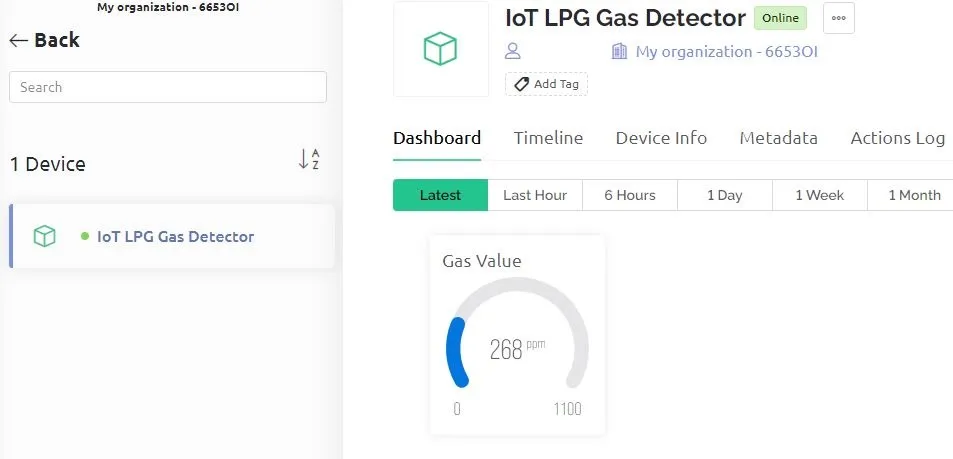
After successfully connecting and uploading the code you will get the below output in your blynk web dashboard.
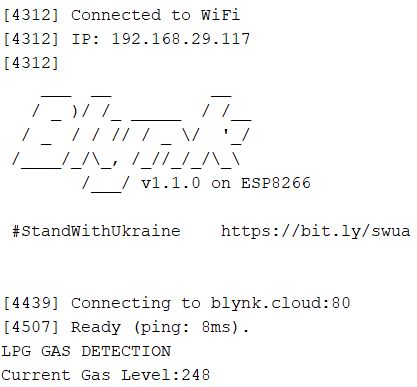
You should get below output in Arduino IDE Serial monitor.
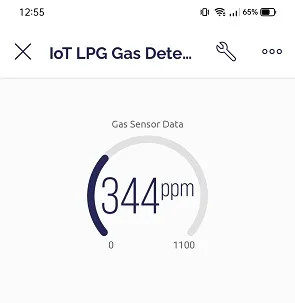
In Blynk mobile app you will be getting the output.
Summary
An IoT LPG Gas Detection system is a device that can be installed in a home or business to help identify if there is a gas leak. The system can be connected to a gas meter or a gas grill to help identify when the gas has been used. The system can also be connected to a home or business’ alarm system to help notify the owner if there is a gas leak. Please do share this tutorial with your social links to needy people.
Related Projects:
- Building Node-RED Dashboard with DHT11 Sensor
- IoT Smart Plant Watering System Project
- Monitoring Weather Data using BMP280 and Blynk 2.0
- Web Server Pulse Oximeter using NodeMCU ESP8266
- Getting Started with Arduino IoT cloud using NodeMCU and DHT11
- Weather Station with Raspberry Pi PICO and DHT11
- Controlling a servo motor using Raspberry Pi Pico
- Configuring BMP280 Sensor with Raspberry Pi
- Weather Station with BMP280 Sensor and Raspberry Pi Pico
- IoT Pulse Oximeter Using NodeMCU MAX30100 & Blynk
- DIY Digital clock with RTC DS1307 and Raspberry Pi PICO
- How to send sensor data to Thingspeak using Raspberry Pi
- ESP32-CAM based Email Notification System
- ESP32 based Gas Leakage Detection using Email Notification
- IoT based Motion Detection Alarm using ESP8266 and Blynk
- IoT based Fire Security Alarm System using NodeMCU
- NTP Digital Clock using ESP8266 and OLED Display
- DHT11 Sensor with ESP-NOW and ESP32


thanks for sharing