ESP32 based Gas Leakage Detection using Email Notification
In recent years, with the introduction of MQ series sensors, each of which is capable of detecting different gases, for example, the MQ5 series, which is capable of detecting LPG gases. We have been able to implement it in various projects, but in this project we intend to use this sensor. Setting up this project is simple and can be done using some handful components. This project will send emails containing the real-time gas values. So lets quickly start building ESP32 based Gas Leakage Detection using Email Notification.
Materials Required
Below Material needed to build this project.
- MQ5 Gas Sensor x 1
- ESP32 Dev Board x 1
- LED x 1
- Resistor 330Ω x 1
- Jumper cables
MQ5 Sensors

The MQ series gas sensor is a device that detects the presence or concentration of gases in the atmosphere. Based on the gas concentration of the sensor, it changes the resistance of the material inside the sensor. It creates a corresponding potential difference which can be measured as the output voltage. Based on this amount of voltage, the type and concentration of gas can be estimated. They can be more or less calibrated or adjusted (using the variable resistance in the board). The output of these sensors is an analog signal and can be read with an Arduino analog input. These sensors are typically available as modules, which consist of a gas sensor and a comparator IC.
- Operating Voltage: 5V DC
- High sensitivity to LPG, natural gas, town gas.
- Small sensitivity to alcohol, smoke.
- Stable and long life.
- Simple drive circuit.
- Fast response.
SMTP Server
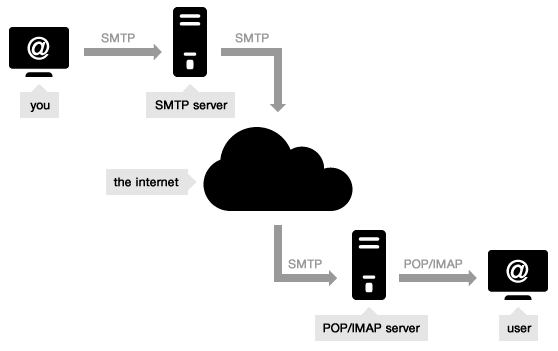
STMP or “Simple Mail Transfer Protocol” is a standard for sending information to e-mail, so to send information from ESP32 we must use this service. In this tutorial ESP32 board will be sending email as a source. Sensor values will be collected from MQ5 sensor. An SMTP server has an address that can be configured by the email client or application that you use, and is generally formatted as smtp.serveraddress.com. When sending an email, the SMTP server processes your email, decides which server to send the message and forwards the message to that server. The recipient inbox service provider, such as Gmail, Hotmail or AOL, then loads the message and places it in the recipient inbox.
Required Arduino Library
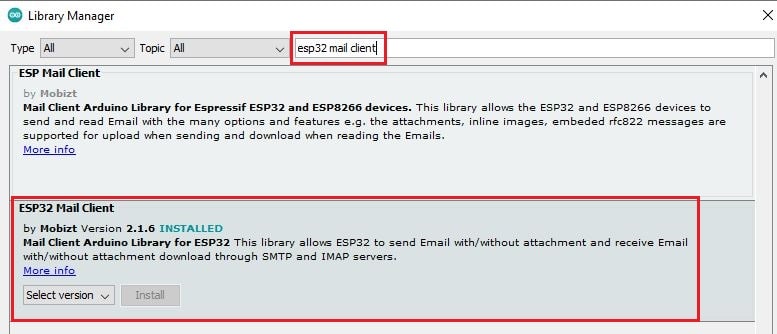
For sending email we need to install ESP32 MailClient library in Arduino IDE. Using this library, the user will be able to send files with .txt extension and .jpg for the email service.
Now it’s time to install this library on the Arduino IDE platform, which has a few very simple steps. In the first step, locate the path Sketch-> Include library-> Manage libraries.
In the Library Manager enter the name as “ESP32 MailClient” and click on install button to install the library.
Configuring Gmail Email
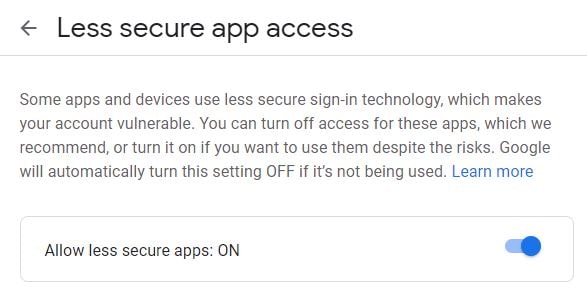
Well, here we are using Gmail smtp service for sending email with the information we need. The receiver of this email will be our email address. I suggest you, not to use your original emails for this purpose and try to create a new email for this project. This email requires special access, which should be given to this email. After creating a new email, refer to this link and activate the required access shown below.
Connection Diagram
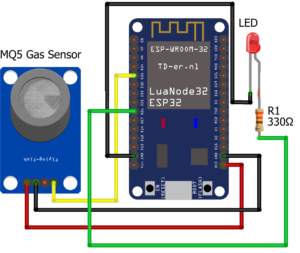
In the first step, we will establish connections between the MQ5 sensor and the ESP32 board. The MQ5 sensor is connected to ESP32 board using A0 pin of MQ5 sensor. We will also connect a led, which will work as sensor warm up indicator. Make the connections according to the schematic and the table below. Click on the diagram to enlarge it.
Code Analysis
In the next section, to launch this project, we will review and upload the code on the ESP32 chip. This code consists of two parts: first, receiving values from the MQ5 sensor and analyzing the values, and then launching the SMTP service and sending the values to the desired destination if Excess of received values. We will first look at parts of the code. First, using these two lines, we will introduce the WiFi network for ESP32 connection.
const char* ssid = "Your WiFi SSID"; //WiFi SSID
const char* password = "WiFi Password"; // WiFi network password
In these two lines, enter an email with a password so that SMTP can send values to another email with this email.
#define emailSenderAccount "email@xxxx.com" // Email address from which email will be sent
#define emailSenderPassword "email password" // Email password
In this section, we specify the values sent by entering an email as the recipient of the destination.
String receivers_email = "email@xxxx.com"; // Email address of recipient
You can set the threshold level by changing the value in the below line of code.
String sensor_limit = "300"; //Gas Threshold value
In these lines, we specify the body content of the sending email.
 String emailMessage = String("ALERT! THERE IS A GAS LEAKAGE. ")+
                                           String("CURRENT GAS LIMIT: ")+ String(sensor_limit)+
                                           String(" CURRENT GAS SENSOR VALUE: ")+
                                           String(gas_value);
Complete Code
You can download the code from the below link. After downloading unzip it and extract it. Open the extracted file in Arduino IDE and upload the code in ESP32. Please refer to the below article if you are not aware about uploading the code in ESP32.
Some More Projects:
- IoT based Motion Detection Alarm using ESP8266 and Blynk
- NTP Digital Clock using ESP8266 and OLED Display
- IoT Vehicle Parking System using ESP8266 and Blynk
- NodeMCU based WiFi Network Scanner with OLED Display
- DHT11 Sensor with ESP-NOW and ESP32
- ESP32 Web Server PWM based LED Control
- IoT Heart Rate Monitoring with ThingSpeak Platform
- Temperature Monitoring with ESP-DASH Webserver
- IoT based Fire Security Alarm System using NodeMCU
- Wemos D1 Mini Web Server based Servo Motor Control
- ESP8266 Web Server for Controlling Electrical Devices
- Important Tips to Improve Security of your Raspberry Pi
Building and Testing
We have setup the components as per the connection diagram.
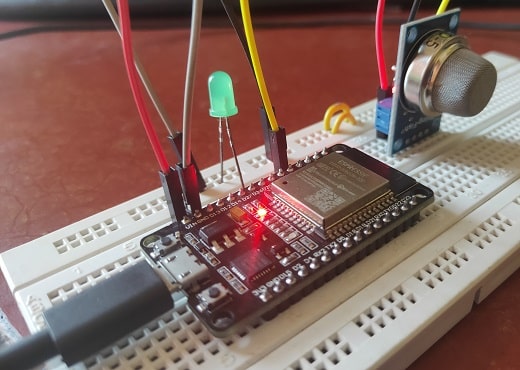
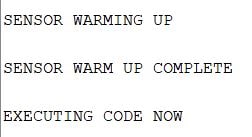
Once you power up the hardware you get the below message on you Arduino serial monitor. Initially the LED will be turned on and the sensor will start warming up. After a certain delay the led will be turned off which indicates the warm up is complete.
The light will be on during sensor warm up. You can use LED of any color.
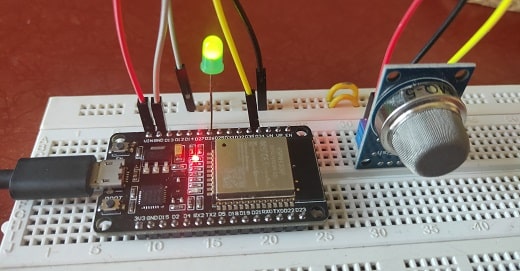
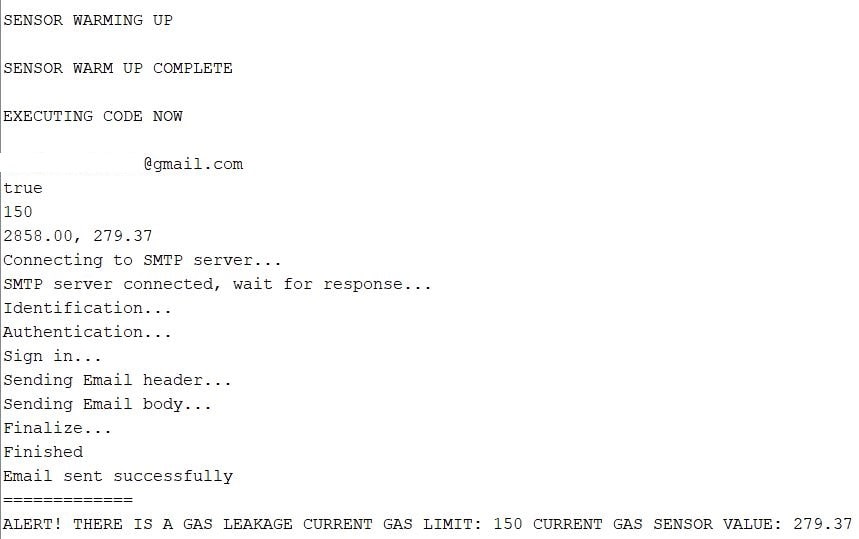
After the execution of the main code it display below information in Arduino serial monitor.
You will receive below email when the gas level goes beyond the threshold level.

Summary
In this tutorial, using the SMTP e-mail service, the MQ5 sensor to detect environmental values, and finally the ESP32 board for project analysis and processing, we have created a gas leak warning service that can be used in various cases. We can also use other sensors in this project by changing the values.
