ESP32-CAM based Email Notification System
In the previous tutorial related to the ESP32-CAM development board, we have built a Smart Door bell project, which captures the photo. In this tutorial, you will receive images captured by ESP32-Cam module and send them to your email address. Lets quickly see how to set it up and build ESP32-CAM based Email Notification System.
Materials Required
You need only three materials to build this project.
- ESP32-Cam x 1
- Micro USB cable x 1
- Jumper Cables x 1
ESP32 Camera
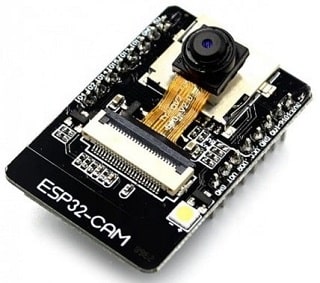
ESP32-Cam module is a combination of ESP32 WiFi module with a OV2640 camera. It also has a ability to store images in a SD card. The maximum 4GB SD card can be used in this module. Also due to WiFi connectivity we can easily access it from any part of the world.
How to send Email?
In this tutorial we are using SMTP, or Simple Mail Transfer Protocol. Its a standard protocol for sending information via email. We will be using this service to send email from ESP32-CAM.
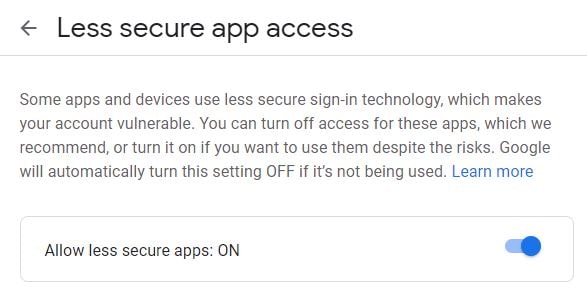
We will also use Gmail’s smtp service to send email. Its advisable to create a new email address in gmail before configuring it. It is suggested, not to use your personal email address here for sending email. The reason is, you need a special access that is to be given to this email. Once you have created a new email then you can refer to this link and activate the required access.
Connection
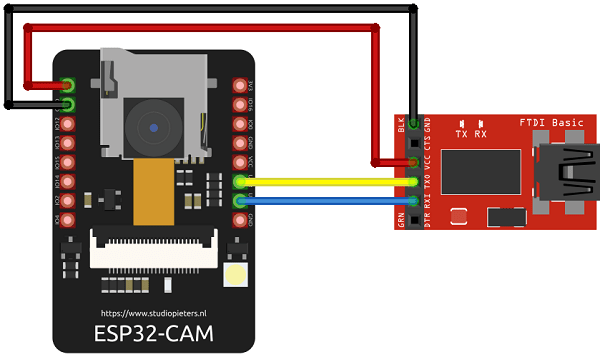
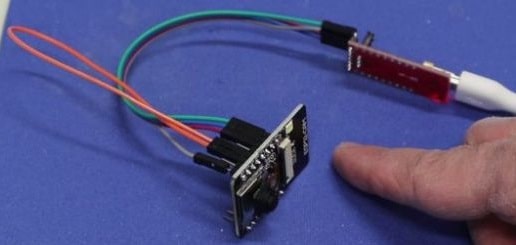
Just connect the ESP32-cam using FT232 USB to TTL module or with 5v power supply. Connection to Rx and Tx is only required while uploading the code.
Required Arduino Library
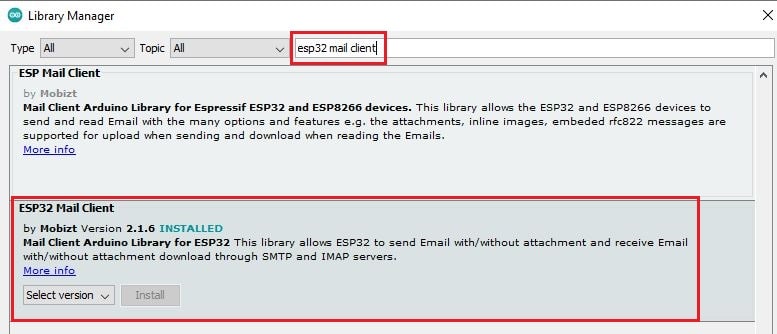
In this code we are using ESP32 MailClient library. Using this library the esp32-cam will send email using attachments. To install this library on the Arduino IDE platform follow the path below
Sketch->Include library->Manage libraries
In the window that opens, enter the name “ESP32 MailClient” in the search box and click on install button.
Configuring the Code
As in this section of code we will add the network details to establish a connection between your WiFi network and esp32-cam.
// REPLACE WITH YOUR NETWORK CREDENTIALS
const char* ssid = "Your WiFi SSID or Name";
const char* password = "Your WiFi Password";
Now we will configure senders and receivers email addresses. This is the email address through which the email will be sent.
#define emailSenderAccount "email@xxxx.com" // Email address from which email will be sent
#define emailSenderPassword "email password" // Email password
Here you must enter your main email to which you are going to receive the email with information.
String emailRecipient = "email@xxxx.com"; // Email address of recipient
In SMTP settings section, we use will update the gmail smtp settings..
#define smtpServer "smtp.gmail.com"
#define smtpServerPort 465
This code contains the subject line of the code. You can change it as pre your need.
#define emailSubject "ESP32-CAM Photo Arrived" // Subject of the email
Code
Upload the code on the ESP32-cam board by modifying the required fields mentioned in the code above. If you have problems with the upload process, refer to How to upload code in ESP32-CAM?
You can download the code from the below link and open it using Arduino IDE. Then select the correct board and settings as shown below and upload the code.
Board: "ESP32 Wrover Module"
Upload Speed: "921600"
Flash Frequency: "80MHz"
Flash Mode: "QIO"
Partition Scheme: "Hue APP (3MB No OTA/1MB SPIFFS)"
Core Debug Level: "None"
COM Port: Depends *On Your System*
Building & Testing
Now connect the esp32-cam with the power supply. If you press the reset button it will trigger ESP32-cam and it will capture the photo.
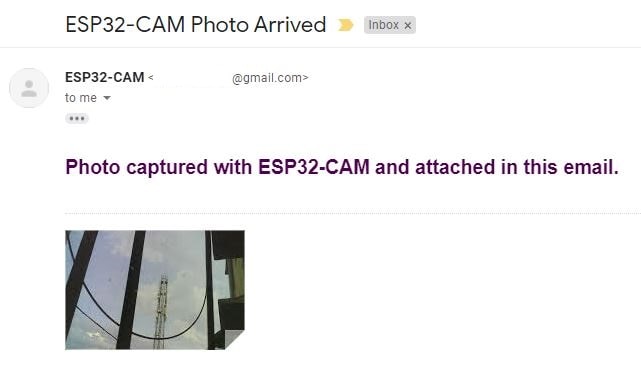
After capturing the photo it will send an email to your email address with the photo as an attachment as shown below.
- Raspberry Pi Pico vs Arduino Which one to choose?
- ESP32 based Gas Leakage Detection using Email Notification
- IoT based Motion Detection Alarm using ESP8266 and Blynk
- Telegram NodeMCU based Home Automation
- IoT based Fire Security Alarm System using NodeMCU
- Smart Doorbell using ESP32 Camera
- DHT11 Sensor with ESP-NOW and ESP32
- PIR based Motion Switch | PIR Sensor Light
- Smart Switch using Blynk | IoT Based WiFi Switch
- IoT based water level Indicator using ESP8266
- Touch Based Switch board using TTP223
- IoT based Door Security Alarm Project with Blynk
- Interfacing LM35 Temp Sensor with Arduino
- DS18B20 with NodeMCU Local WebServer
- IoT Heart Rate Monitoring with ThingSpeak Platform
- Wemos D1 Mini Web Server based Servo Motor Control
Summary
This is a simple tutorial for beginners to understand the concept of capturing pictures using ESP32-Cam and sending it to user via email. This a low cost camera module with inbuild WiFi feature and powerful SOC. You can trigger or automate capturing of pictures and build a nice security projects. Do try this tutorial and don’t forget to share this article.
