Building an ESP32-based MAX30100 Pulse Oximeter Web Server
In recent years, the Internet of Things (IoT) has revolutionized the healthcare industry by introducing innovative solutions for patient monitoring. One such fascinating project is the development of a Pulse Oximeter using the ESP32 microcontroller and the MAX30100 sensor. Monitoring vital health parameters has become increasingly important, and with the advent of IoT devices, creating a Pulse Oximeter with a web interface is now easier than ever. In this tutorial, we will guide you through building an ESP32 based MAX30100 Pulse Oximeter Webserver with a 16×2 LCD display for remote monitoring that enables real-time monitoring of blood oxygen levels and heart rate.
Introduction to Pulse Oximetry and MAX30100
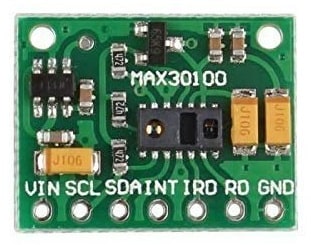
Pulse oximetry is a non-invasive method for monitoring a person’s oxygen saturation (SpO2) and heart rate. The MAX30100 sensor is a compact, integrated solution that combines two LEDs, a photodetector, and signal processing electronics to measure oxygen saturation and pulse rate.
Components Needed
- ESP32 Development Board: The ESP32 provides Wi-Fi connectivity and is powerful enough to handle web server functionalities.
- MAX30100 Pulse Oximeter Sensor: The core sensor for measuring SpO2 and heart rate.
- 16×2 LCD Display: For local display of real-time data.
- Two 4.7KΩ Resistor for pullup
- Jumper Wires and Breadboard: Essential for connecting components during prototyping.
Working
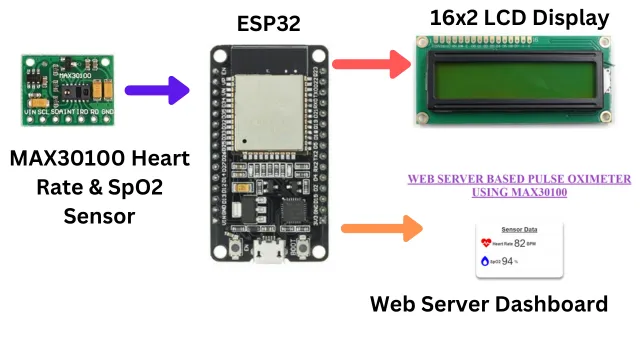
The ESP32-based MAX30100 Pulse Oximeter Webserver with a 16×2 LCD operates as a comprehensive health monitoring system. The MAX30100 sensor is utilized to capture vital health parameters such as pulse rate and blood oxygen saturation levels.
The ESP32 microcontroller manages the sensor readings and communicates with a 16×2 LCD display to present real-time health metrics in a user-friendly format. Through the integrated web server functionality, the ESP32 establishes a local web page accessible via a web browser, allowing users to remotely monitor their health status.
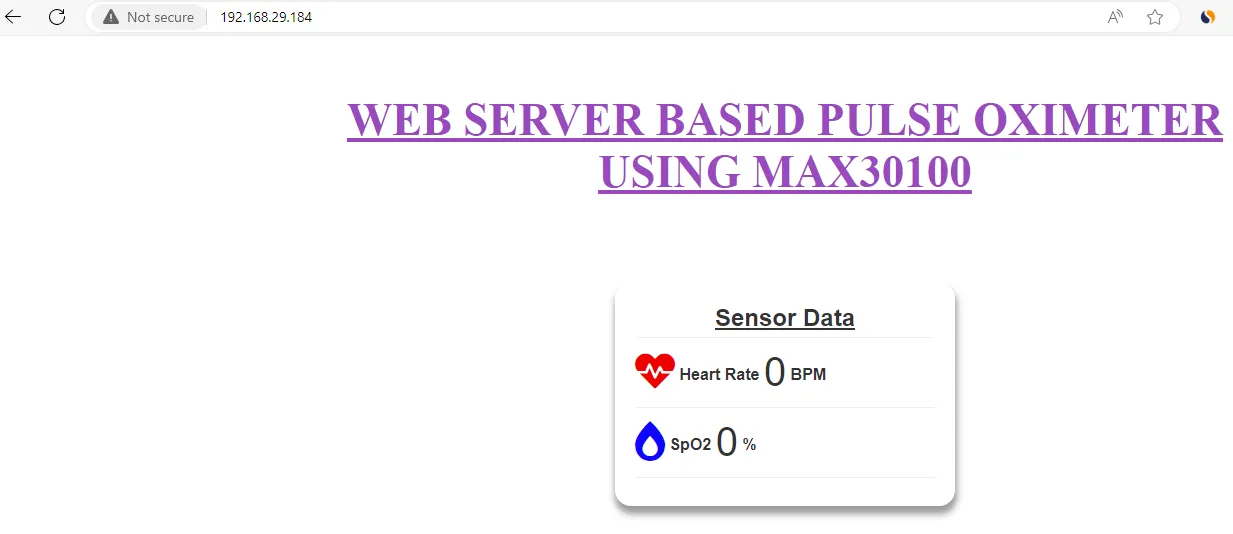
The web interface displays the pulse rate and blood oxygen levels in a clear and organized manner, providing a convenient means for users to keep track of their vital signs.
Connection
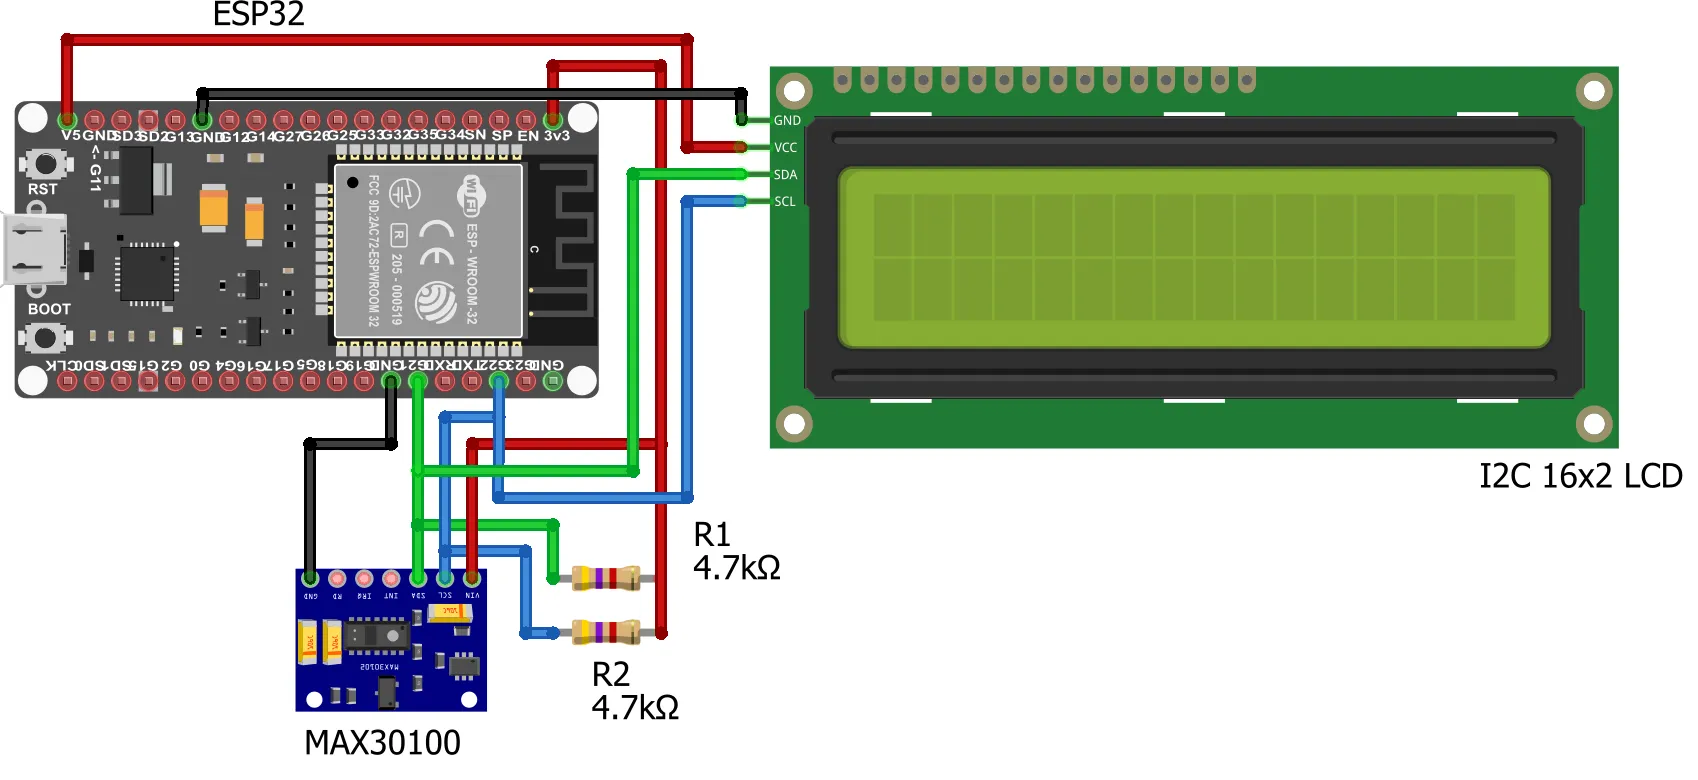
Connect the MAX30100 sensor to the ESP32 as follows:
- Connect VCC to 3.3V on the ESP32
- Connect GND to GND on the ESP32
- Connect SDA to GPIO 21 on the ESP32
- Connect SCL to GPIO 22 on the ESP32
Connect the MAX30100 sensor to the ESP32 using jumper wires. Also, connect an 16×2 LCD display to visualize the real-time data locally.
- LCD VCC -> Vin on the ESP32
- GND -> GND on the ESP32
- SDA -> GPIO 21 on the ESP32
- SCL -> GPIO 22 on the ESP32
Prerequisite
Before you proceed with coding and uploading the code in ESP32, you have to fulfill the following requirements.
- Download and install the Arduino IDE on your computer.
- Add ESP32 board support to the Arduino IDE using the Board Manager.
https://dl.espressif.com/dl/package_esp32_index.json
- Install Necessary Libraries for the MAX30100 sensor and the I2C 16×2 LCD display.
-
- MAX30100lib by OXullo Intersecans
- LiquidCrystal_I2C by Frank De Brabander
Code
You can download the code from below link and extract it in a folder. Open the file using Arduino IDE and upload it into ESP32. For uploading the code in ESP32 module you can refer to below guide.
ESP32 programming using Arduino IDE
Testing and Deployment
After gathering the components and following the connection diagram we have set up a prototype on a breadboard.
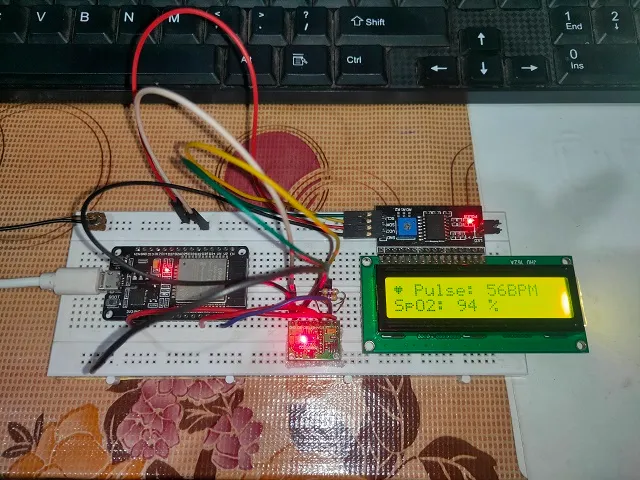
Now we have uploaded the code to ESP32. Once we power on the project the LCD display will show some information. On placing the finger on pulse oximeter, you will get some readings.
Open a web browser and enter the IP address assigned to your ESP32 to access the real-time Pulse Oximeter data.
Conclusion
By combining the MAX30100 Pulse Oximeter sensor with an ESP32 and a 16×2 LCD display, you’ve created a powerful health monitoring device. The integration of a web server allows you to access real-time readings remotely. This project can be extended by adding more sensors or integrating with cloud platforms for long-term data storage and analysis.
Feel free to customize the code to suit your needs and explore additional features. Building IoT health monitoring devices empowers individuals to monitor their well-being proactively, providing valuable insights into their health. Hope you like this article on ESP32 based MAX30100 Pulse Oximeter Webserver. Please share, stay creative, and happy tinkering!
Disclaimer:
Remember that this project is for educational purposes and should not be used as a substitute for professional medical advice or diagnosis. Always consult with a healthcare professional for any health concerns.
Related Projects:
- Connecting DS18B20 Sensor with Node-RED using Raspberry Pi
- Building an RFID RC522 Access System with ESP32
- What’s a Single Board Computer and Which One Is Right for Me?
- Raspberry Pi Pico W with DHT11 Sensor and 16×2 LCD Display
- Connecting BMP280 sensor with Raspberry Pi Pico W
- Raspberry Pi Pico with LCD & SSD1306 OLED Display
- Custom Android app with DS18B20 sensor and Raspberry Pi PICO W
- Raspberry Pi Pico W web server with BMP180 sensor
- Configuring BMP280 Sensor with Raspberry Pi
- Weather Station with BMP280 Sensor and Raspberry Pi Pico

