Introduction
Today security is one of the prime aspect in our society. Securing our home and family is important. In this article we will see how to make a IoT based Door Security Alarm using Blynk. This is a simple but effective door security system.
IoT based Door Security Alarm consists of simple, easy to find components and modules. You can get these form local market and start building it by your own.
Parts List
This project requires simple components and modules. These are easily available in the market.
- WeMos D1 Mini x 1
- Magnetic Door Sensor x 1
- Buzzer 5V x 1
- Transistor BC547 x 1
- Resistor 330Ω x 3
- LED x 2
- 2 Pin Screw connector x 1
- Male/Female berg strip x 1 (Each)
- Dotted PCB small x 1
How it Works?
WeMos D1 Mini wifi module constantly checks the status of magnetic door sensor. If there is a change in door sensor the alarm gets activated and buzzer beeps. IoT based Door Security Alarm will also notify you through your smartphone using blynk app.
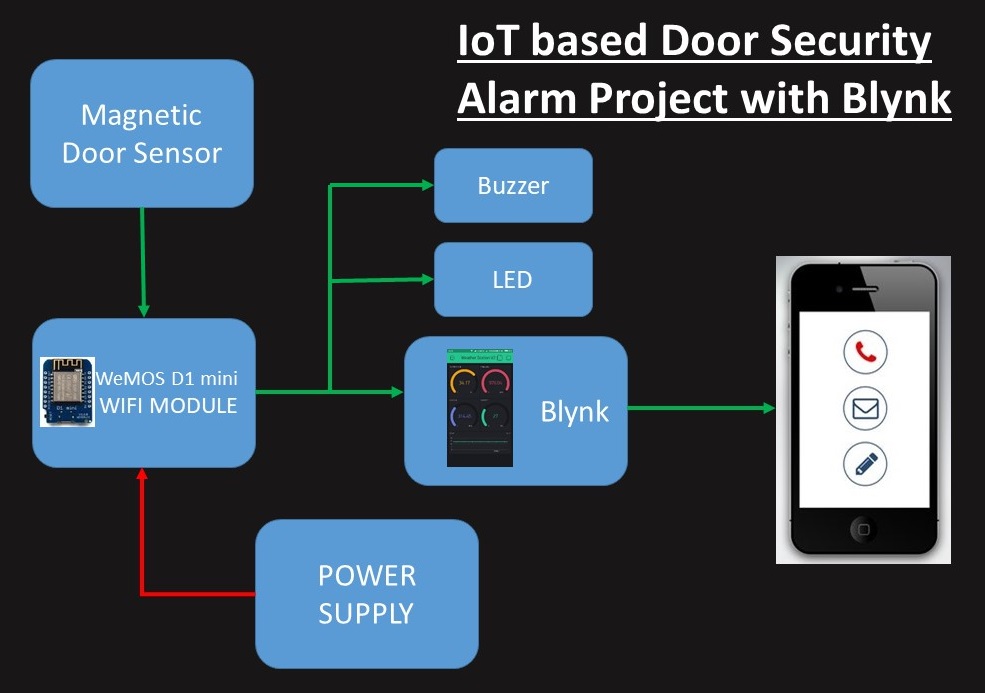
There are two modes available to set. You can enable the alarm when you are not at home or when you think it should be enabled.
- Alarm ON – In this mode if door is opened buzzer will start beeping and you will be notified via Blynk app.
- Alarm OFF – In this mode there will be no buzzer beeps neither blynk notification.
Sensors and Modules Functions
WeMos D1 Mini
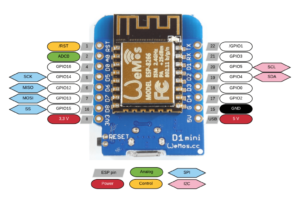
This wifi module is used to connect with internet and send data to blynk app. This also controls buzzer and Led’s as per the code.
Magnetic Door Sensor

Magnetic Door sensor is used to detect the movement of the door. These sensors are available in two types.
- Normally Open
- Normally Closed
In this project we are using normally open type.
Circuit Diagram
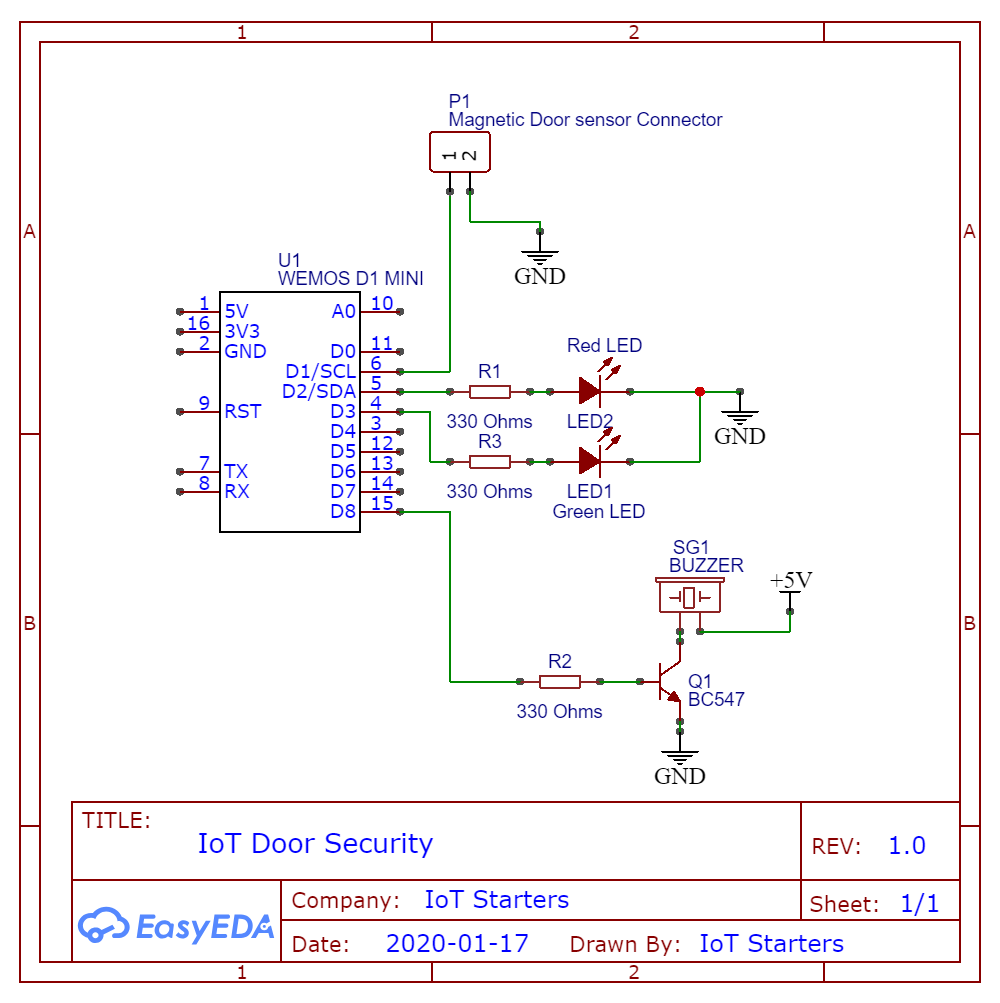
This is the circuit diagram of IoT based Door Security Alarm. You can connect all these components in a normal PCB and solder it. Use USB to power WeMos D1 Mini
Must Read:
Blynk Setup
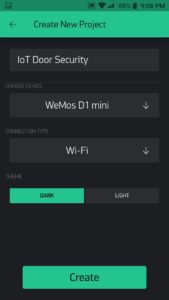
Open Blynk app and tap on New Project

Give a name of the Project, Select Device as WeMos D1 Mini, Connection Type Wi-Fi and tap on Create
You will receive an email with Auth Token. Tap on OK

Tap on + Button to add widgets Labeled Value
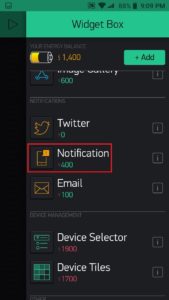
Add Notification Widget
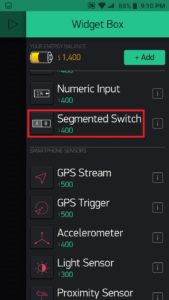
Add Segmented Switch
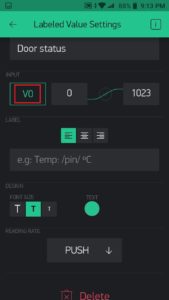
Configure Labeled Value Setting as per below
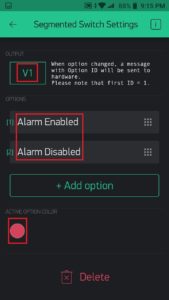
Configure Segmented Switch Setting as per below
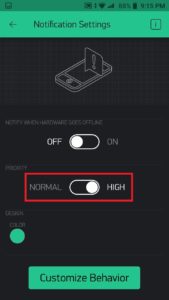
Configure Notification Setting as per below
Finally the complete setup

Code
The code is simple and easy to understand. Just update the Auth Token, Network SSID and Password. You can download the code from this link and upload the code in wifi module using Arduino IDE.

Construction
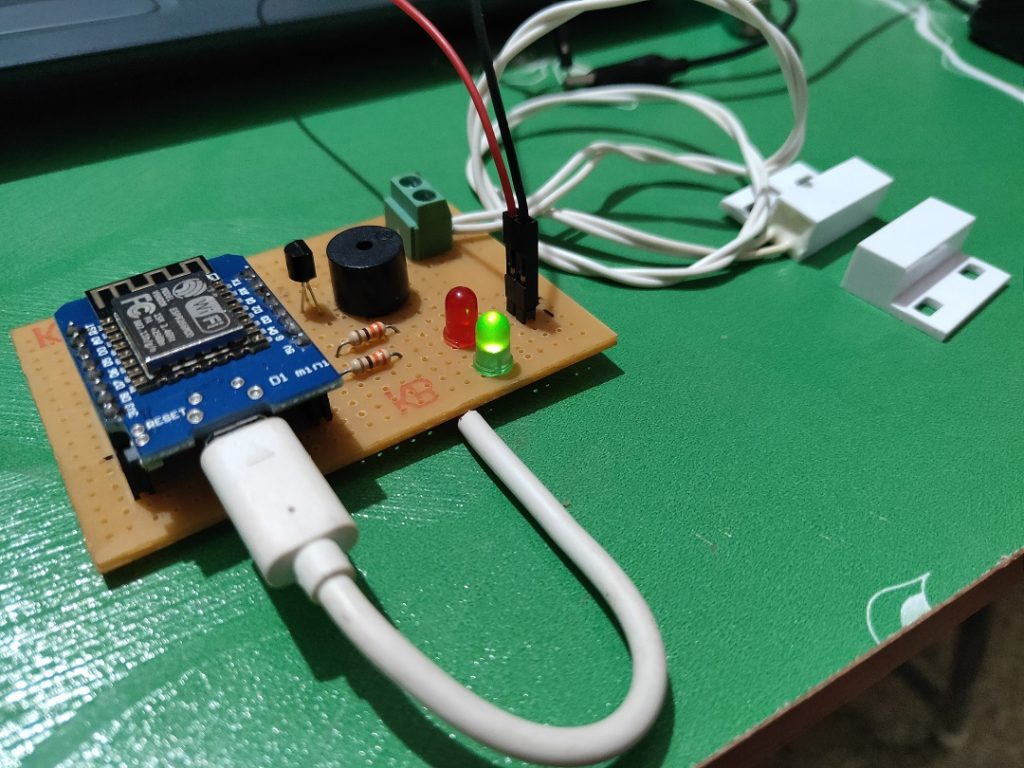
As per the circuit diagram we have placed the components on a PCB. Here we have use USB socket to power up WeMos D1 Mini wifi module. For testing purpose you can build this on a bread board as well
Testing
This is a complete video of the project.
Conclusion
IoT based Door Security Alarm is a economical project which can be built by beginners. This project will help you to interface magnetic door sensor with WeMos D1 Mini. Also you will be able to learn interfacing blynk to make the project IoT based.

Hi, thanks for the project. Can you add a relay that works when the door opens to the circuit and codes?
Hi
Yes it can be done with slight changes in the code.
Hi,
Thanks for the project.
When the alarm is on, as long as the door is open, the siren will sound and send messages. How can set the siren to sound for only one minute and only send a message if the door stays open?
You can modify the code by adding a timer. The message is sent only when the door is open.
wemos d1 . same like nodemcu esp8266 ? and program of wemos d1 still same like nodemcu?
Yes, It will be same just need to select the correct board in Arduino IDE while compiling and uploading the code.
There is messing in the code
Please give me the correct code
Kindly try https://iotstarters.com/iot-door-security-with-custom-android-app-using-firebase/