Connecting DS18B20 Sensor with Node-RED using Raspberry Pi
In the world of Internet of Things (IoT), the ability to monitor and control physical parameters remotely has become increasingly crucial. One such parameter is temperature, and a popular choice for temperature sensing in DIY projects is the DS18B20 sensor. In this tutorial, we’ll dive into the process of connecting a DS18B20 sensor to Node-RED using a Raspberry Pi, providing a practical guide for enthusiasts and developers alike.
Materials Required
- Raspberry Pi
- DS18B20 Temperature Sensor
- 4.7KΩ Resistor
- Breadboard (Optional)
Understanding DS18B20 Sensor
The DS18B20 is a digital temperature sensor known for its accuracy and ease of use. Its one-wire interface simplifies the connection process, making it a favorite among hobbyists and professionals alike. With its ability to operate in a wide temperature range, it is well-suited for various applications, from home automation to industrial monitoring.
Setting up Raspberry Pi
Before diving into the sensor connection, ensure that your Raspberry Pi is set up and running. You can install the Raspbian operating system, connect to the internet, and enable the SSH interface for remote access. Additionally, make sure your Raspberry Pi has the necessary GPIO pins available for connecting the DS18B20 sensor.
Wiring the DS18B20 Sensor
Connect the DS18B20 sensor to the Raspberry Pi using a 4.7kΩ resistor. The one-wire data line (DQ) should be connected to GPIO pin 4 (physical pin 7), the power line to the 3.3V pin (physical pin 1), and the ground line to the ground pin (physical pin 6).
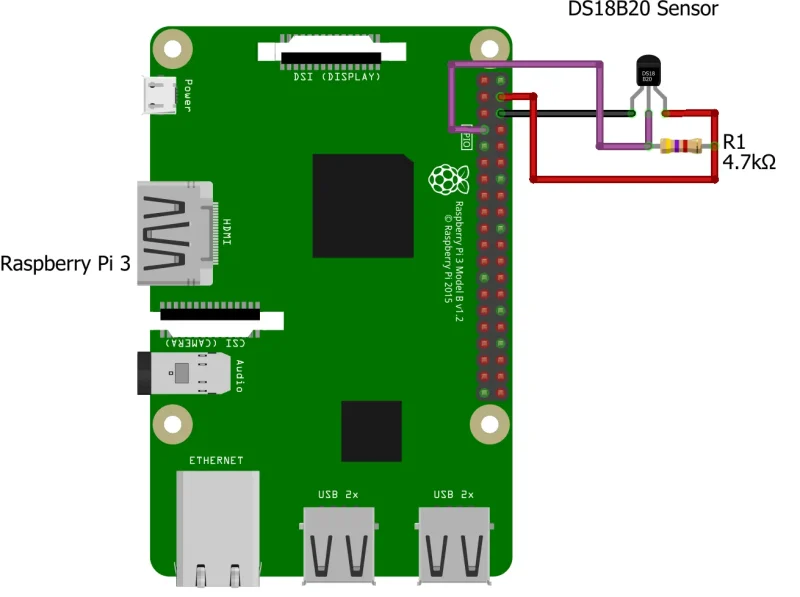
Double-check your connections to ensure a secure and accurate setup.
Enabling One-Wire Interface
- Open the terminal on your Raspberry Pi or connect to it remotely via SSH.
- Type the following command to edit the Raspberry Pi configuration:
sudo raspi-config
- Navigate to “Interfacing Options” and enable the “1-Wire” interface.
- Reboot the Raspberry Pi for the changes to take effect.
Installing Node-RED
If Node-RED is not yet installed on your Raspberry Pi, you can do so by using the following commands in your raspberry pi.
sudo apt update
bash <(curl -sL https://raw.githubusercontent.com/node-red/linux-installers/master/deb/update-nodejs-and-nodered)
In case you need some more details, you can refer to this guide or you can refer to How to install Node-Red on Raspberry Pi.
Configuring Prerequisites in Node-RED
Open Node-RED in your web browser by navigating to “http://<your-pi-ip>:1880”.
Goto Manage Palette option and install below nodes.
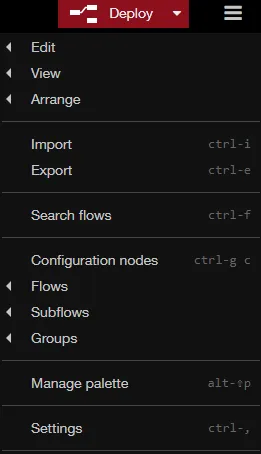
Click on Install tab and copy paste these names one by one.
- node-red-dashboard
- node-red-contrib-ds18b20-sensor
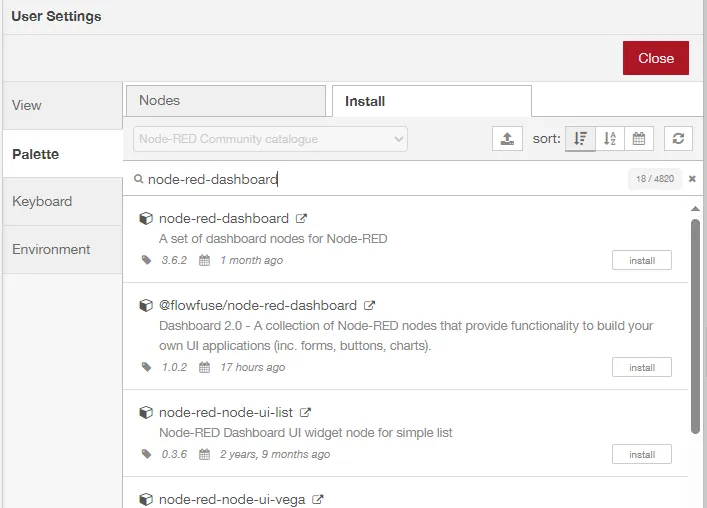
Now click on install

Creating the Dashboard in Node-RED
In workspace tab, drag and drop below nodes.
- Inject
- Function
- Debug
- rpi-ds18b20
- Gauge
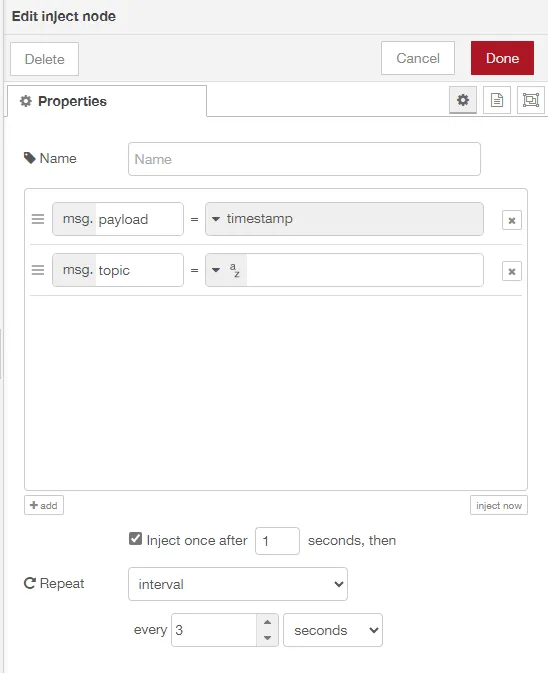
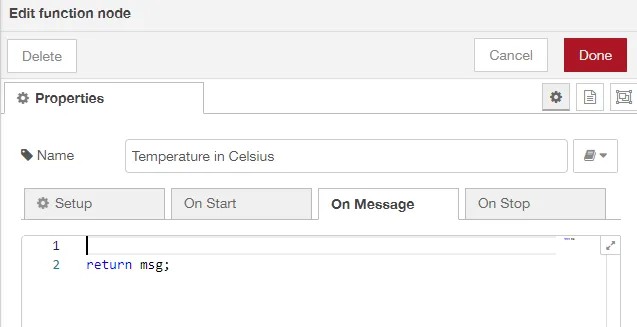
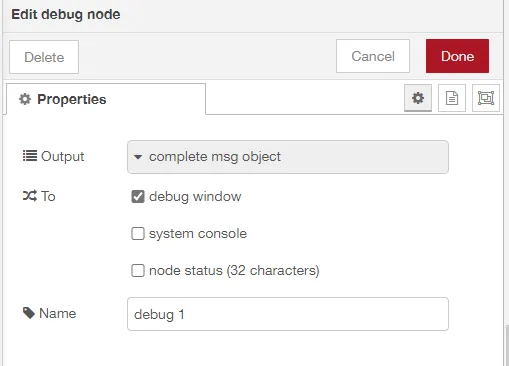
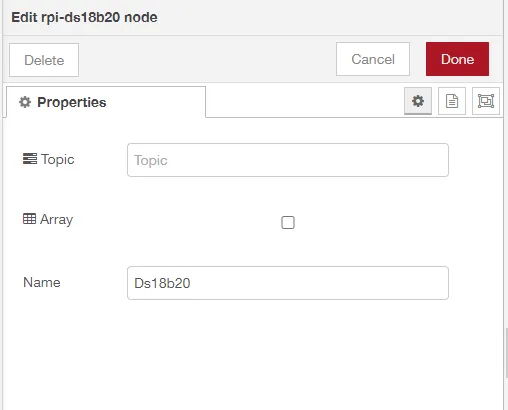
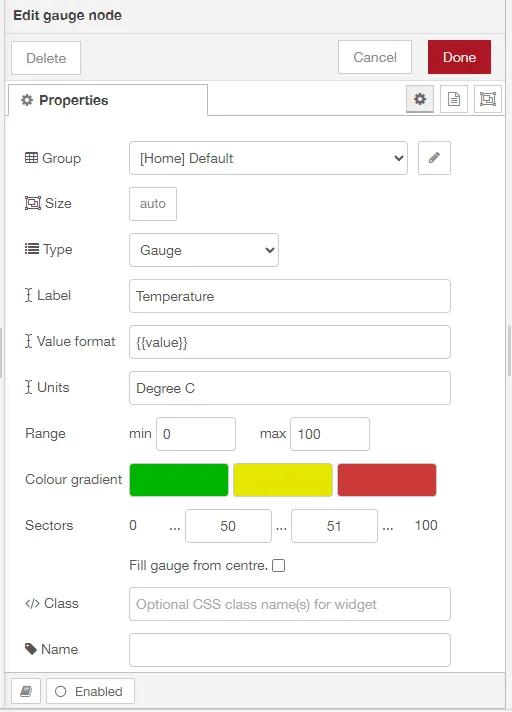
Now configure the nodes as shown below
Drag and drop an Inject node.
Function Node
Debug Node
Double-click on the rpi-DS18B20 node to configure it.
Gauge Node
Finally connect the nodes as shown below and click on Deploy in top right-hand corner.

Displaying Temperature Data
To see the sensor temperature data, open a browser and go to http://<your-pi-ip>:1880/ui. If all the connections are correct, then you will be able to see the dashboard with temperature gauge.
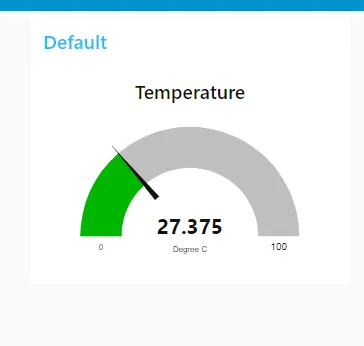
You can now use various Node-RED nodes and dashboards to visualize and analyze the temperature data. For example, you can use the built-in Dashboard node to create a simple web interface displaying real-time temperature readings.
Conclusion
Connecting a DS18B20 sensor to Node-RED using a Raspberry Pi provides a straightforward solution for temperature monitoring in IoT projects. With the combination of the reliable DS18B20 sensor and the versatile Node-RED platform, you can easily build and customize temperature monitoring systems for a wide range of applications. Whether you’re a hobbyist or a professional, this guide offers a practical starting point for exploring the world of sensor integration with Node-RED on the Raspberry Pi.
Related Projects:
- Building an RFID RC522 Access System with ESP32
- What’s a Single Board Computer and Which One Is Right for Me?
- Raspberry Pi Pico W with DHT11 Sensor and 16×2 LCD Display
- Connecting BMP280 sensor with Raspberry Pi Pico W
- Raspberry Pi Pico with LCD & SSD1306 OLED Display
- Custom Android app with DS18B20 sensor and Raspberry Pi PICO W
- Raspberry Pi Pico W web server with BMP180 sensor
- Configuring BMP280 Sensor with Raspberry Pi
- Weather Station with BMP280 Sensor and Raspberry Pi Pico
