Connecting to Raspberry Pi via Putty
If you have got a Raspberry Pi and you have loaded raspbian OS then you might try to connect it with you laptop via SSH. This is a process to configure a Raspberry Pi without connecting it to any display. You can follow the below steps to configure it in simple way Connecting to Raspberry Pi via Putty.
Step # 1 Initial Setup
To access raspberry pi via SSH you need to know the IP address. Once you boot up your Raspberry Pi it will start loading up the OS. If you have installed raspbian OS for first time then raspberry pi will not get connected to your network automatically. You have to make some changes to make it connect to your network.
Software that you need
Download these applications and and keep it ready.
Step # 2 Enabling SSH
To reach out raspberry Pi via Putty you need to enable SSH first. For enabling it we have add an empty TEXT file name “SSH” in the root directory of micro SD card. This will enable SSH (Secure Socket Shell) on Raspberry Pi. It will also allow to access Raspberry Pi remotely from computer.

Step # 3 Enabling and connecting to Headless WiFi
To setup a WiFi connection on your headless Raspberry Pi, create a text file called wpa_supplicant.conf, and place it in the root directory of the micro SD card.

You need to copy paste below lines in wpa_supplicant.conf file . Just replace the wifi ssid and wifi password with yours.
  country=US
  ctrl_interface=DIR=/var/run/wpa_supplicant GROUP=netdev
  update_config=1

  network={
      ssid="NETWORK-NAME"
      psk="NETWORK-PASSWORD"
  }
Must Read:
Step # 4 Identifying the Raspberry Pi IP address
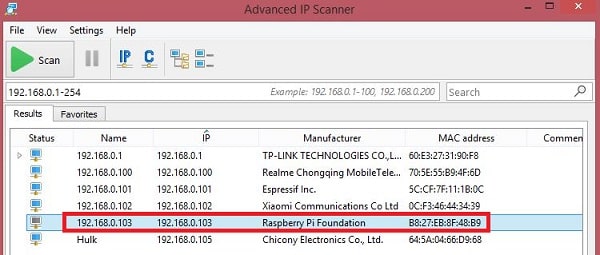
Since your raspberry Pi is connected to your network, lets fins out the IP address to access it further. For identifying IP address you need Advance IP Scanner application. You can download it from above link.
This application has 2 modes. Install or Run. If you are willing to install in your computer then select install. If you are planning to run only once then you can select Run and proceed no installation will be done.
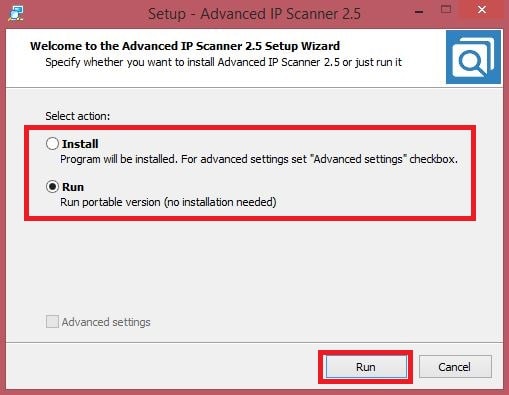
Once you launch the application click on Scan. This will start scanning you network and list out the devices connected to it.
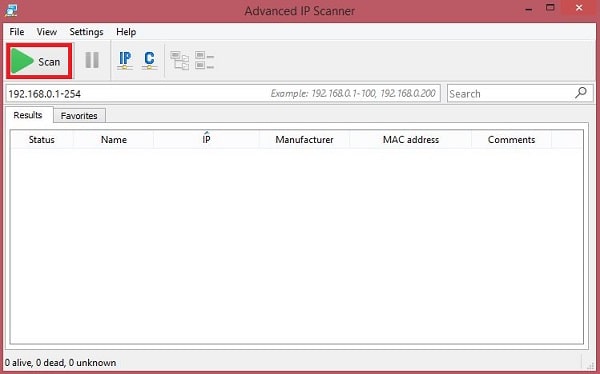
Once the scanning is completed, it will show the IP address and MAC address of Raspberry Pi Foundation. Note the IP address.
Step # 5 Accessing Raspberry Pi using Putty
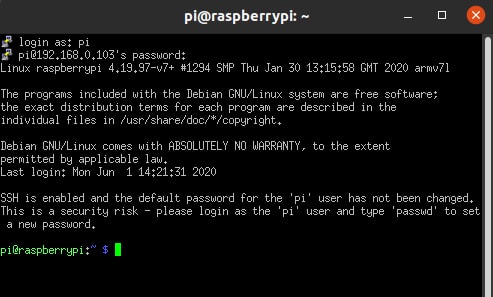
Since you are aware of raspberry Pi IP address, now lets try to access Raspberry Pi using putty. Lauch putty application and enter the IP address.
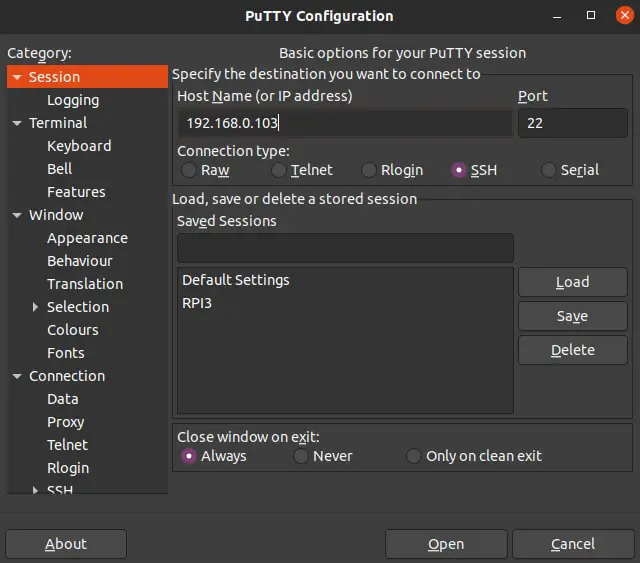
A security pop up will be displayed and click on Yes

Use the below credentials to login. These are default credentials to login.
- Logon: pi
- Password: raspberry
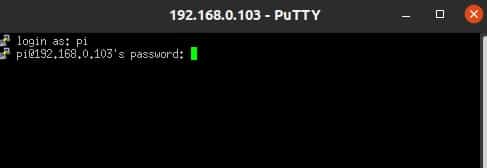
Now you will be able to logged in.
Optional : Advance configuration
If you want to configure or enable VNC, GPIO and other interfacing configuration then copy paste the below command and enter
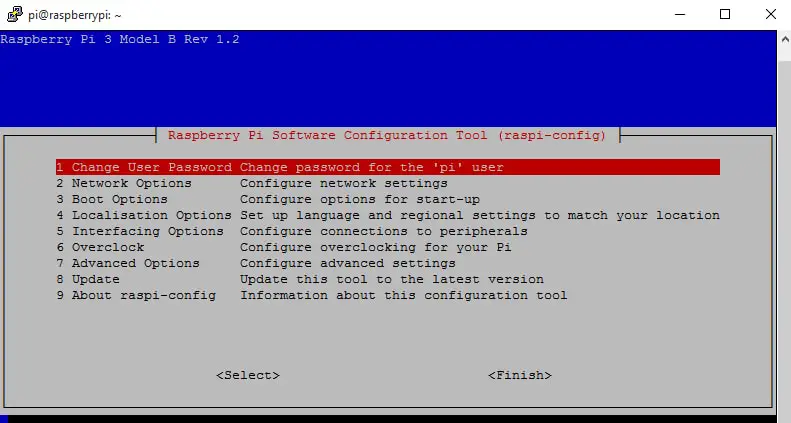
sudo raspi-config
Above command will open the software configuration tool which will allow you to configure many things. Please be aware before making any changes.
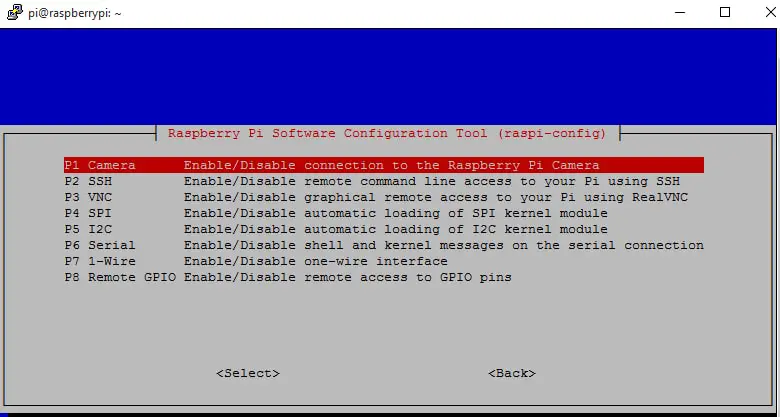
You can scroll down to Interfacing Options and press enter see further options.
Here you will get all the interfacing options and you can enable or disable them as per your need.
If you want to get an IP address, whether it’s on wireless or not, you can simply run this command on the server: ifconfig. It will show you all the hardware that is connected or not. You can very quickly get the IP address from the server that way. If it asks you to install net-tools, just install it and you can run ifconfig. It’s a very small installation and doesn’t take long to install.
In other words, get the IP address from ifconfig, then follow the other steps without scanning.
Most routers have a section that shows all the connected devices and their IP addresses.
Thanks for the update!
The sentence ‘For enabling it we have add an empty test file name “SSH” in the root directory of micro SD card’ in the first paragraph of Step 2 (https://iotstarters.com/connecting-to-raspberry-pi-via-putty/#Step_2_Enabling_SSH) should surely read ‘For enabling it we have add an empty TEXT file name “SSH” in the root directory of micro SD card’
Thanks and updated!